



After you sign in to Pay2.House, you land in your personal dashboard.
The interface is designed so that all key actions are in one place, while the left menu neatly separates them into clear sections.
In this guide, we’ll go through what each section is for and what tasks you can handle in each one.
Before you start
If you’re not familiar with the basic steps yet or you’re just getting started, we recommend reading the first part first: Guide 1. How to Register and Start Using Pay2.House
Left menu in Pay2.House
The left menu is your main navigation.
It takes you to all core sections: accounts and cards, top-ups, transfers, transaction history, team management, and additional tools.
Depending on your task, you can work in the main section or switch to a specific category.
Cards and accounts
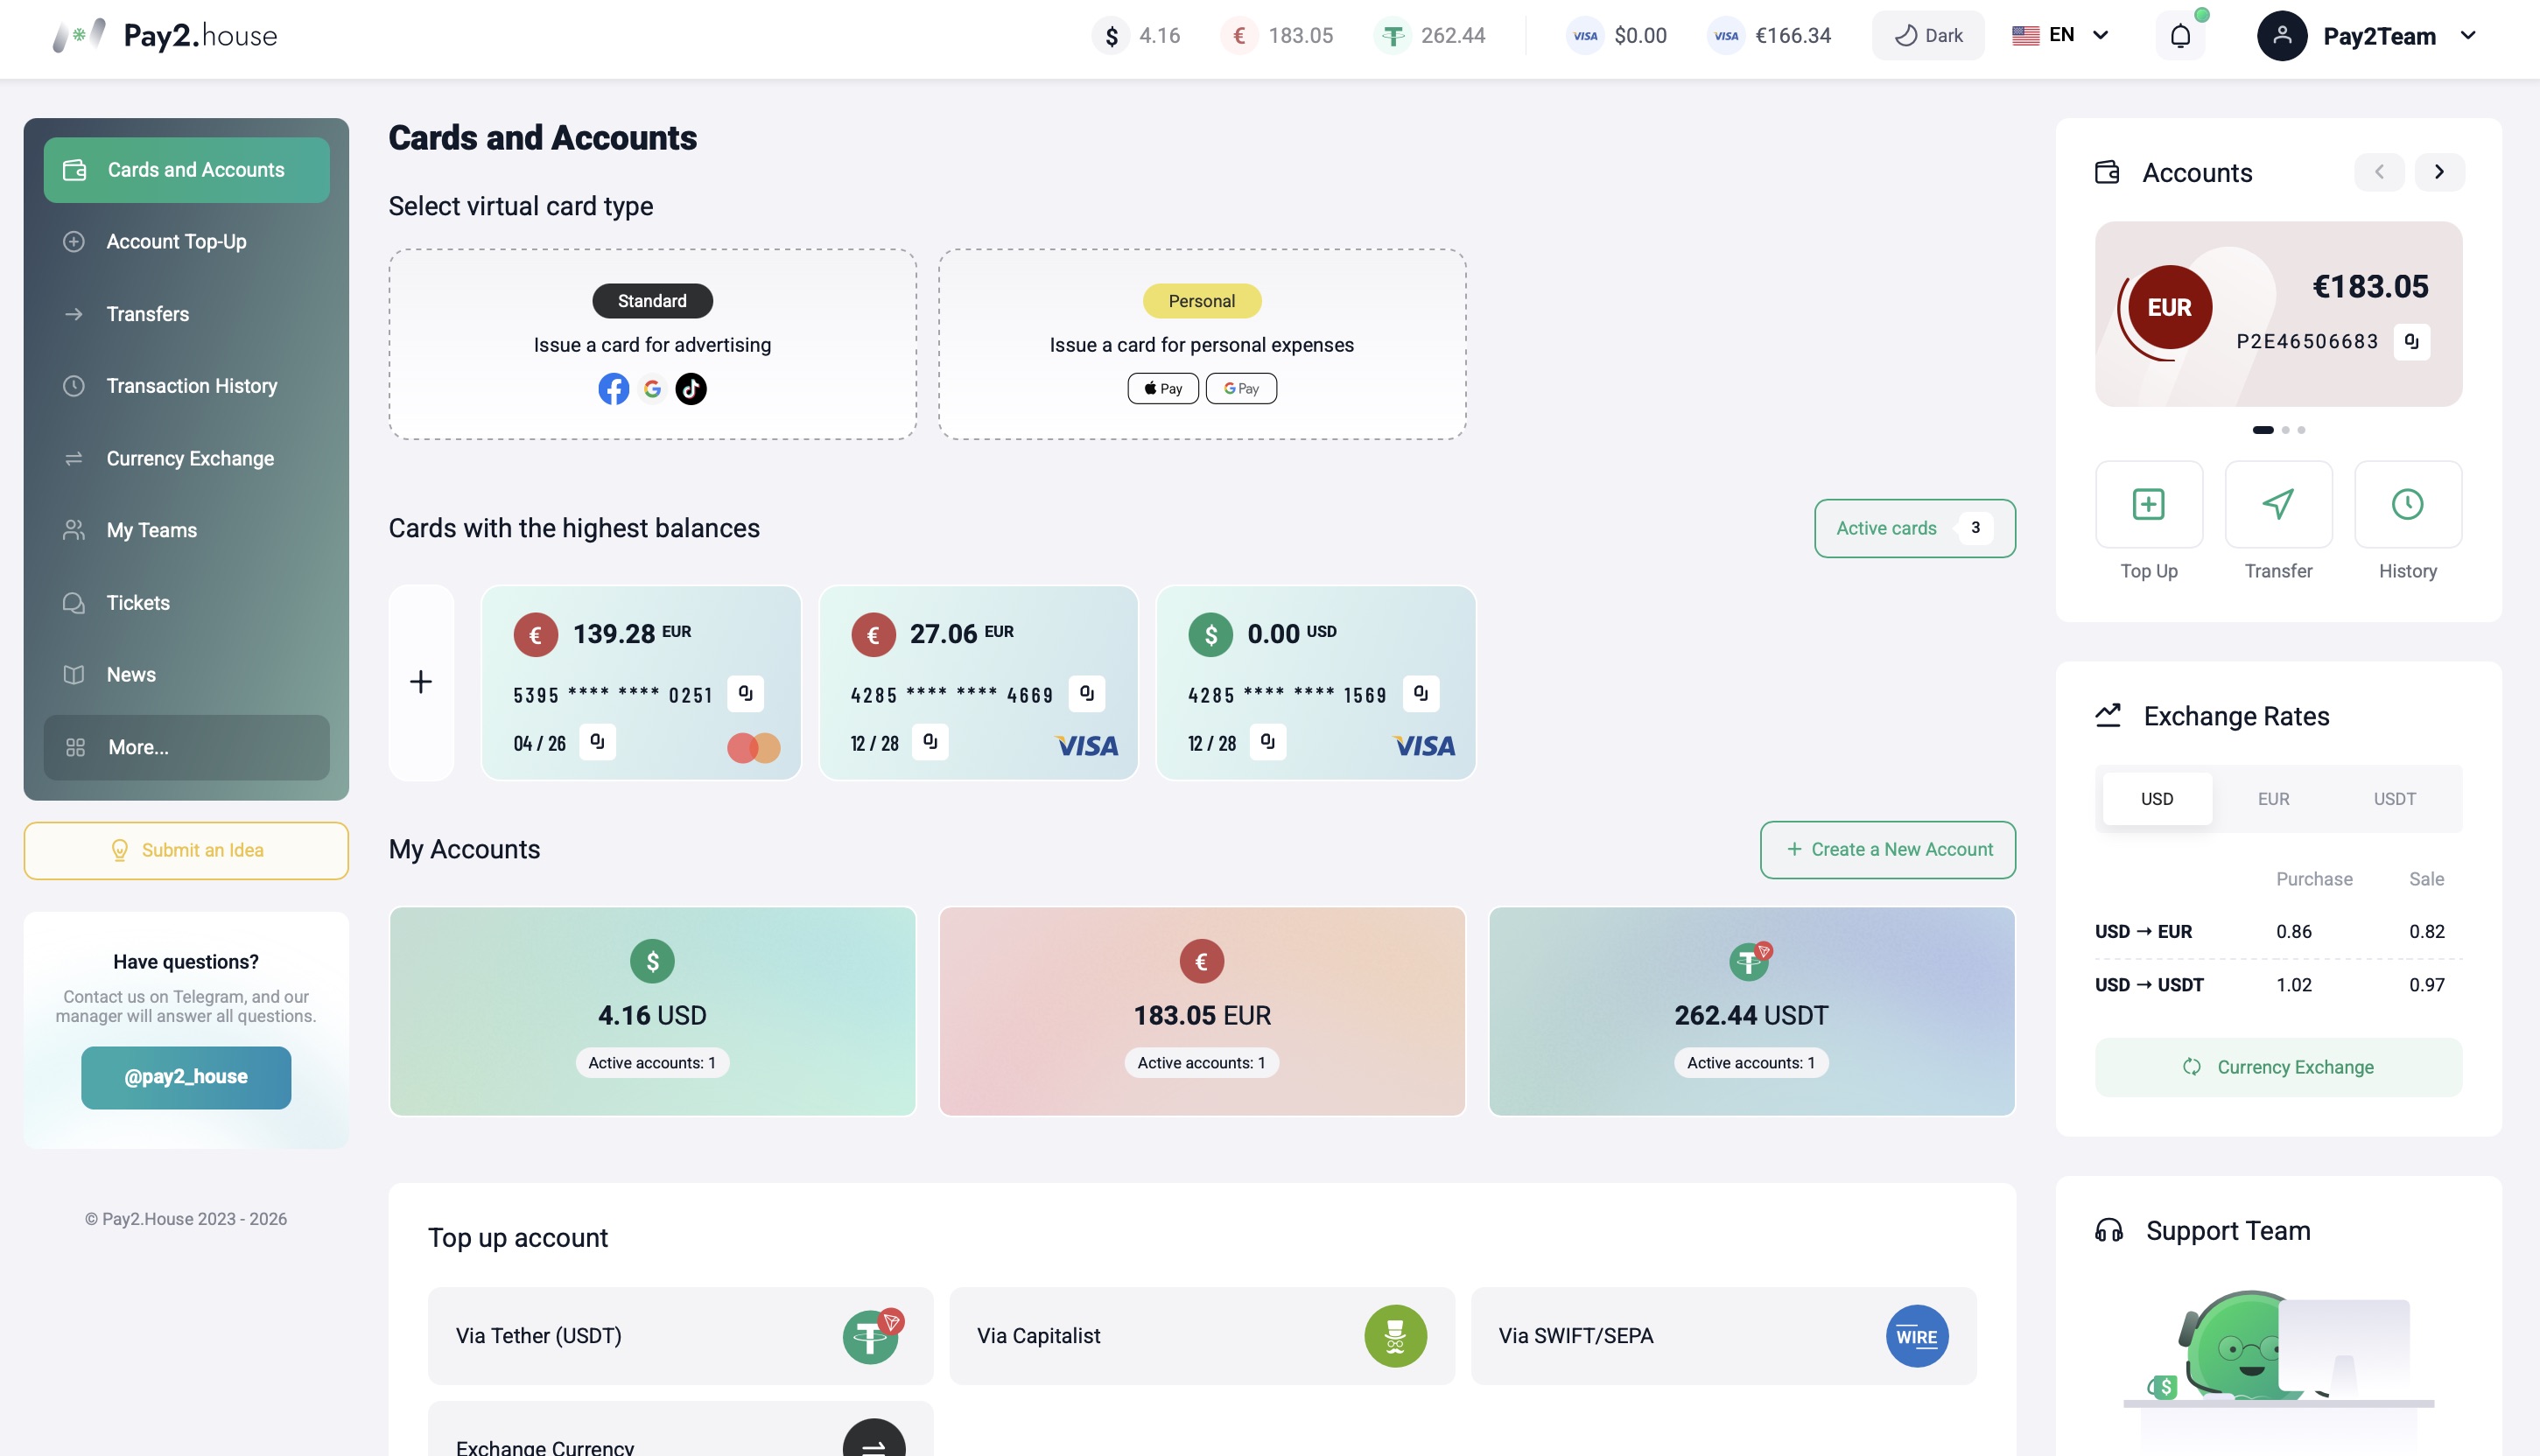
The “Cards and accounts” section is the main working screen in Pay2.House.
This is the first page you see right after logging in.
Here you can:
- view all your accounts in available currencies
- track current balances
- issue virtual cards
- manage active cards
- check card and operation statuses
In the same section, you can issue Standard or Personal cards depending on your needs and manage them in one place.
Important: transaction codes and detailed card transaction statuses are available inside the card page for the specific active card. To find a transaction code or see charge details, open the card and view its transaction history.
Top up your account
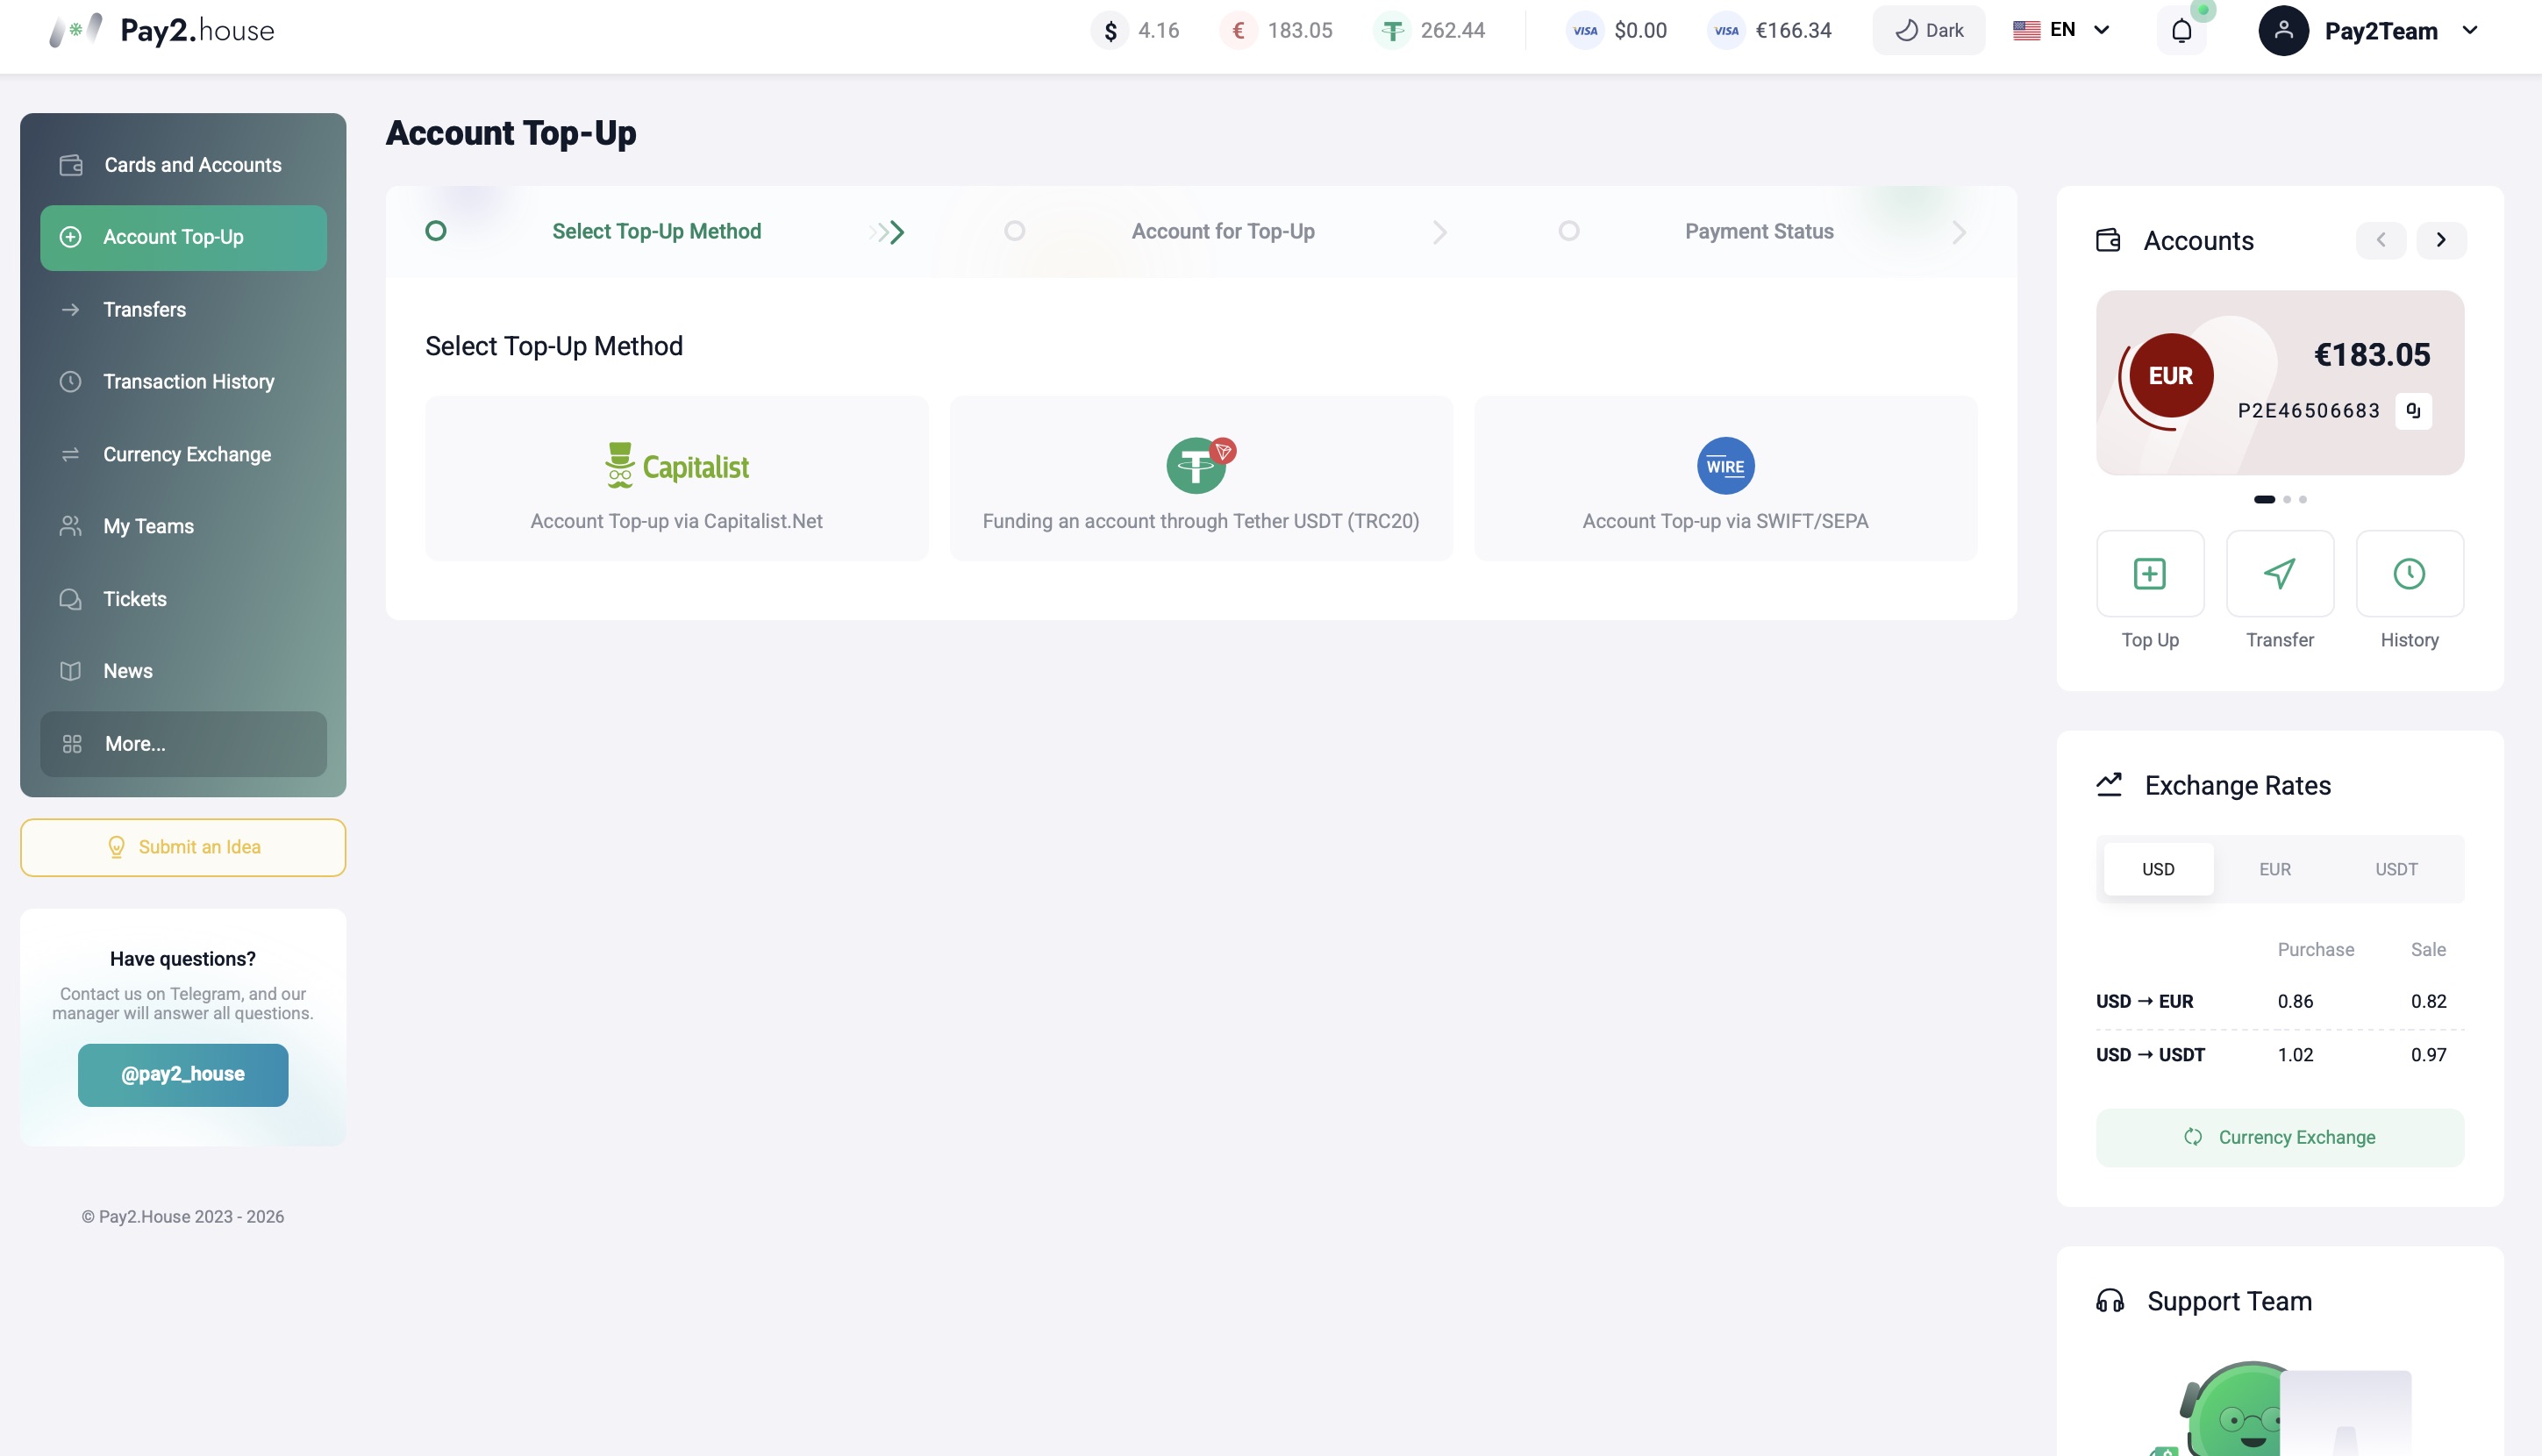
The “Top up your account” section is used to add funds to your Pay2.House accounts.
When you open this section, you’ll first see “Choose a top-up method”. The following options are available:
- top up via Capitalist
- top up via Tether USDT TRC20
Important: the minimum top-up amount is 5 USDT (TRC20). Transfers below 5 USDT will not be credited to your account.
Please note: these details accept only direct transfers from Tether USDT (TRC20) wallets.
- top up via Wire / SWIFT / SEPA (from $5,000)
Funds are always credited to your account first – after that, you can use them for transfers, currency exchange, or topping up cards.
Transfers
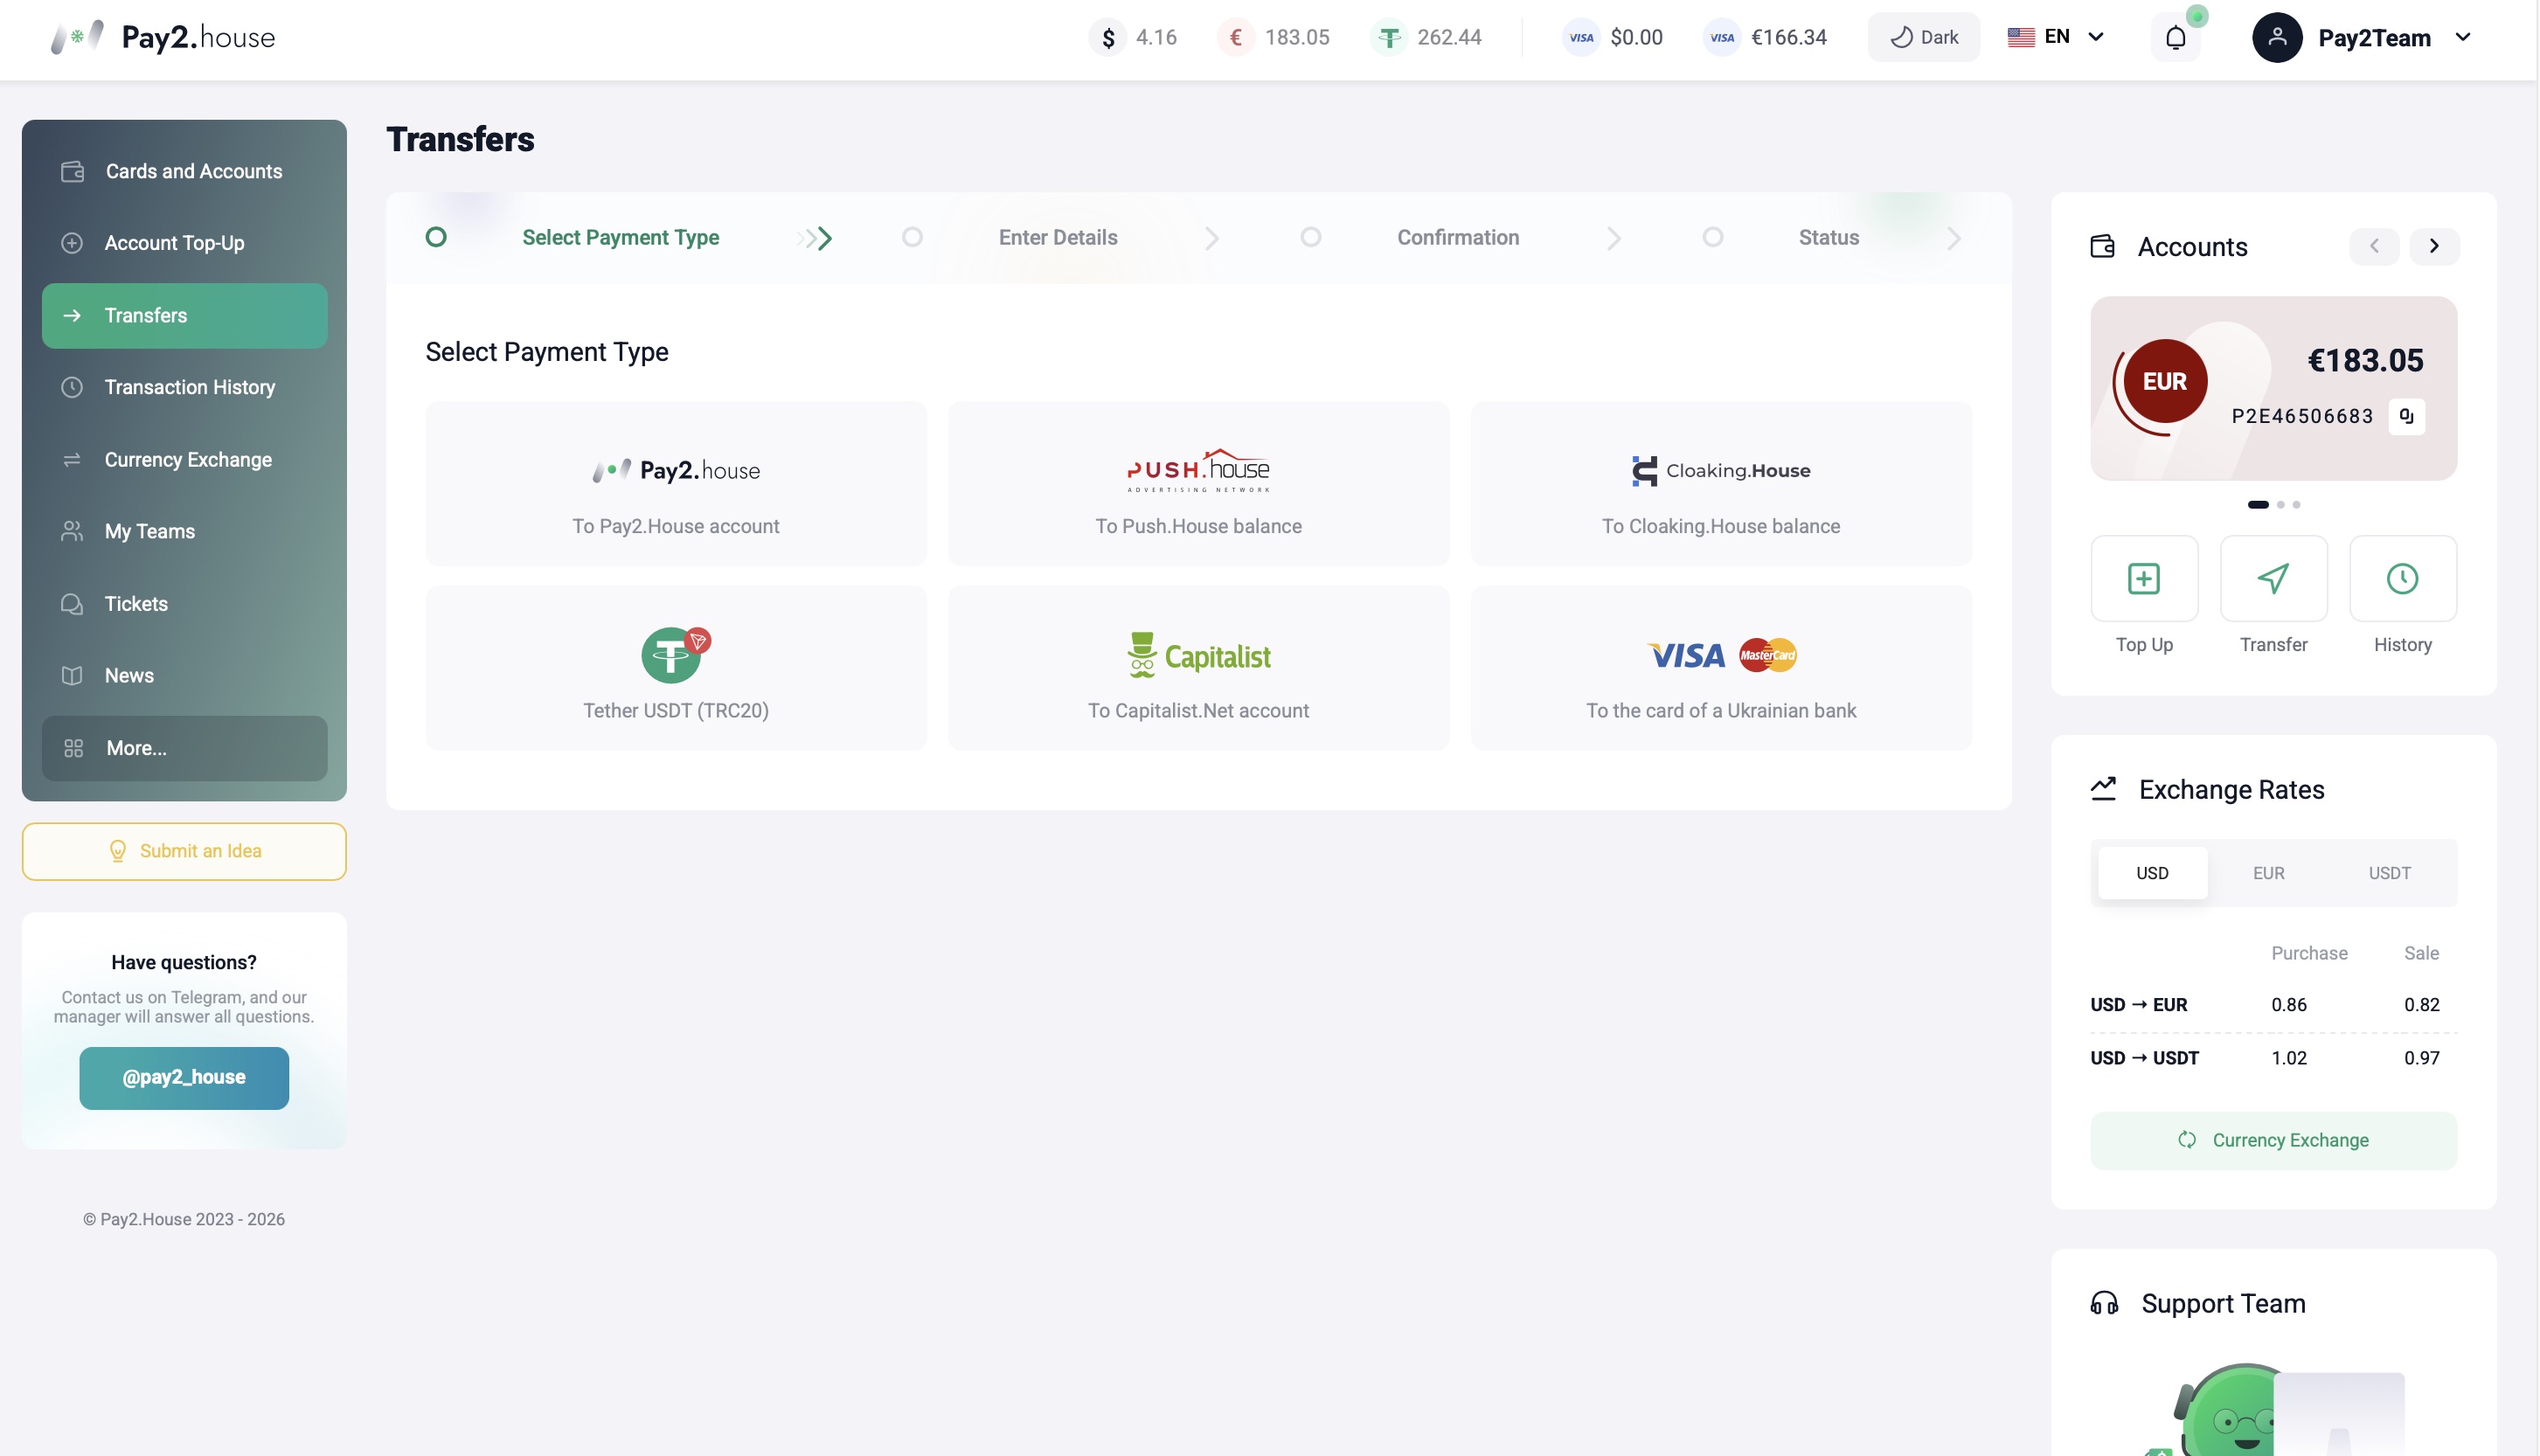
The “Transfers” section is used to move and withdraw funds.
When you open this section, you’ll first see “Choose a payment type”. The following options are available:
- transfer to another Pay2.House account
- transfer to Push.House balance
- transfer to Tether USDT TRC20 (withdrawal to a crypto wallet)
- transfer to Capitalist account
- transfer to a Ukrainian bank card
Use this section when you need to withdraw funds from the system or send them to another service or account.
Transaction history
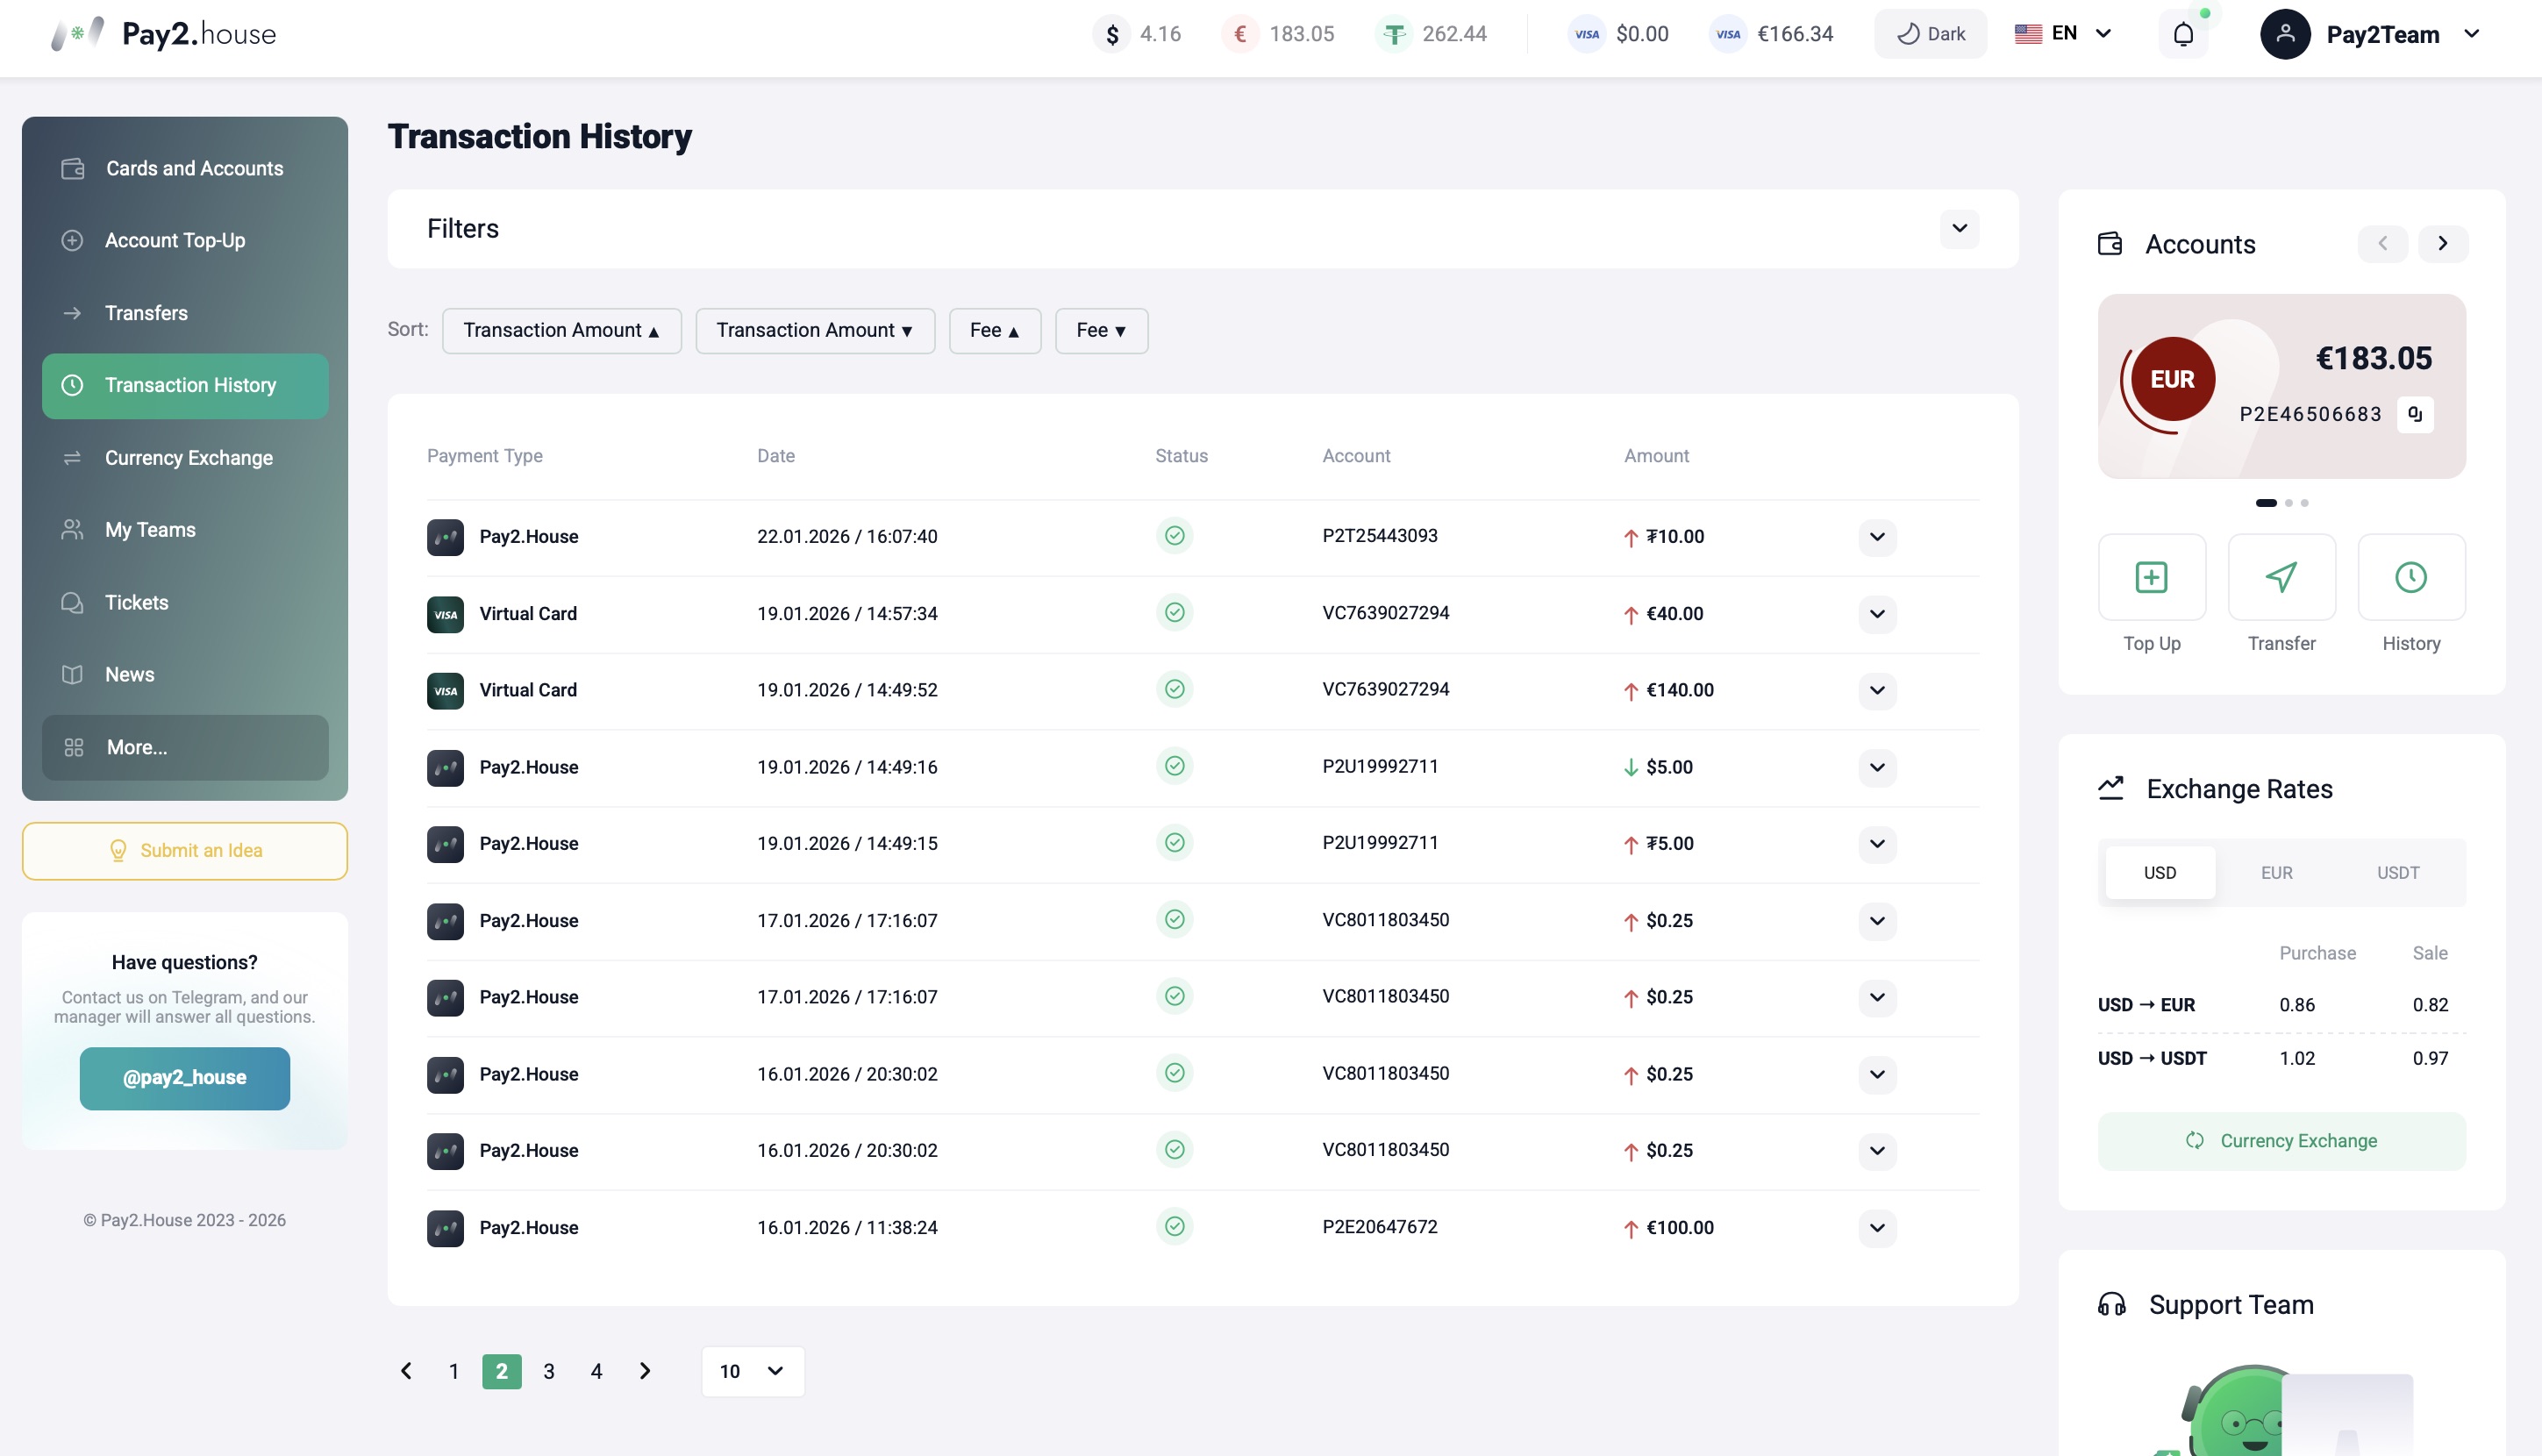
The “Transaction history” section shows all operations by your accounts.
Here you can see:
- all incoming funds to your accounts
- transfers
- currency exchange
- the full history of funds movement within your account
This section helps you monitor and verify all financial actions.
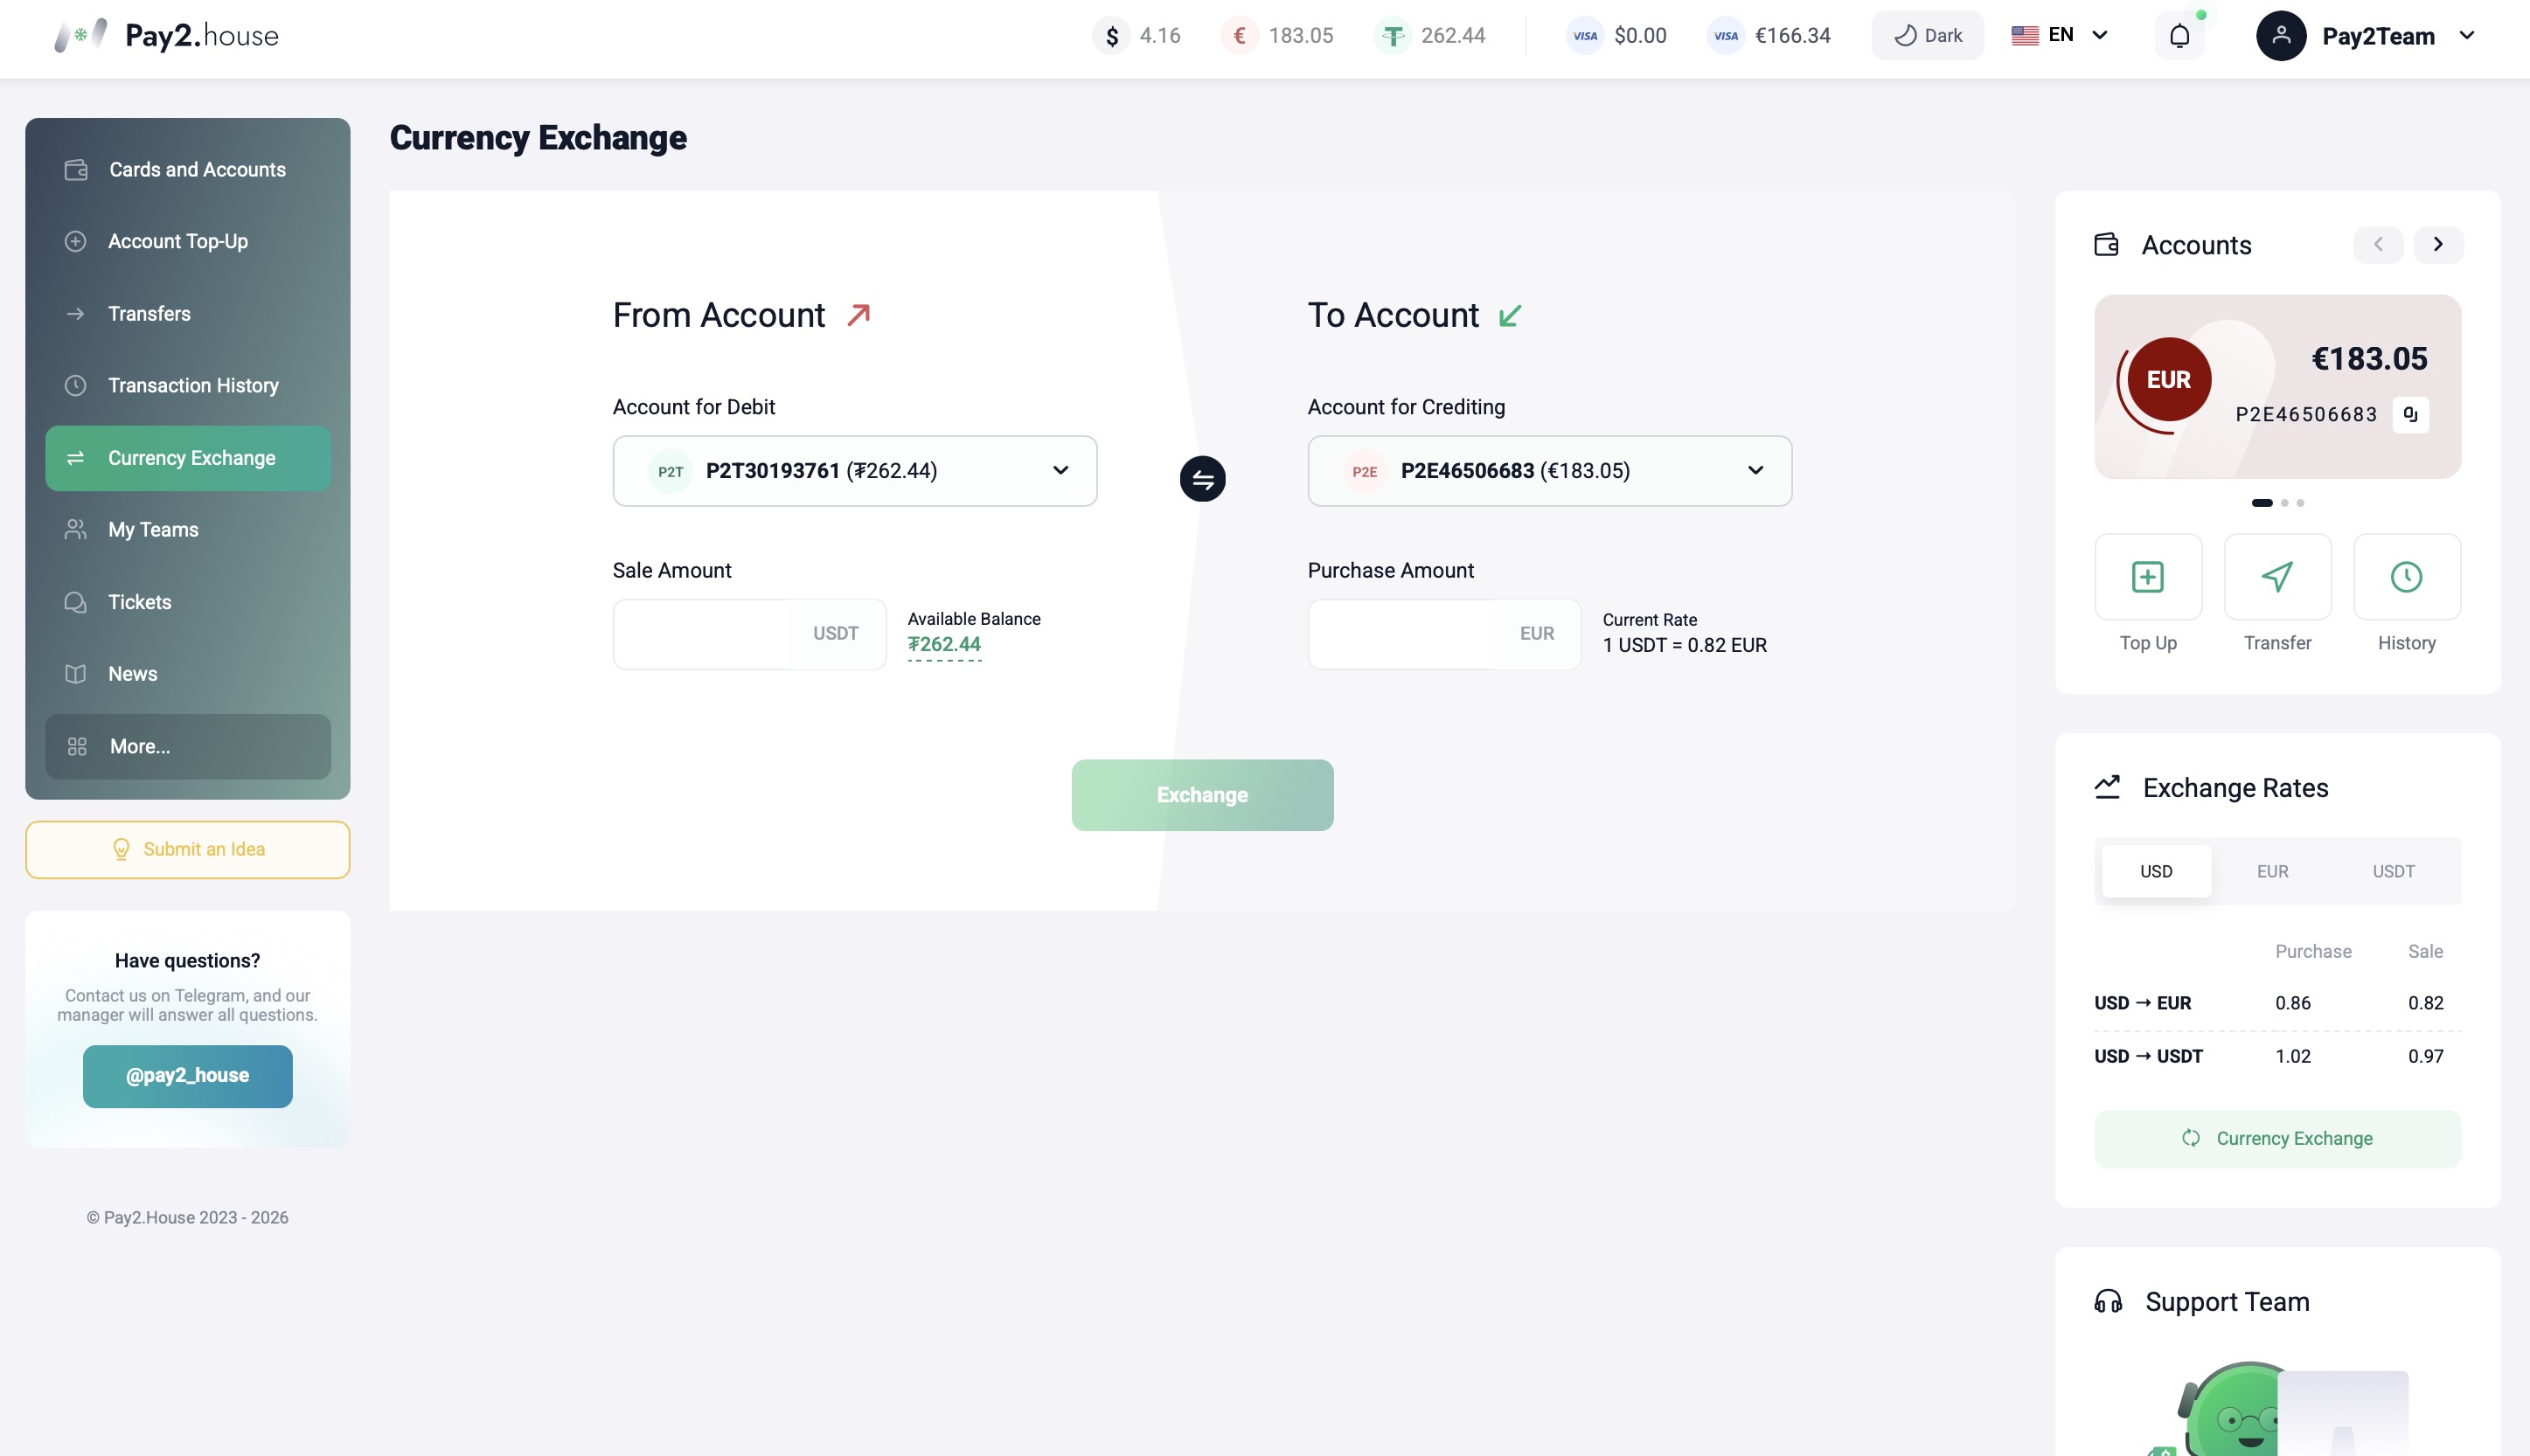
Currency exchange
The “Currency exchange” section is used to convert funds between accounts.
Here you can:
- exchange USDT to EUR or USD
- exchange EUR to USD
- manage your currency balances
Important:
You can top up a USD card directly from your USDT account.
To top up a EUR card, you first need to exchange funds from your USDT account to your EUR account.
My Teams
The “My Teams” section is designed for team workflows.
It’s a good fit if you:
- work with media buyers
- manage a team
- allocate budgets
Here you can invite team members, fund team accounts, and track activity.
A detailed overview of “My Teams” is available in a separate article – My Teams in Pay2.House: a Team Lead tool to control buyers and budgets
Tickets
The “Tickets” section is used to contact Pay2.House support.
Here you can create a ticket, describe your question or issue, and get a reply from the support team directly in the interface.
News
The “News” section publishes platform updates, new features, and important notices. We recommend checking it from time to time to stay up to date.
More
The “More” section contains additional Pay2.House tools.
Payment templates
Save templates for recurring payment operations.
Invoicing
You can create an Invoice and send it for payment. The invoice can be paid via a QR code or a direct link.
Bulk payouts
Speed up bulk payouts by uploading a file with recipient details – the system will automatically process payouts to Pay2.House accounts, the Capitalist payment system, and in Tether (USDT).
Payment acceptance
A section for working with the Merchant API. It enables fast and secure payment acceptance to your account via Pay2.House.
Here you can add a merchant and review the documentation.
Marketplace
The Pay2.House partner marketplace includes services we collaborate with. Pay2.House clients can access special bonuses and offers.
If you run your own service, you can also submit it to the Marketplace.
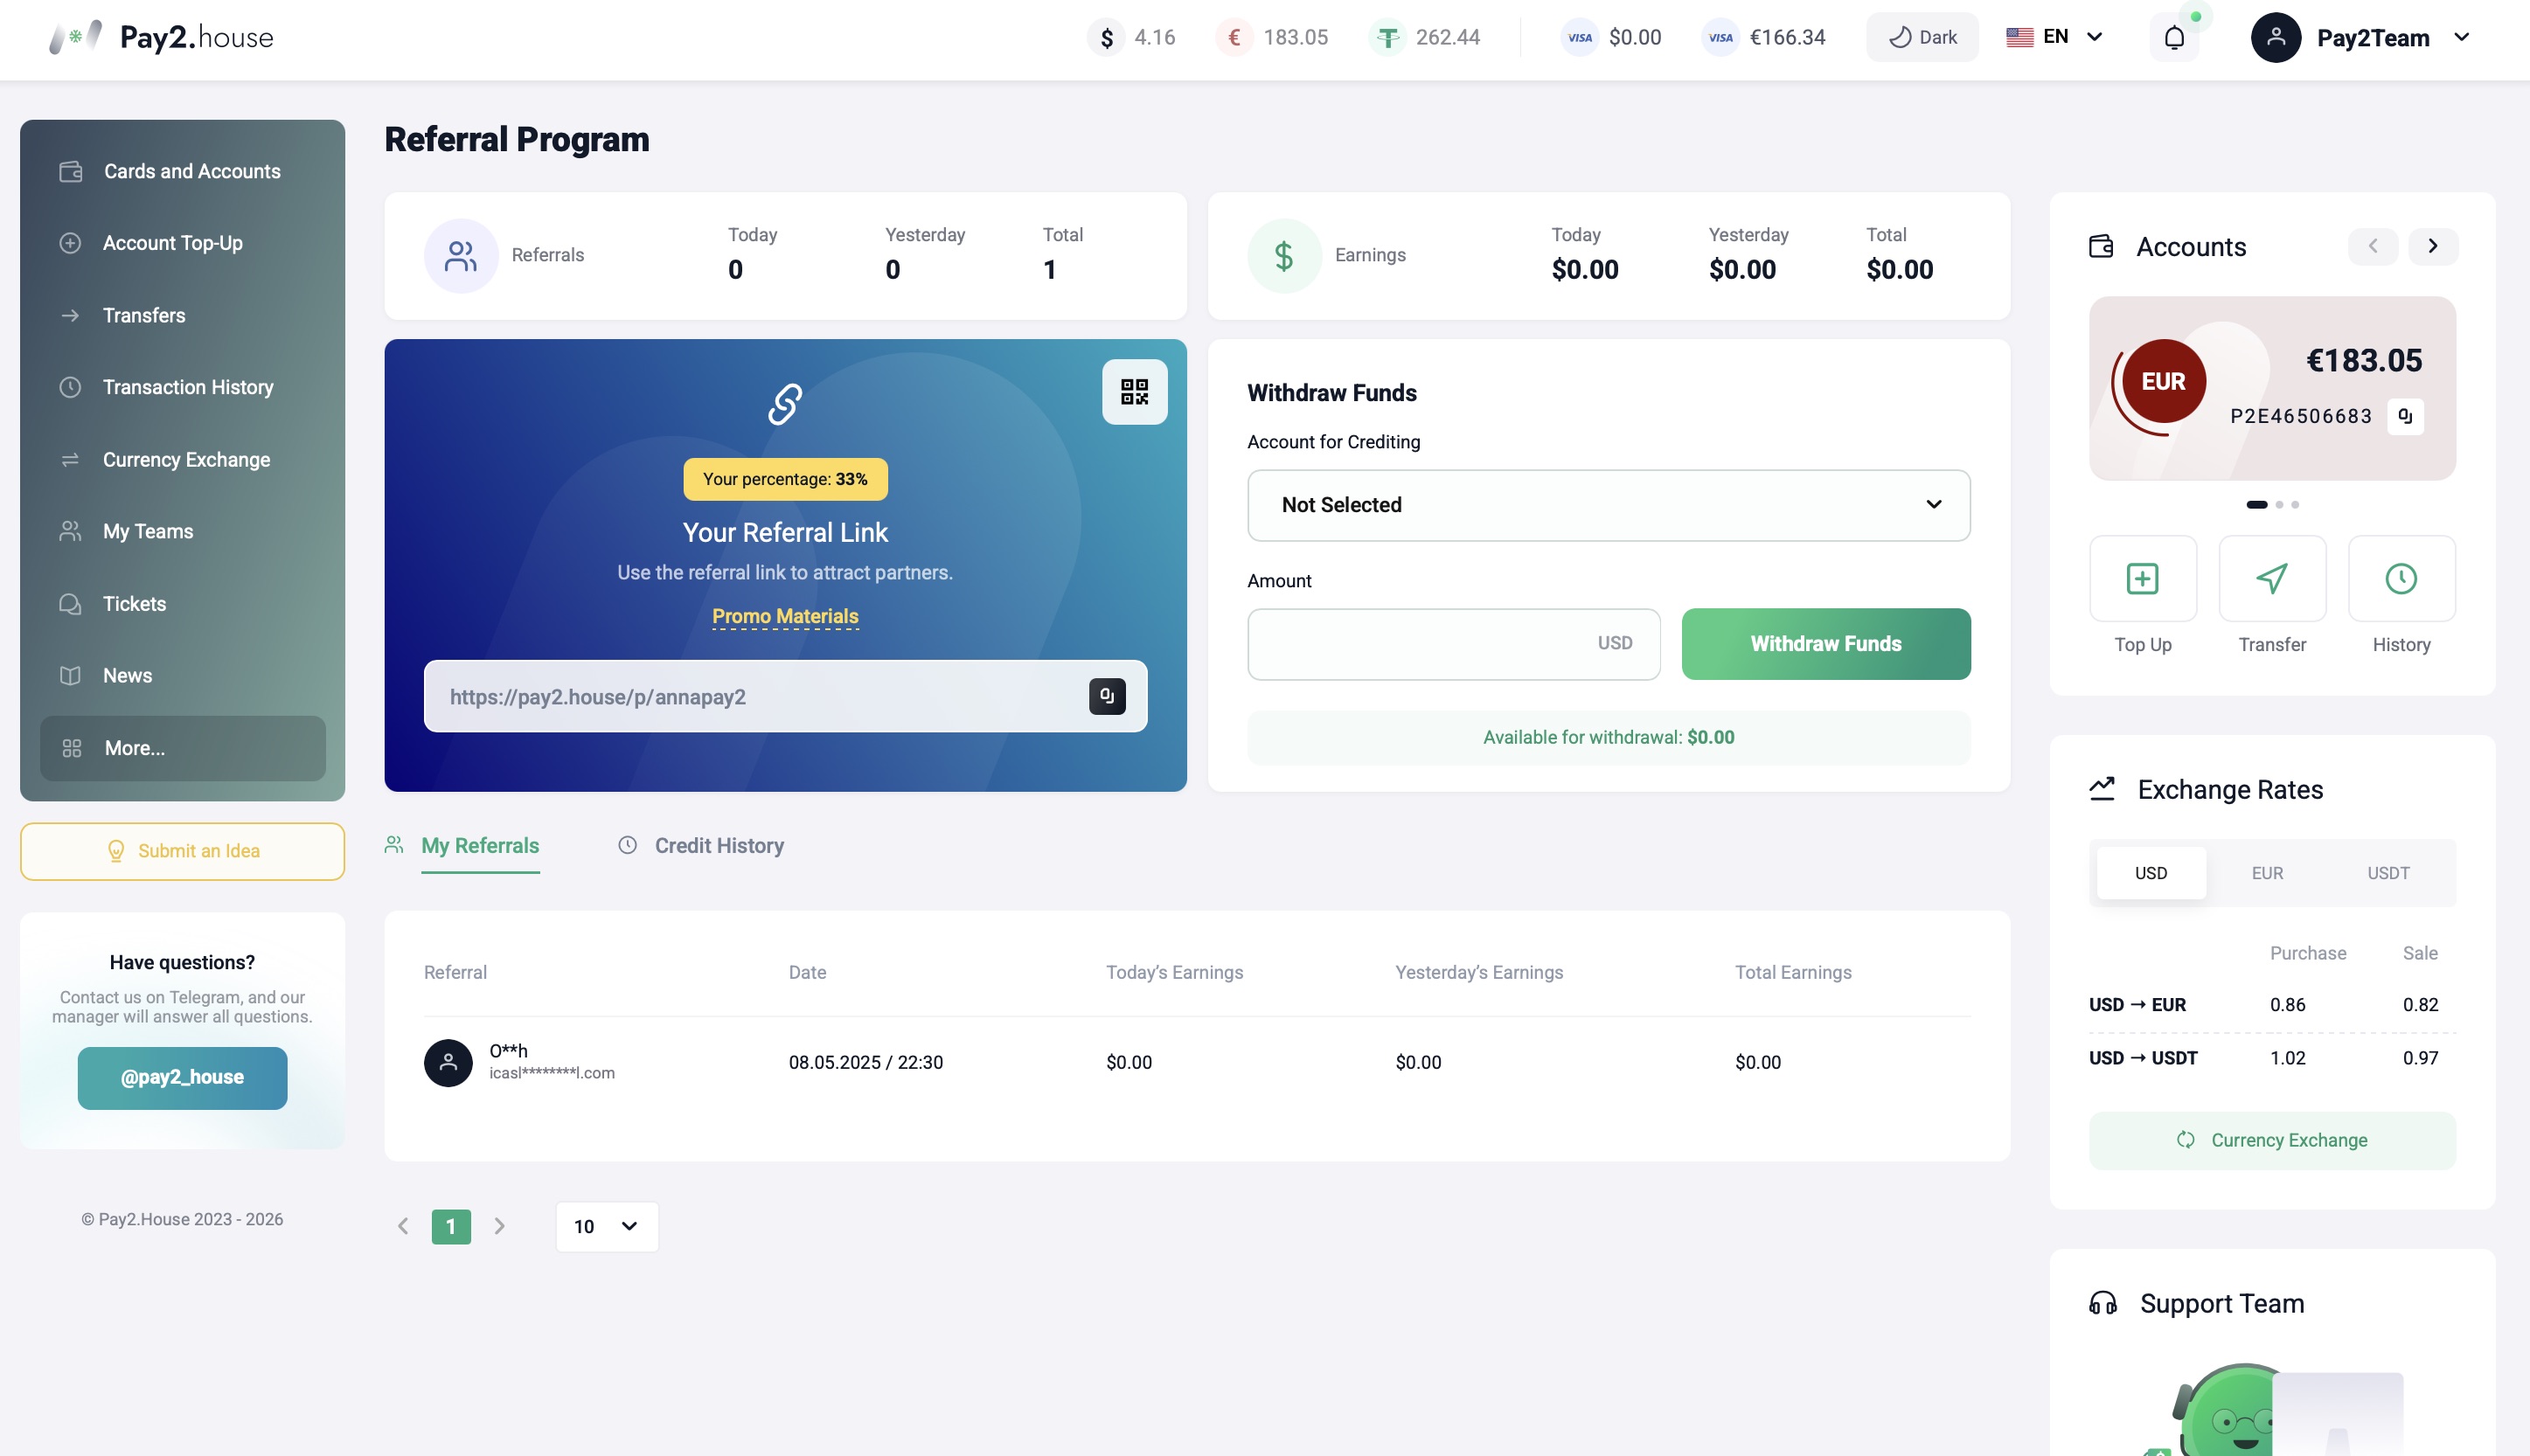
Referral program
A section for participating in the Pay2.House partner program.
You earn 33% of the platform’s revenue, get access to referral links, and ready-to-use promo materials.
If you have a Telegram channel, a website, or another resource, you can use banners and links and earn with us.
Details are available in a separate article – Earn with Pay2.House: a detailed guide to the referral program
Rates and services
A section with information about platform rates and available services.
API
The API lets you integrate your systems with Pay2.House for automated interaction.
Here you can create an API key and review the documentation.
Summary
The Pay2.House dashboard is built so you can handle all tasks in one interface and quickly switch between sections depending on your goal.
Understanding what each menu item is for helps you use the service confidently and get the most out of Pay2.House.



 Telegram
 Email
Email









Be the first to share your opinion!
We value your feedback — share your thoughts.