



Pay2.House – a payment service designed for working with advertising platforms, online services, and subscriptions. The service lets you manage multi-currency accounts, issue virtual cards, control payments, and perform operations in one interface.
1. Account registration
To get started, you need to create a Pay2.House account.
Open the website and click “Log in”, then select “Registration”. You can also go directly to the registration page via this link: https://pay2.house/registration
1.1. Filling out the registration form
During registration, you’ll need to complete the form with the following details:
- Login – the name that will be shown to other users and used in service notifications.
- Email – a valid email address.
- Password – a strong password and its confirmation.
- Messenger Contact – select Telegram and enter your username (e.g., @username).
- Field of Activity – choose your field of activity so the service can enable the relevant features.
After completing the form, confirm you’re not a robot by passing the CAPTCHA, then click Continue.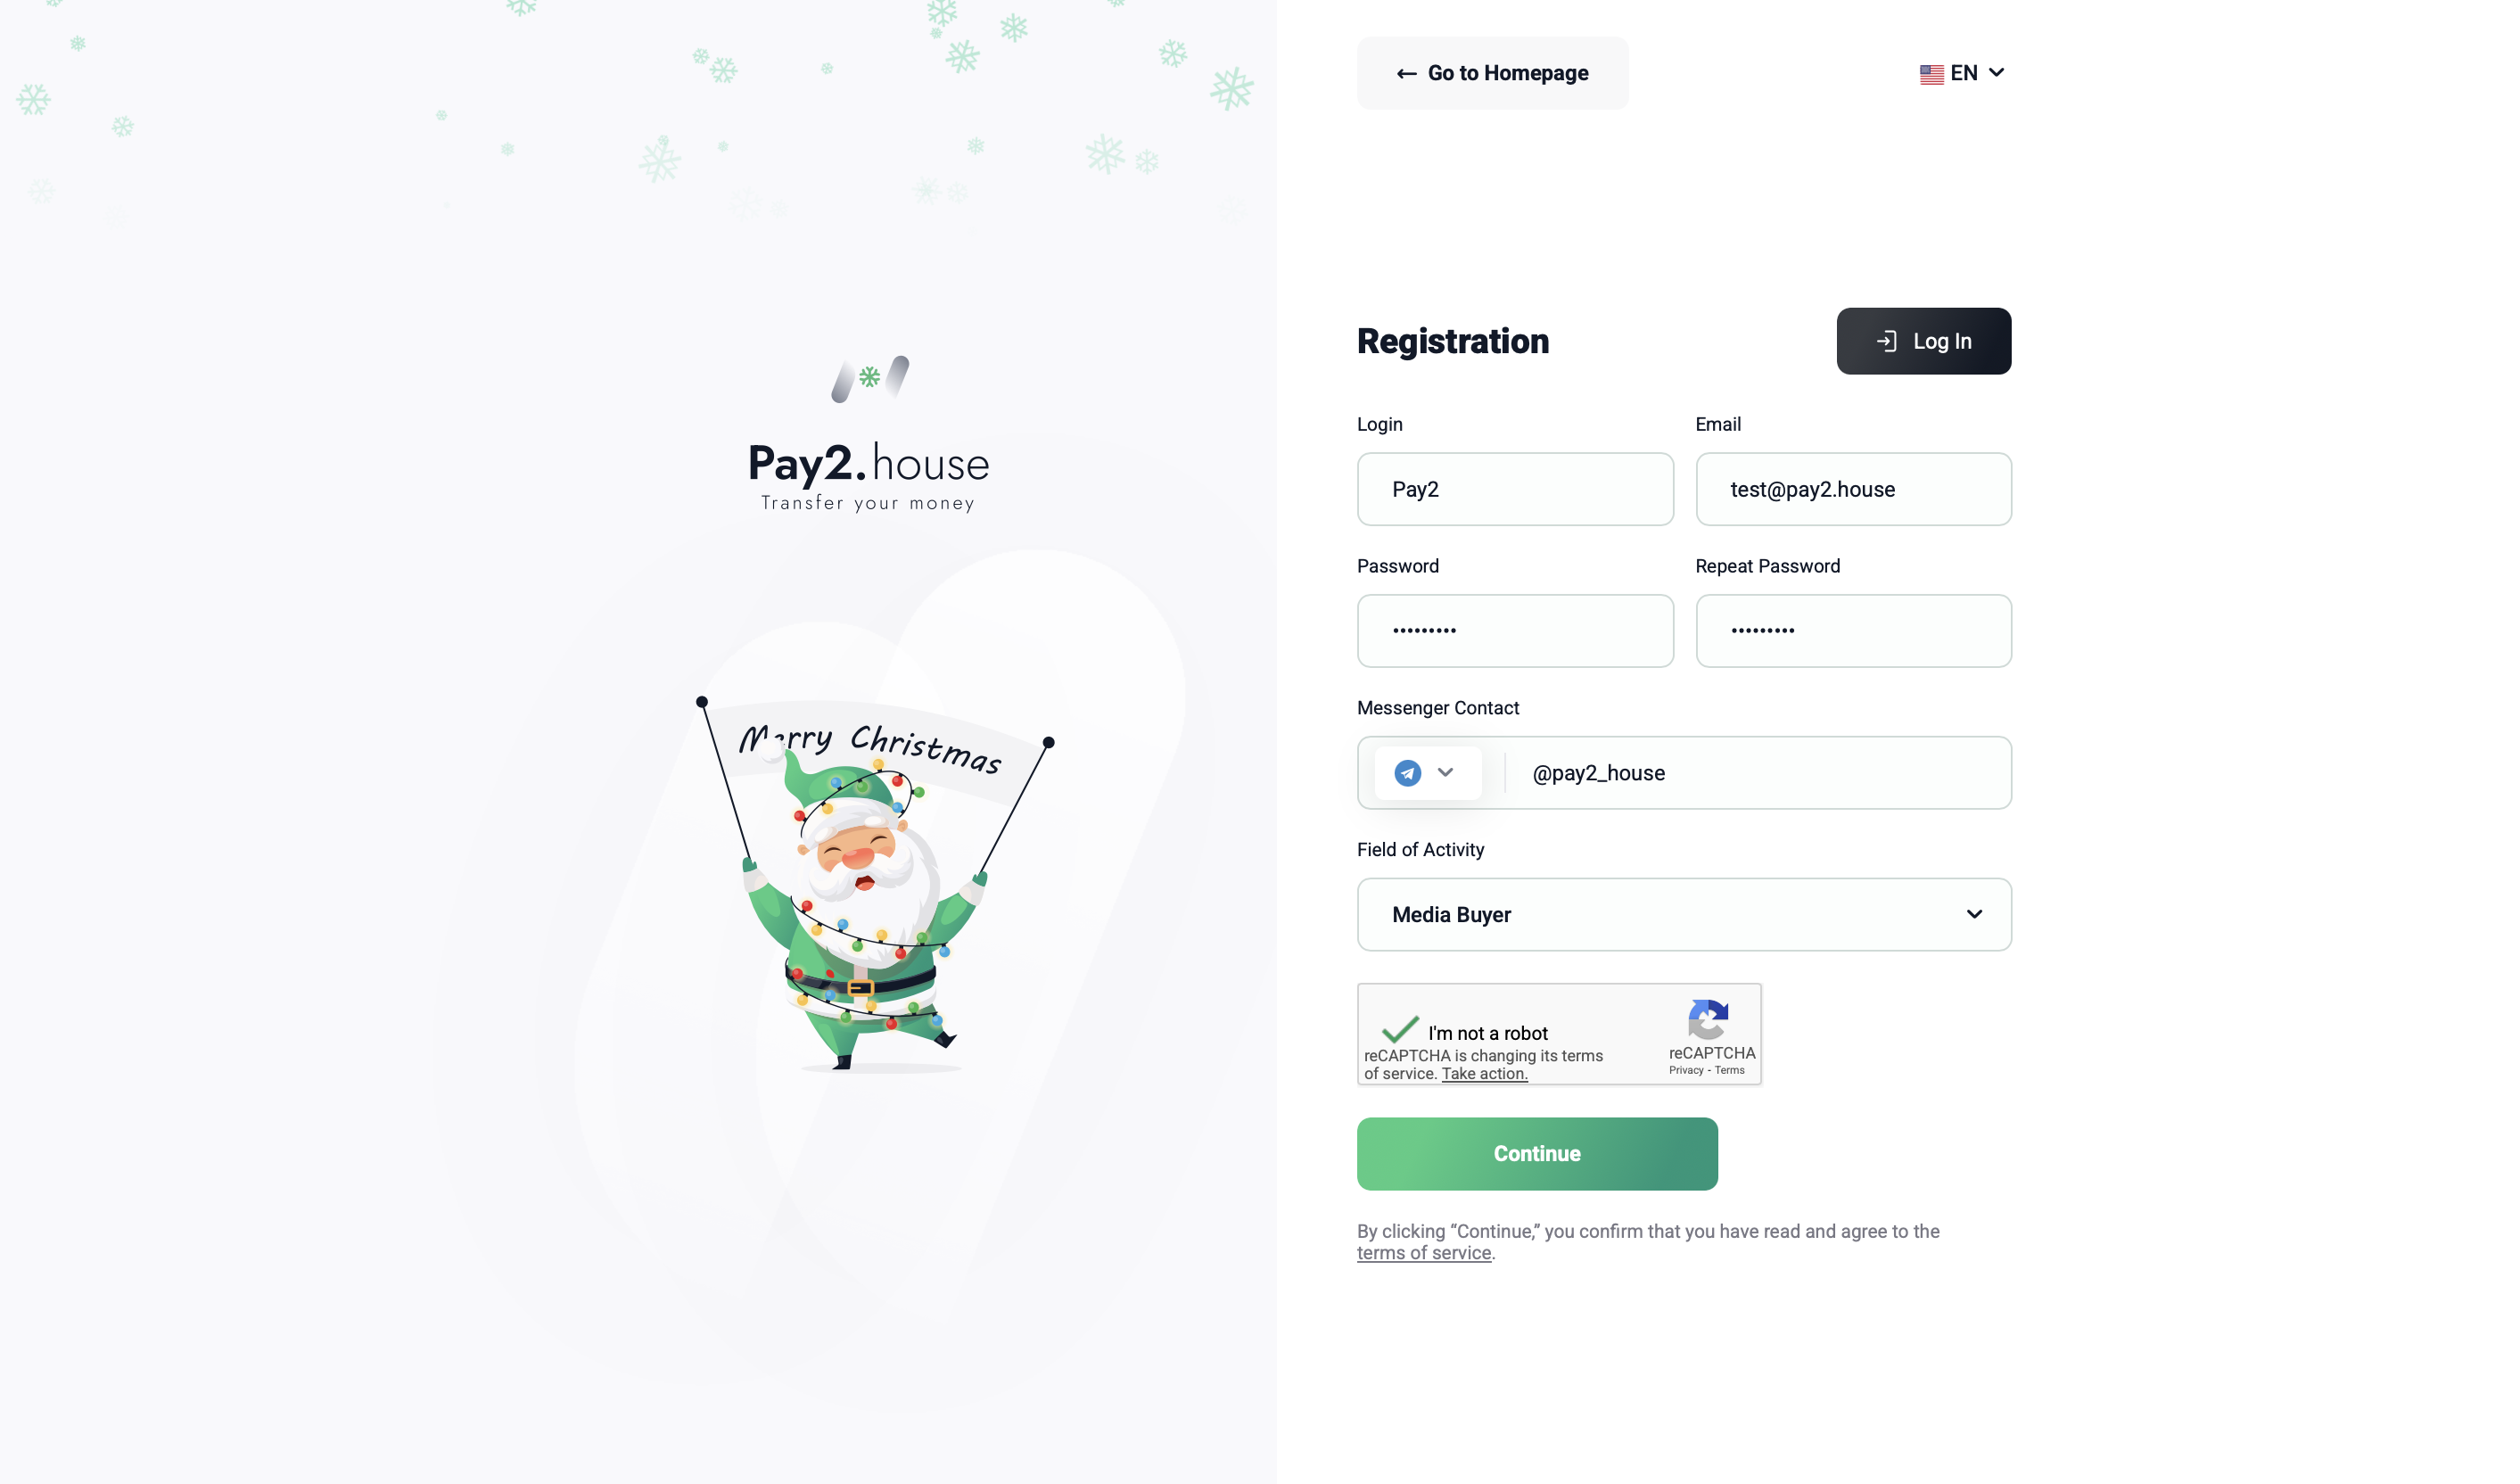
2. Email verification
After registration, you need to verify your email address. This is required for account security and to receive service notifications.
2.1. Check your inbox
An email with a 4-digit verification code will be sent to the address you used during registration.
- If you don’t see the email – check your Spam folder.
- You can also click “Send again” to request a new code.
2.2. Enter the code on the website
Go to the activation page and enter the code from the email. If the code is correct, you’ll move to the next step.
2.3. Click “Confirm”
After successful verification, your account will be activated and you will be automatically redirected to your Pay2.House dashboard.
3. Pay2.House dashboard and navigation
After logging in, you land on the Pay2.House main screen, built around quick actions.
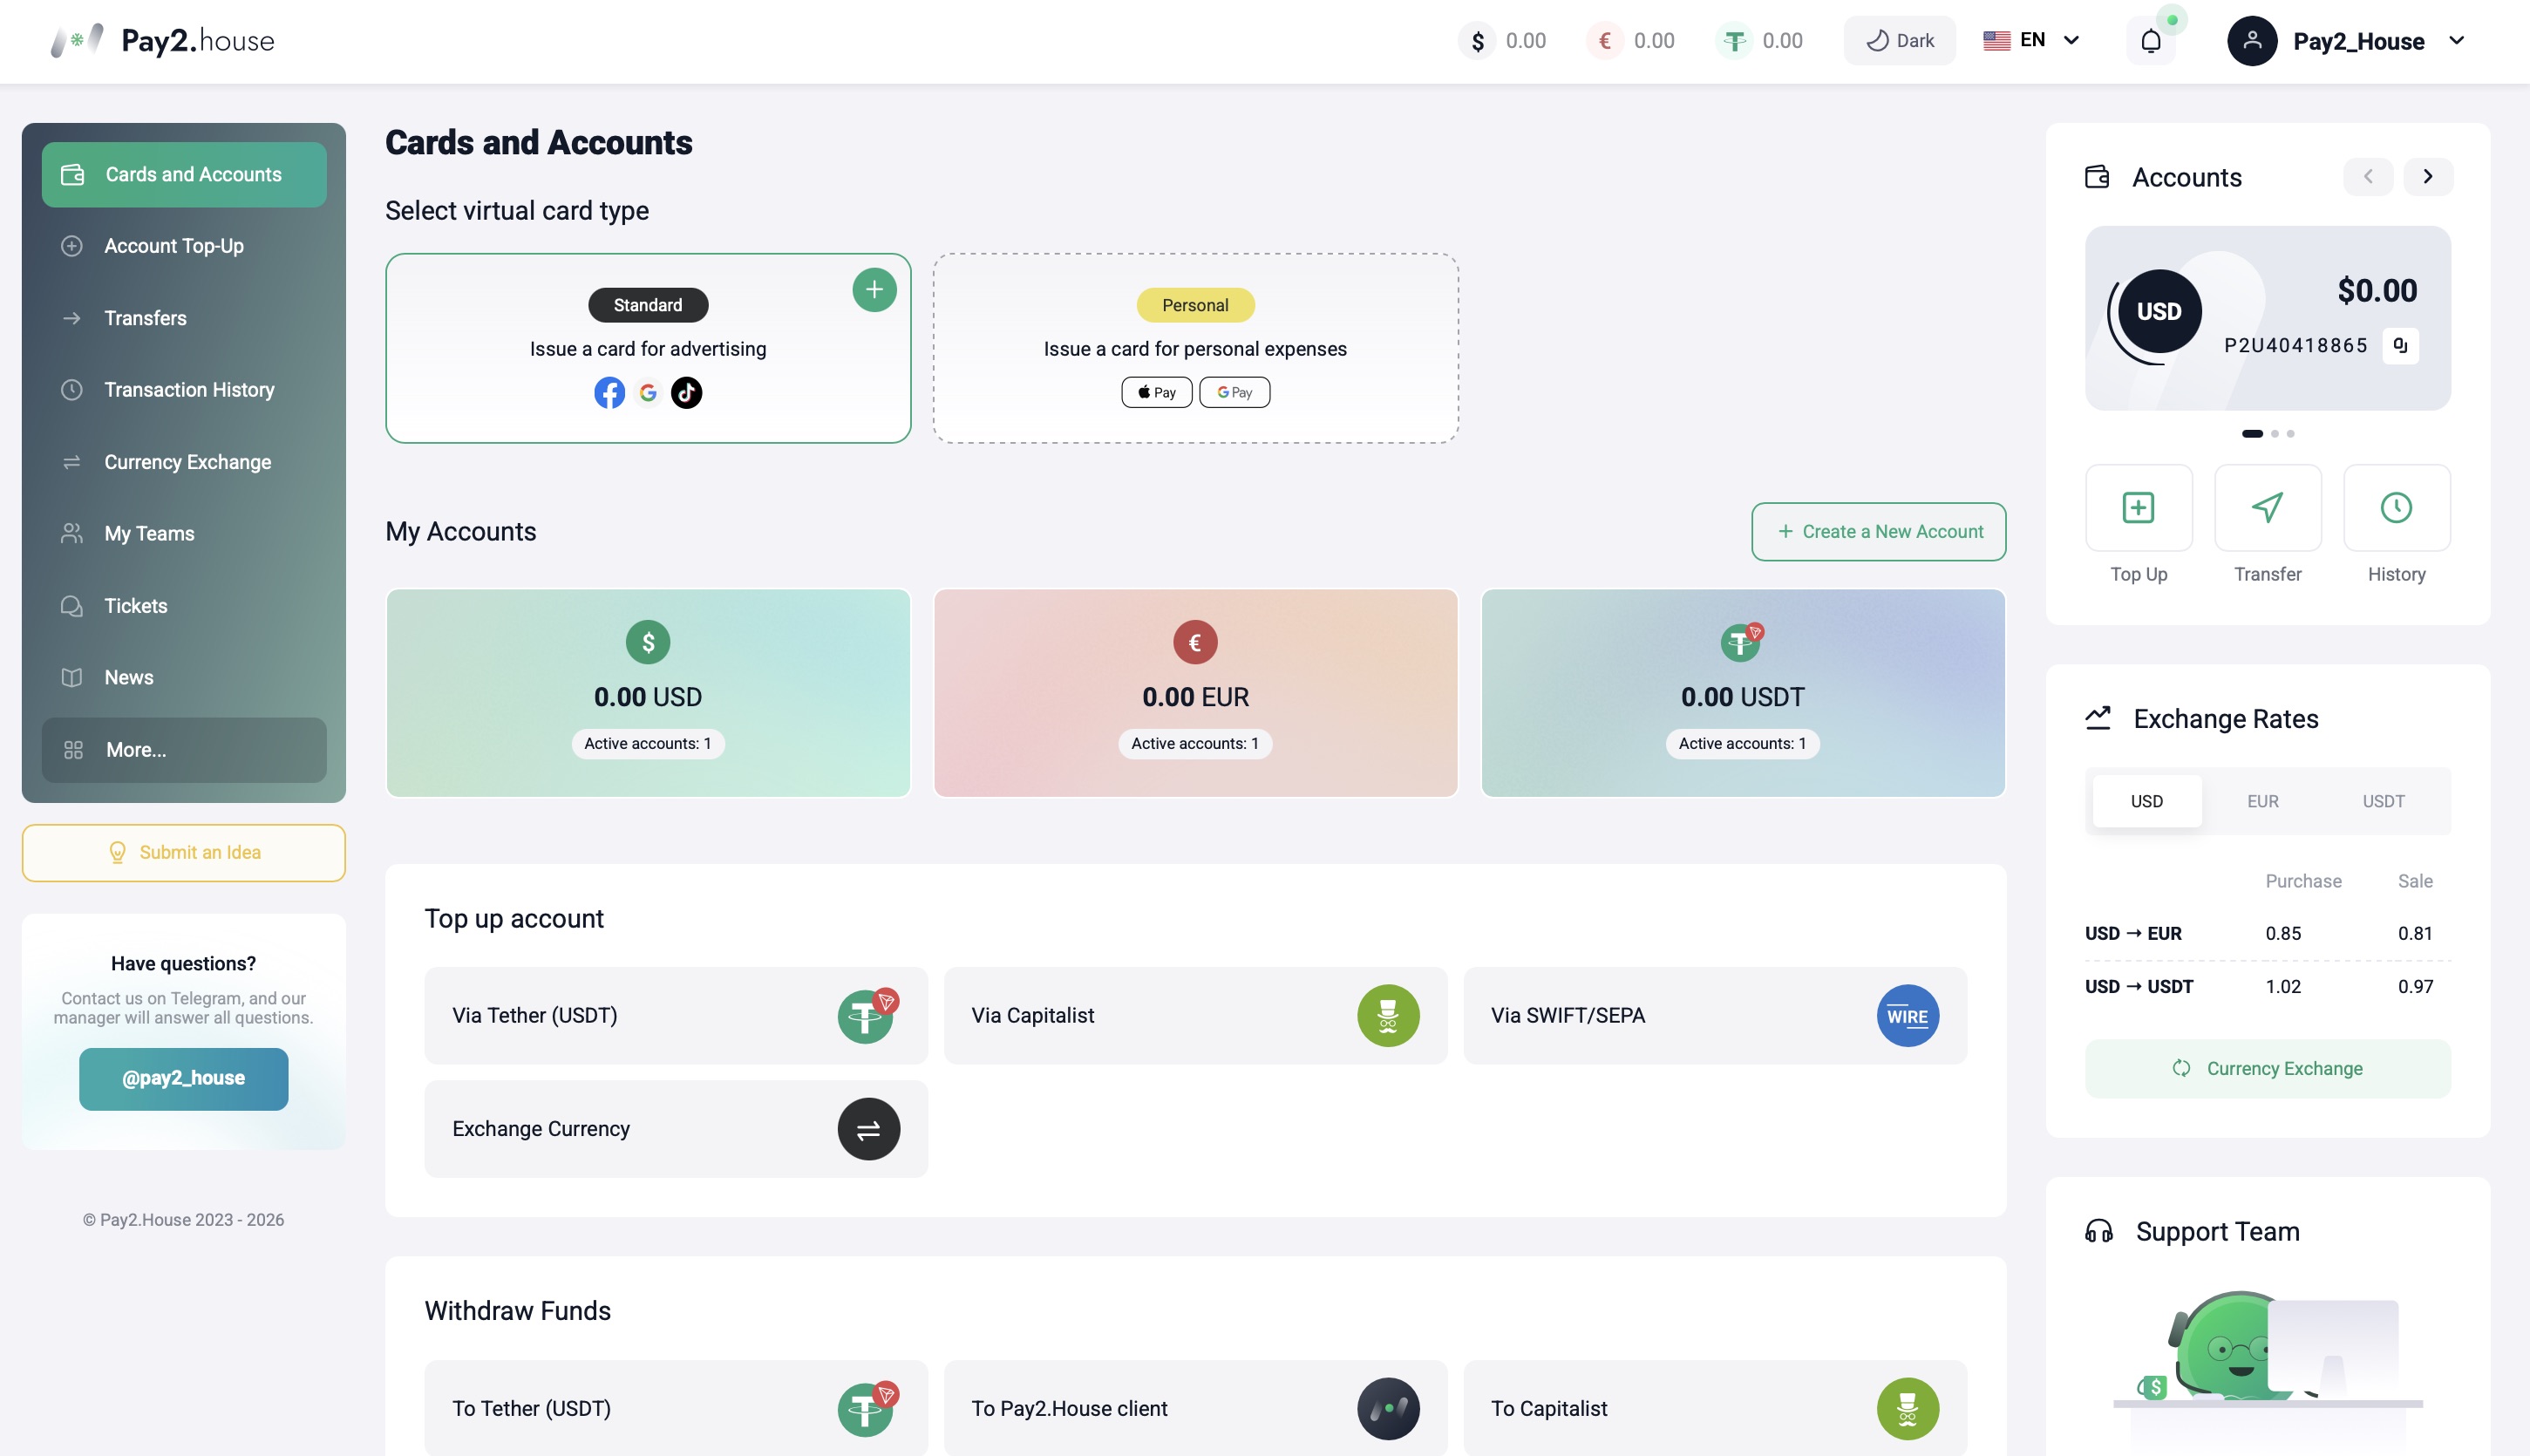
In the center of the screen, you can immediately choose which virtual card you want to issue. Different card types are available, and you can go straight to the option you need without digging through the menu. This helps you start faster without wasting time searching for the right section.
Below, you’ll see the “My Accounts” block. It displays all your active accounts in different currencies. If you have multiple accounts, you can view them all in one place. If needed, there is a “Create a new account” button that lets you open an additional account to separate budgets or tasks.
Further down is the account top-up block. Here you can choose a convenient top-up method and go directly to the option you need without switching to separate menu sections. The same block also includes currency exchange – you can jump straight to exchange and convert between available currencies.
Under the top-up block is the withdrawals section. Here you can select an available withdrawal method and complete the operation directly from the main screen.
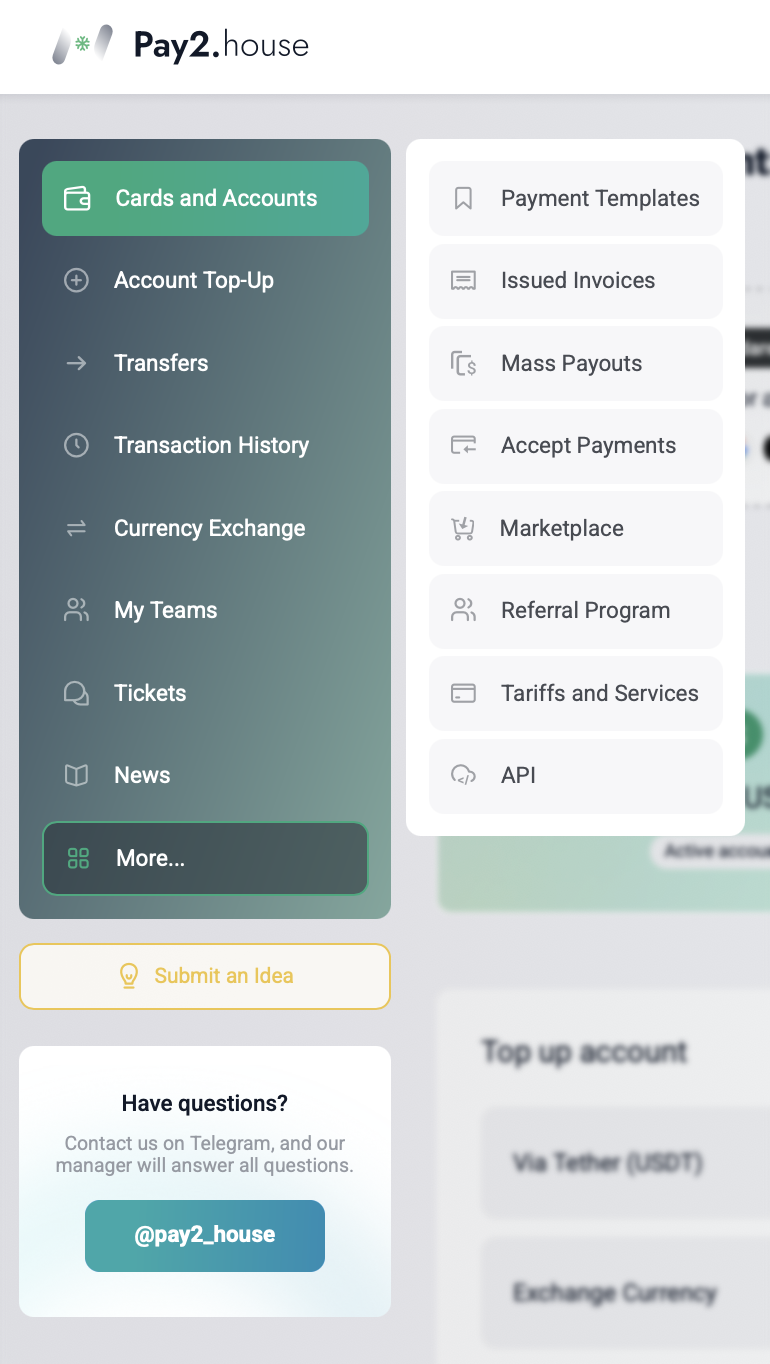
Key Pay2.House sections:
- Cards and Accounts – manage your accounts and virtual cards.
- Top up account – add funds to your main account balance using available methods.
- Transfers – transfer funds between accounts, partner services, to an external TRC20 wallet on the Tether USDT network, or to a Ukrainian bank card.
- Transaction history – view all transactions and actions.
- Currency exchange – convert funds between currencies.
- My Teams – work with teams and access management.
- Tickets – contact support.
- News – service updates and system notifications.
- More – additional tools and service features.
In the next guides, we’ll break down these sections in detail and show how to use them in practice.
At the bottom, there is a “Suggest an idea” button. You can leave feedback or share which features and improvements you’d like to see in Pay2.House. We regularly collect customer feedback and take it into account as we develop the platform.
If you have any questions about using the service, you can always message our Telegram channel – https://t.me/pay2_house. A support manager will help you and suggest the best solution for your case.
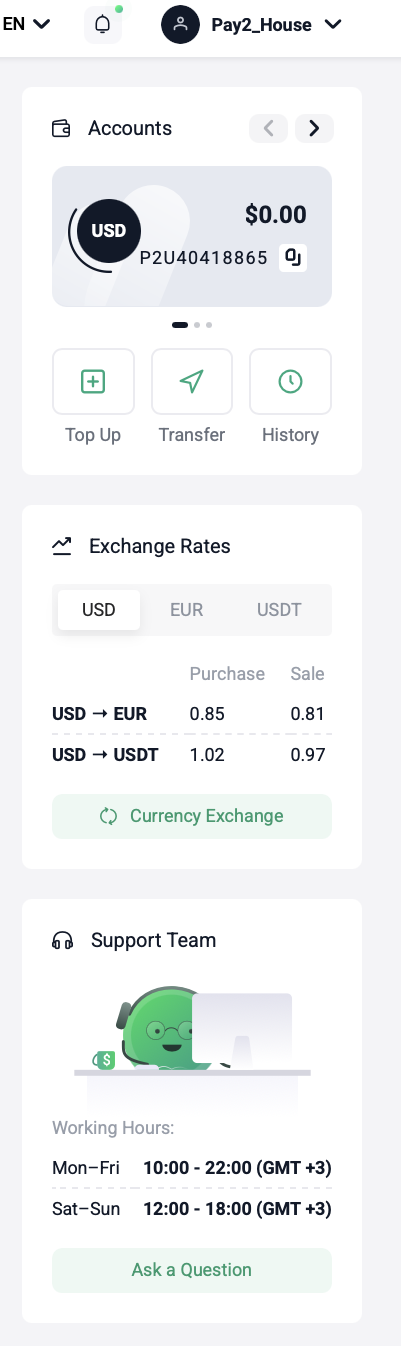
On the right side of the screen, you’ll see a block with your Accounts. It shows all active accounts. You can switch between them using the left and right arrows. Each account has quick actions: Top up, Transfer, Transaction history – so you can manage funds directly without opening other sections.
Below, on the right side of the screen, there is a “Exchange Rates” widget showing current exchange rates between USD, EUR, and USDT. To convert, click “Currency Exchange” – you will be redirected to the exchange page.
Also on the right side, there is a Support Team widget. It shows support working hours and includes a “Ask a Question” button. You can quickly message support from your dashboard if you have any questions about the service.
4. What is available after registration
After registration and email confirmation, the user gains access to the Pay2.House dashboard.
In the dashboard, users can review the available products, create the necessary accounts, and proceed to card issuance. If verification is required to activate the selected product, a corresponding notification will appear in the interface.
5. Account verification
Pay2.House applies KYC and AML procedures to confirm the user’s identity and ensure the security of transactions.
Verification may be required when activating certain products or features, as well as before certain transactions. In some cases, the compliance team may request an additional review.
How to complete verification
1. Log in to your Pay2.House dashboard.
2. Hover over the profile icon at the top of the interface.
3. If the status shows “Not verified”, click it.
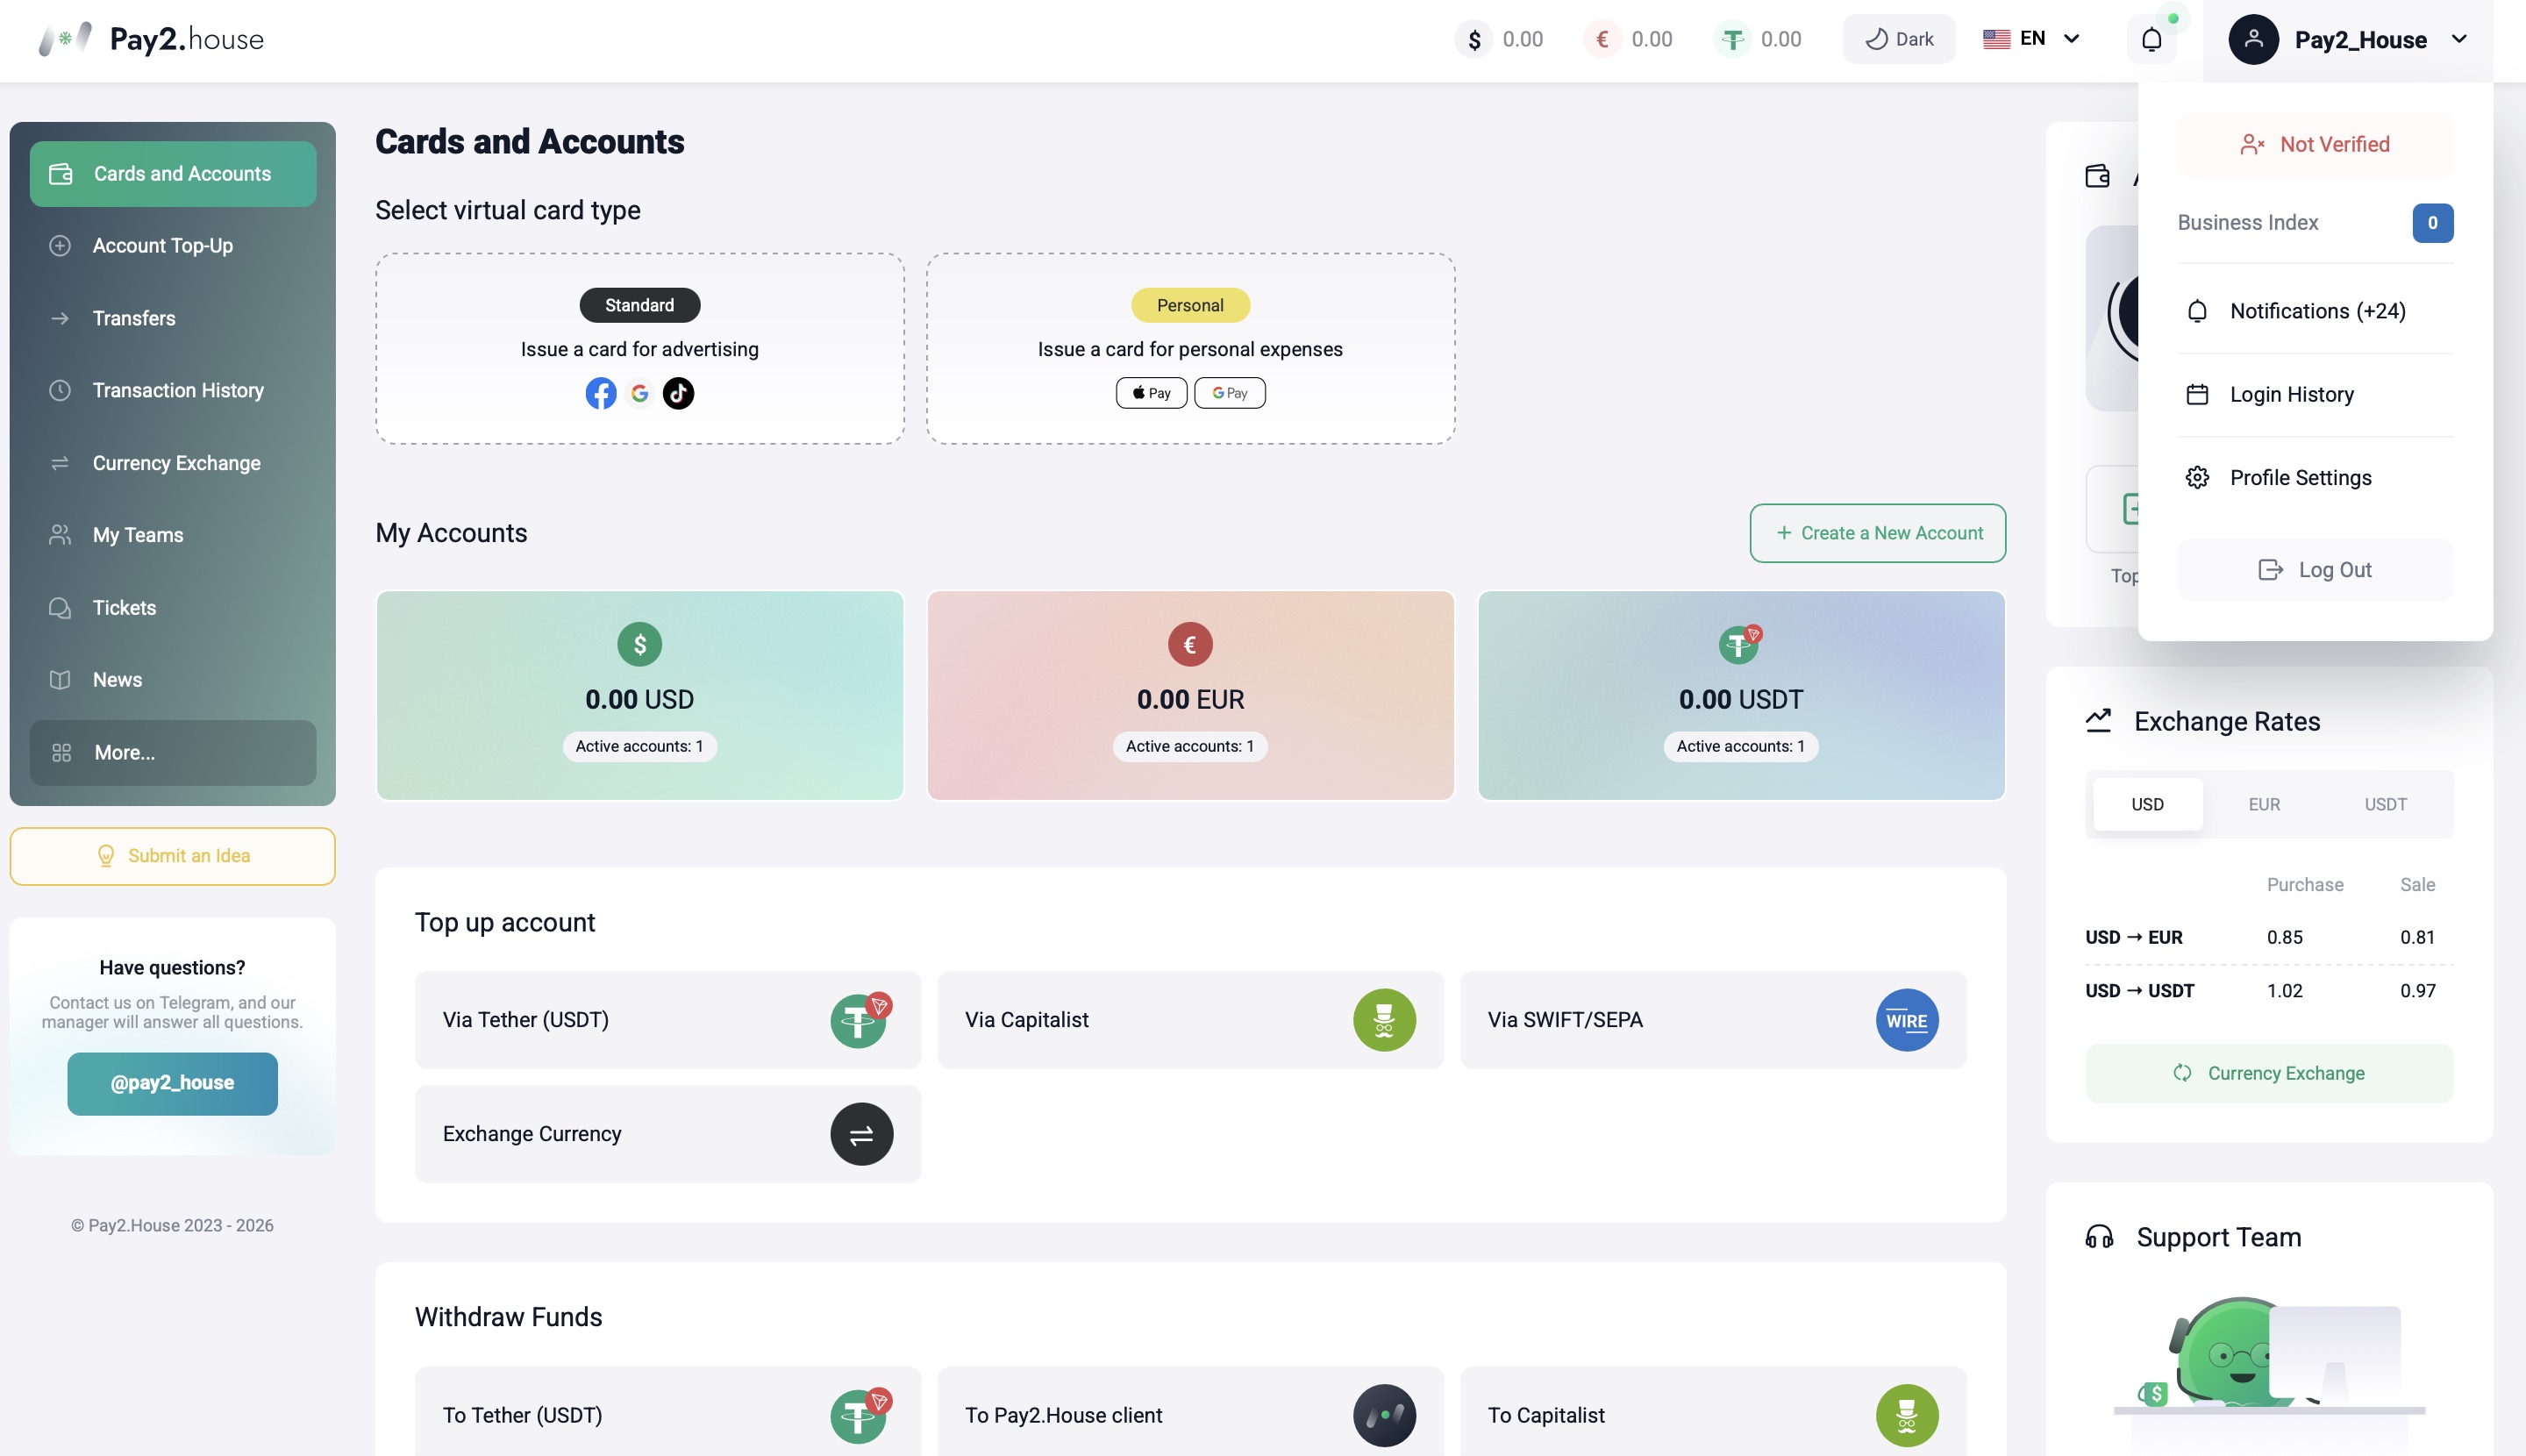
4. You will be automatically redirected to the verification page.
5. Enter the required information and follow the on-screen instructions.
6. Upload an identity document.
7. Submit the information for review.
The review result will be displayed in your account profile.
In some cases, the compliance team may request an additional document or information, such as proof of the source of funds. If this is required, the user will receive a separate notification with further instructions.
Learn more about the security requirements in the “AML and KYC Policy” section: https://pay2.house/aml_policy
6. Two-factor authentication (2FA)
In Pay2.House, two-factor authentication is mandatory. Without 2FA confirmation, no operation will be completed. This applies to logging in and confirming payments.
How to set up 2FA
To set up two-factor authentication, follow these steps:
- Hover over the profile icon at the top of the interface.
- Click “Profile settings”.
This will open the profile settings page.
Personal information
In the “Personal information” tab, you can:
– update your account details
– update your contact information
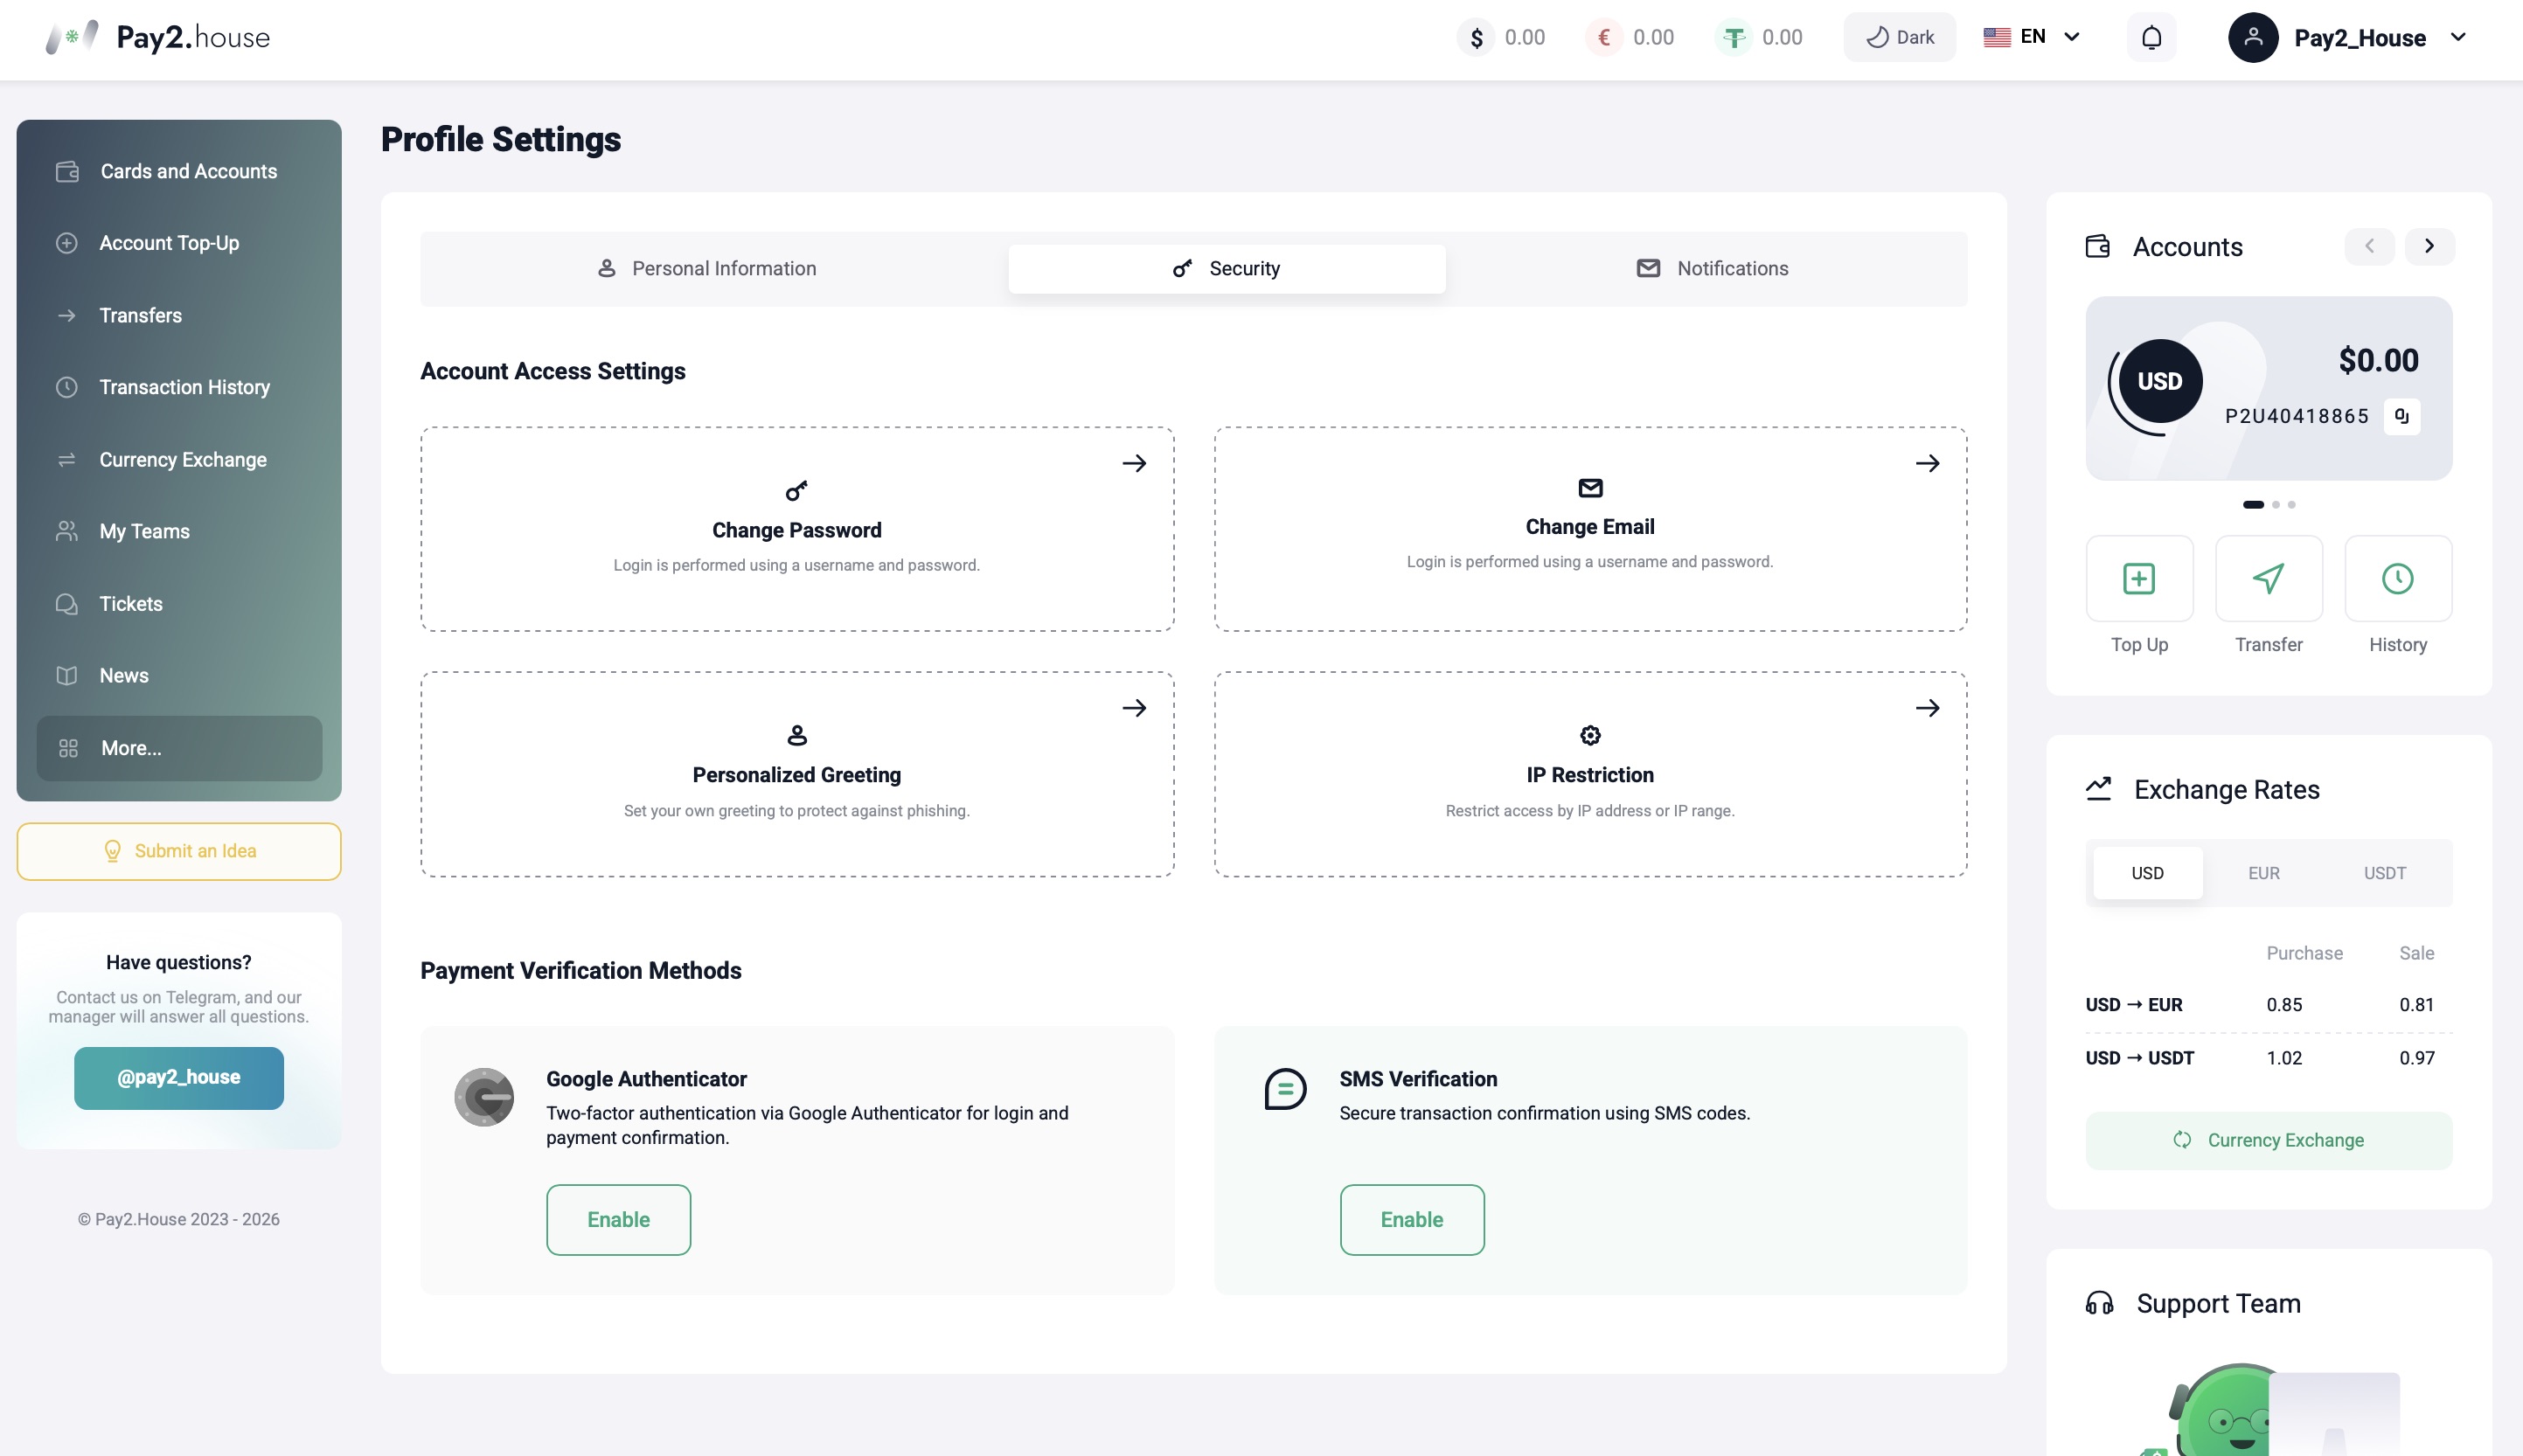
Security
In the “Security” tab, you’ll find key account protection settings:
– change password
– change email
– set a personal greeting (additional anti-phishing protection)
– restrict access by IP address or IP range
Payment confirmation methods
Further down on the Security page, you can choose how to confirm operations and payments.
Available 2FA methods:
- Google Authenticator – confirm login and payments using one-time codes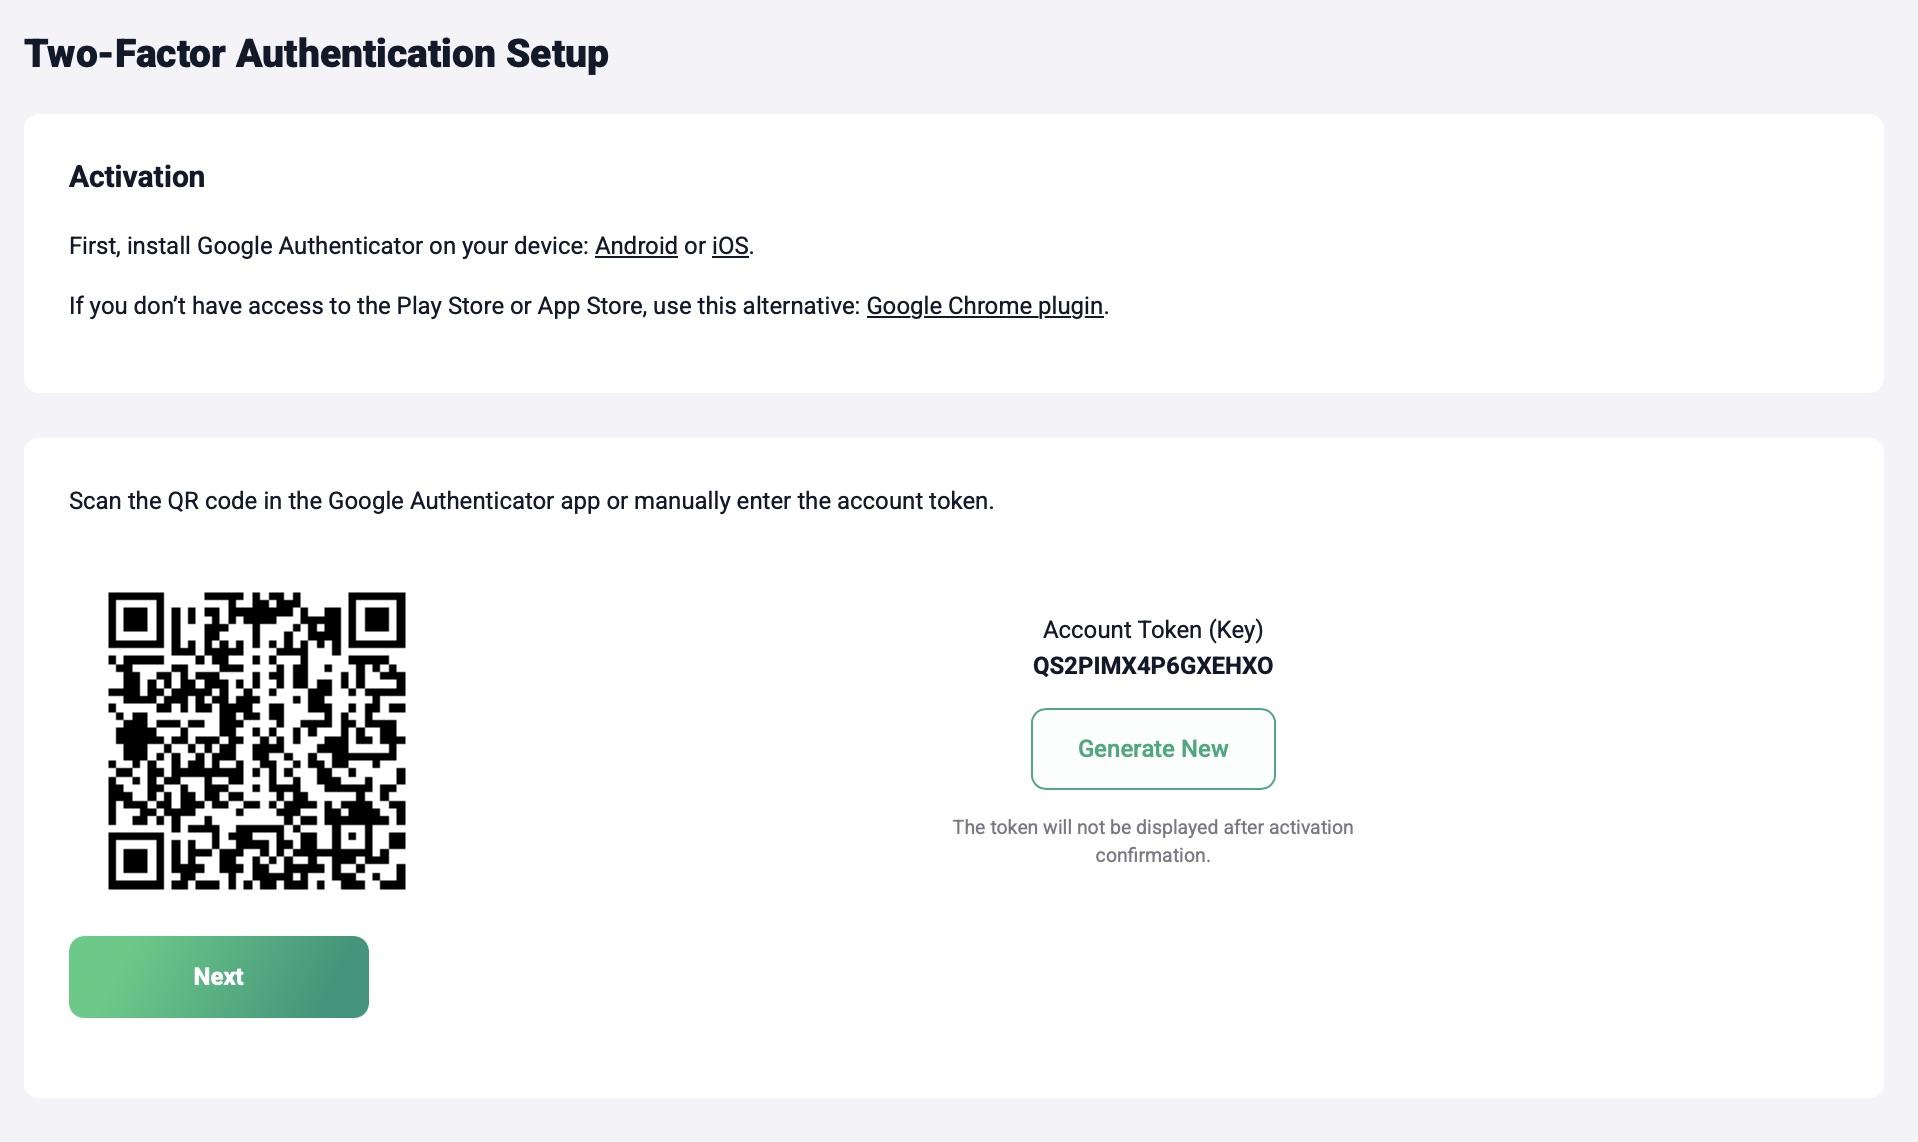
To connect Google Authenticator:
- Install Google Authenticator on your device (Android or iOS). If Google Play or the App Store is unavailable, you can use a Google Chrome extension.
- Scan the QR code in the app or enter the account token manually.
- Confirm activation.
- SMS confirmation – confirm operations using SMS codes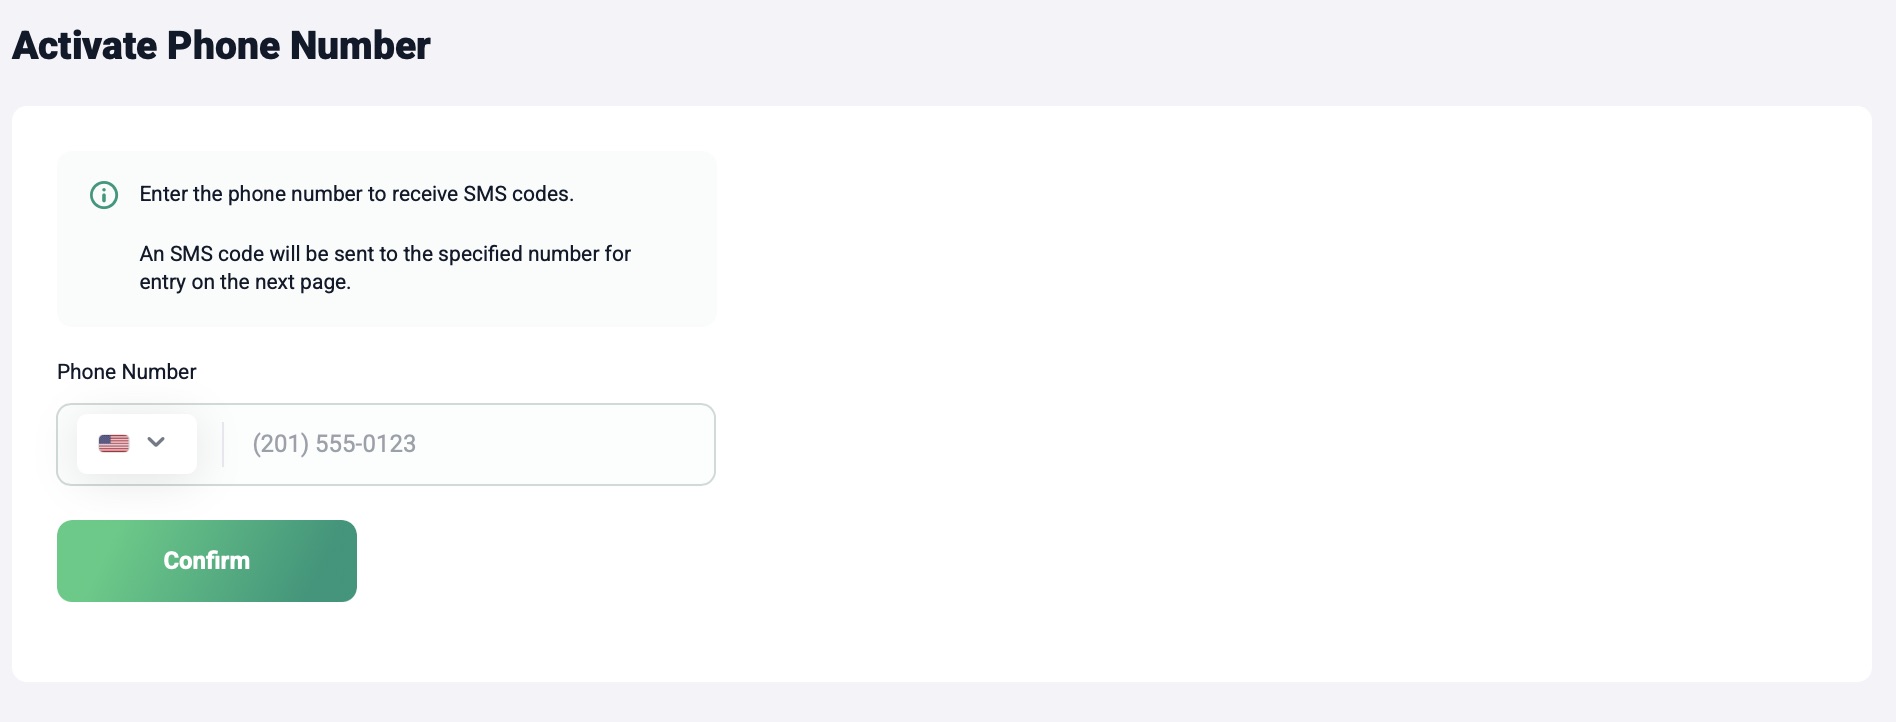
To connect SMS confirmation:
- Enter the phone number that will receive confirmation codes.
- Confirm the number and enter the 4-digit code from SMS. After successful confirmation, the number will be used to protect logins and operations.
- If needed, you can disable the current number and connect a new one at any time.
What’s next
In the next guide “How Pay2.House works and how to use it”, we’ll explain how accounts, balances, and cards are structured, and how accounts and payments are connected inside the service.


 Telegram
 Email
Email









Be the first to share your opinion!
We value your feedback — share your thoughts.