



Introduction
OnlyFans is one of the most popular platforms for subscriptions and content. To pay for subscriptions or promote your account, you need a reliable payment method. Pay2.House virtual cards are a perfect fit: they work on OnlyFans, support 3D Secure, and make it easy to control your spending.
This article is a step-by-step guide on how to link your card correctly.
What you need beforehand
-
An OnlyFans account with no restrictions
-
A standard Pay2.House virtual card (USD or EUR)
-
A card balance of at least $10 (subscriptions usually cost $5–10 + $0.25 transaction fee)
How to issue and top up your card — see our guide: https://pay2.house/docs/guide
Step-by-step instructions
1. Log into your OnlyFans account
Click Add Card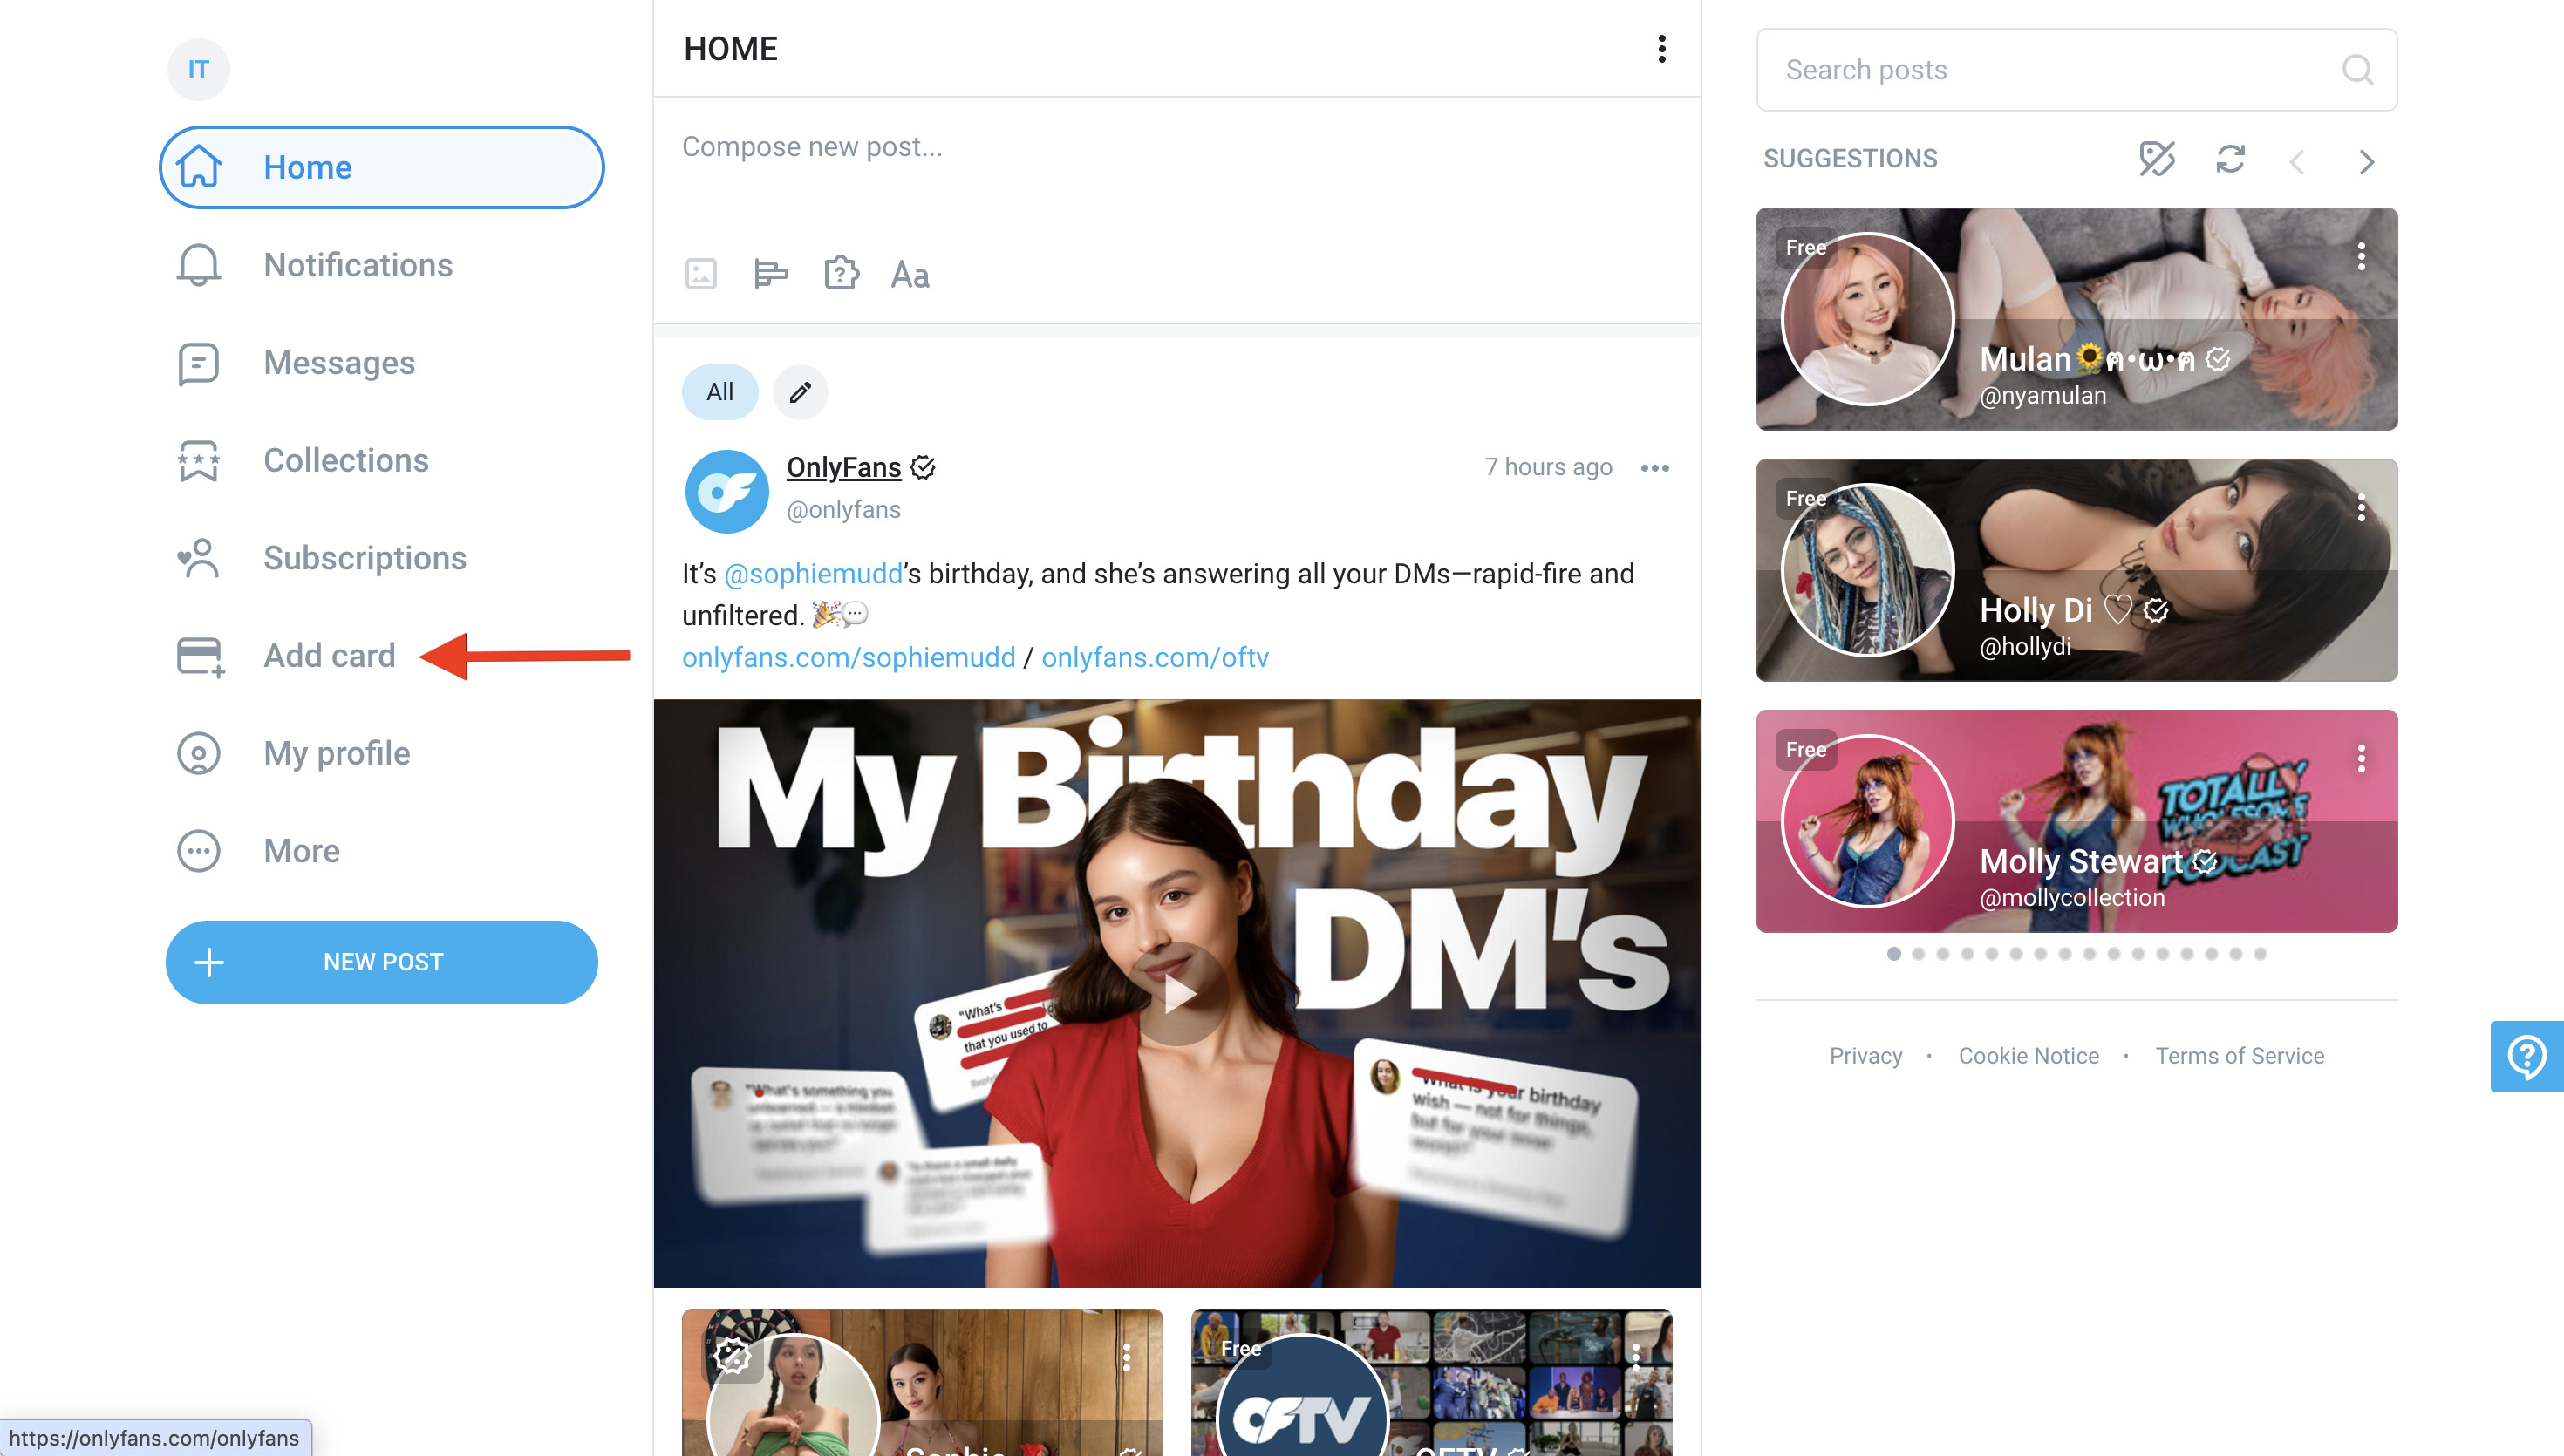
2. Add a payment method
A form will open to enter your card details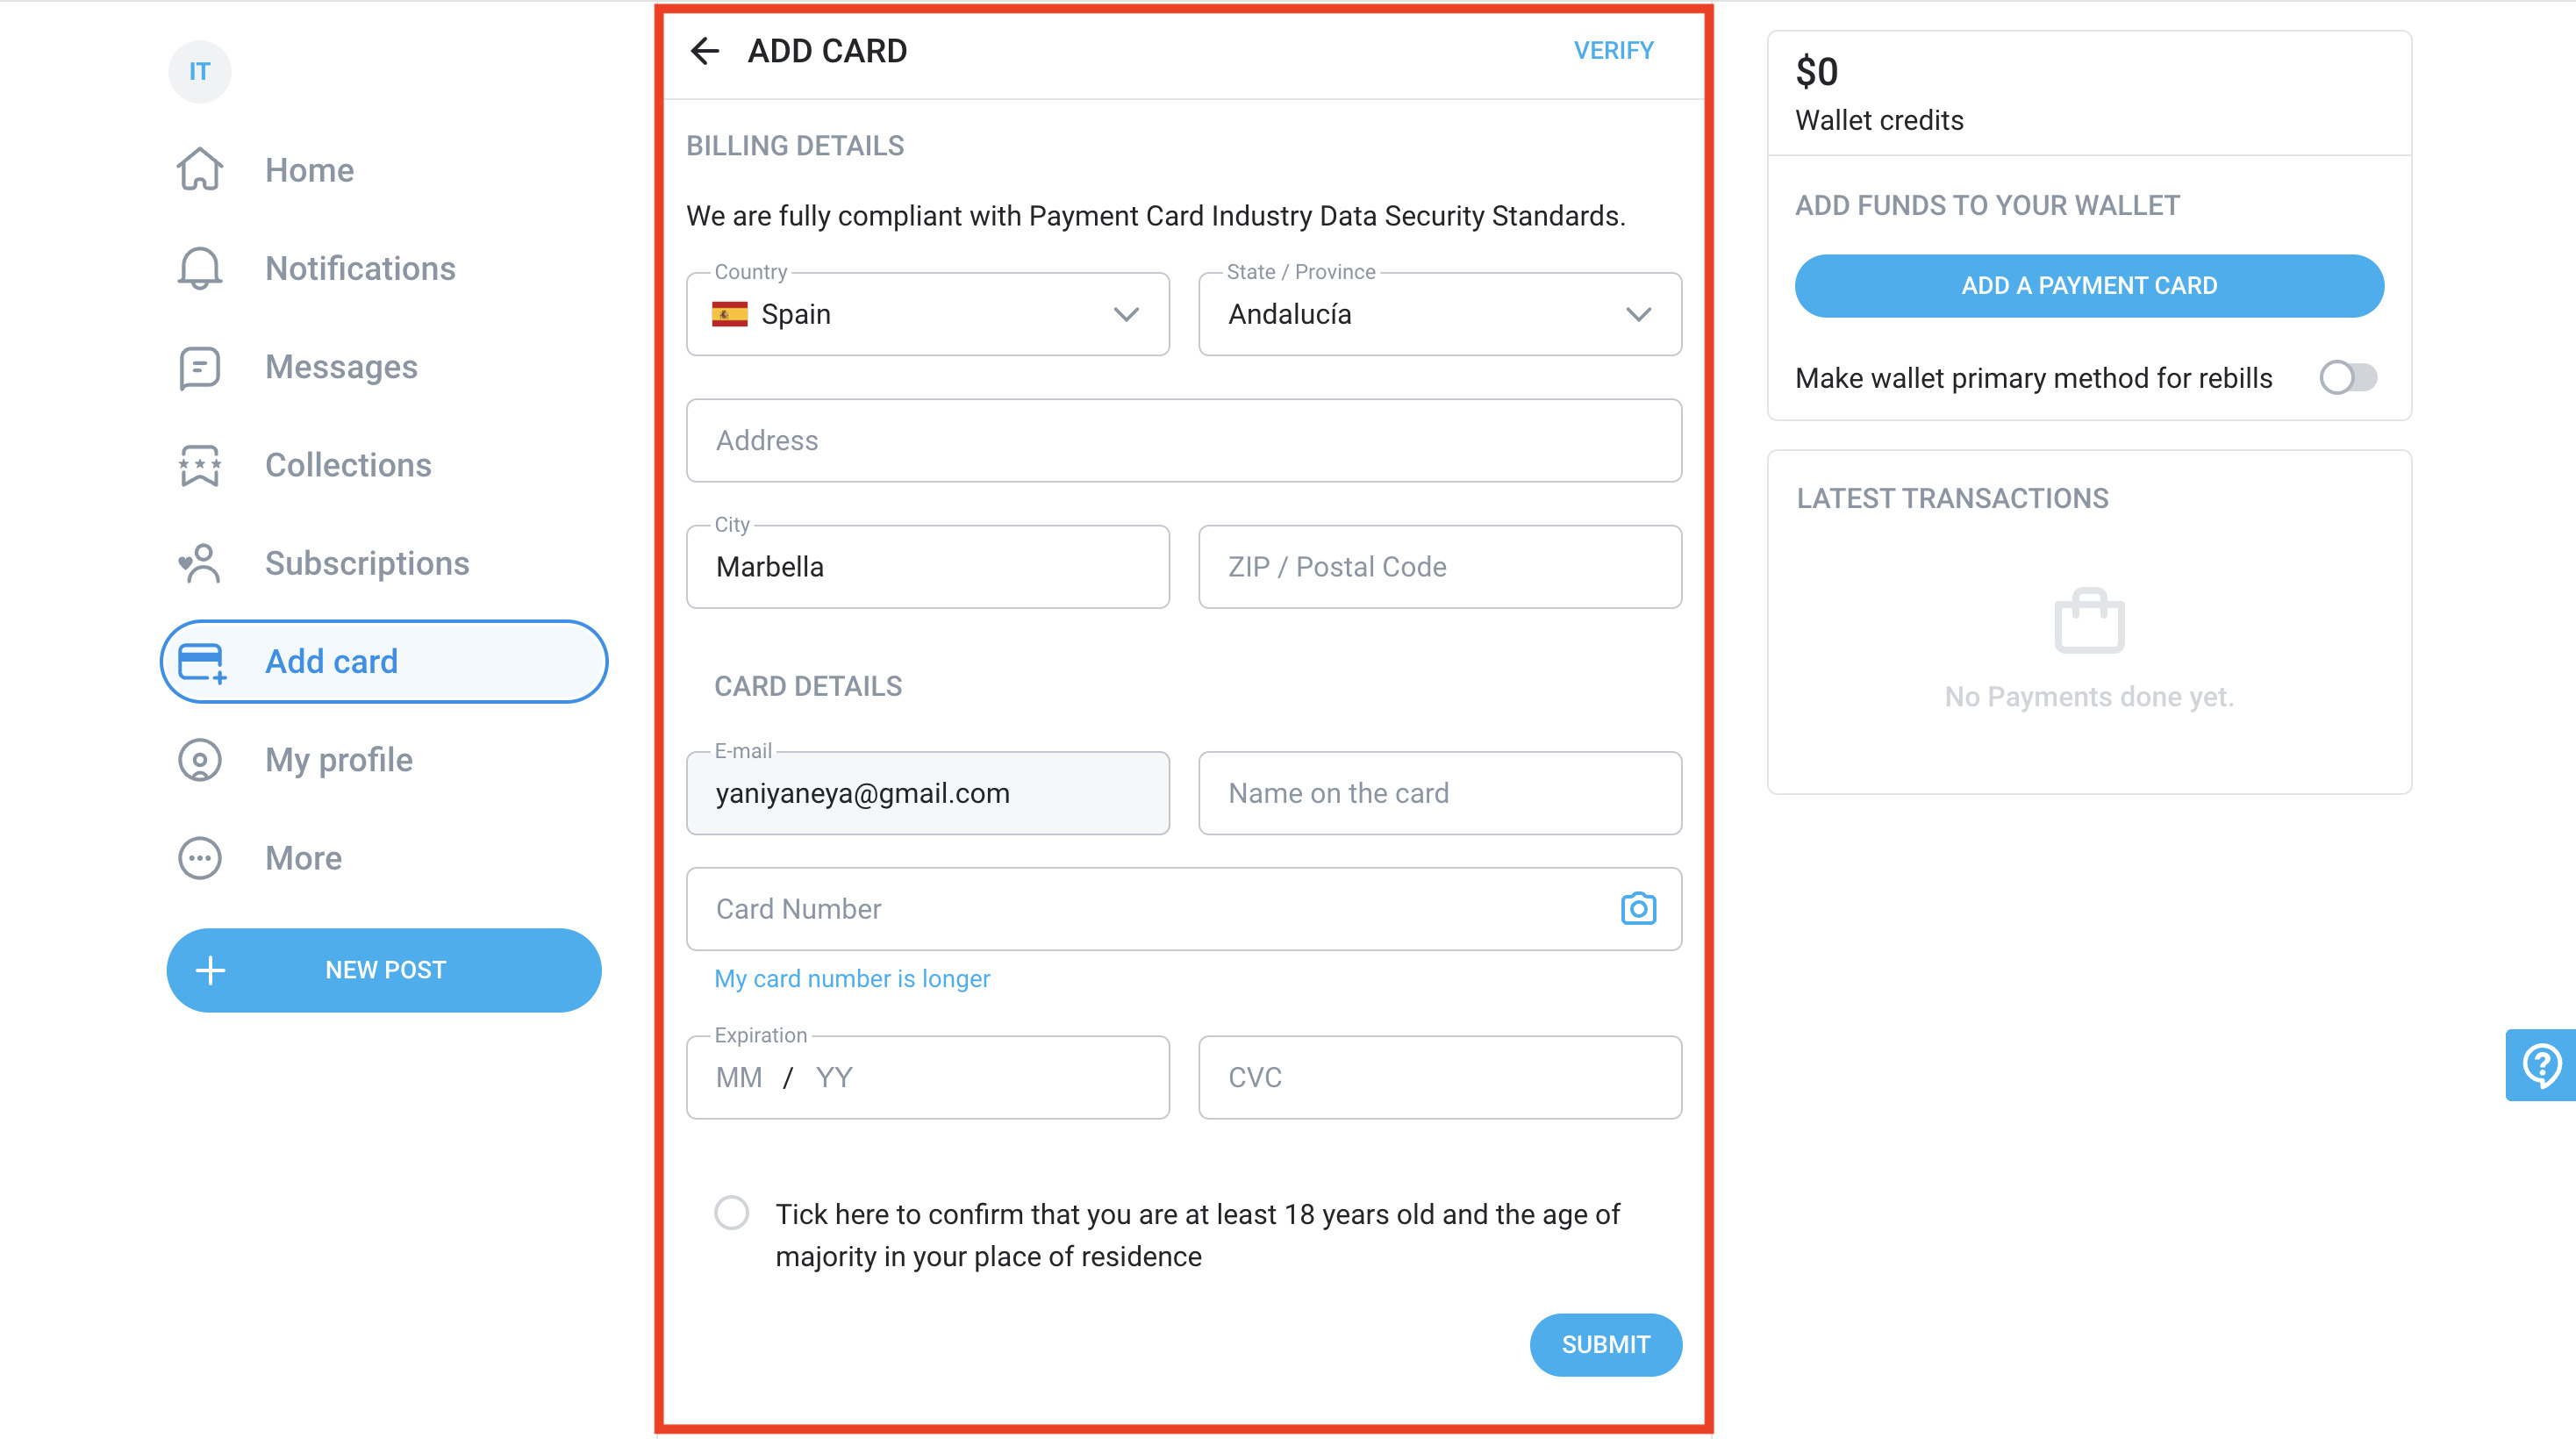
3. Enter your Pay2.House card details
Enter the card number, expiration date, and CVC
Click SUBMIT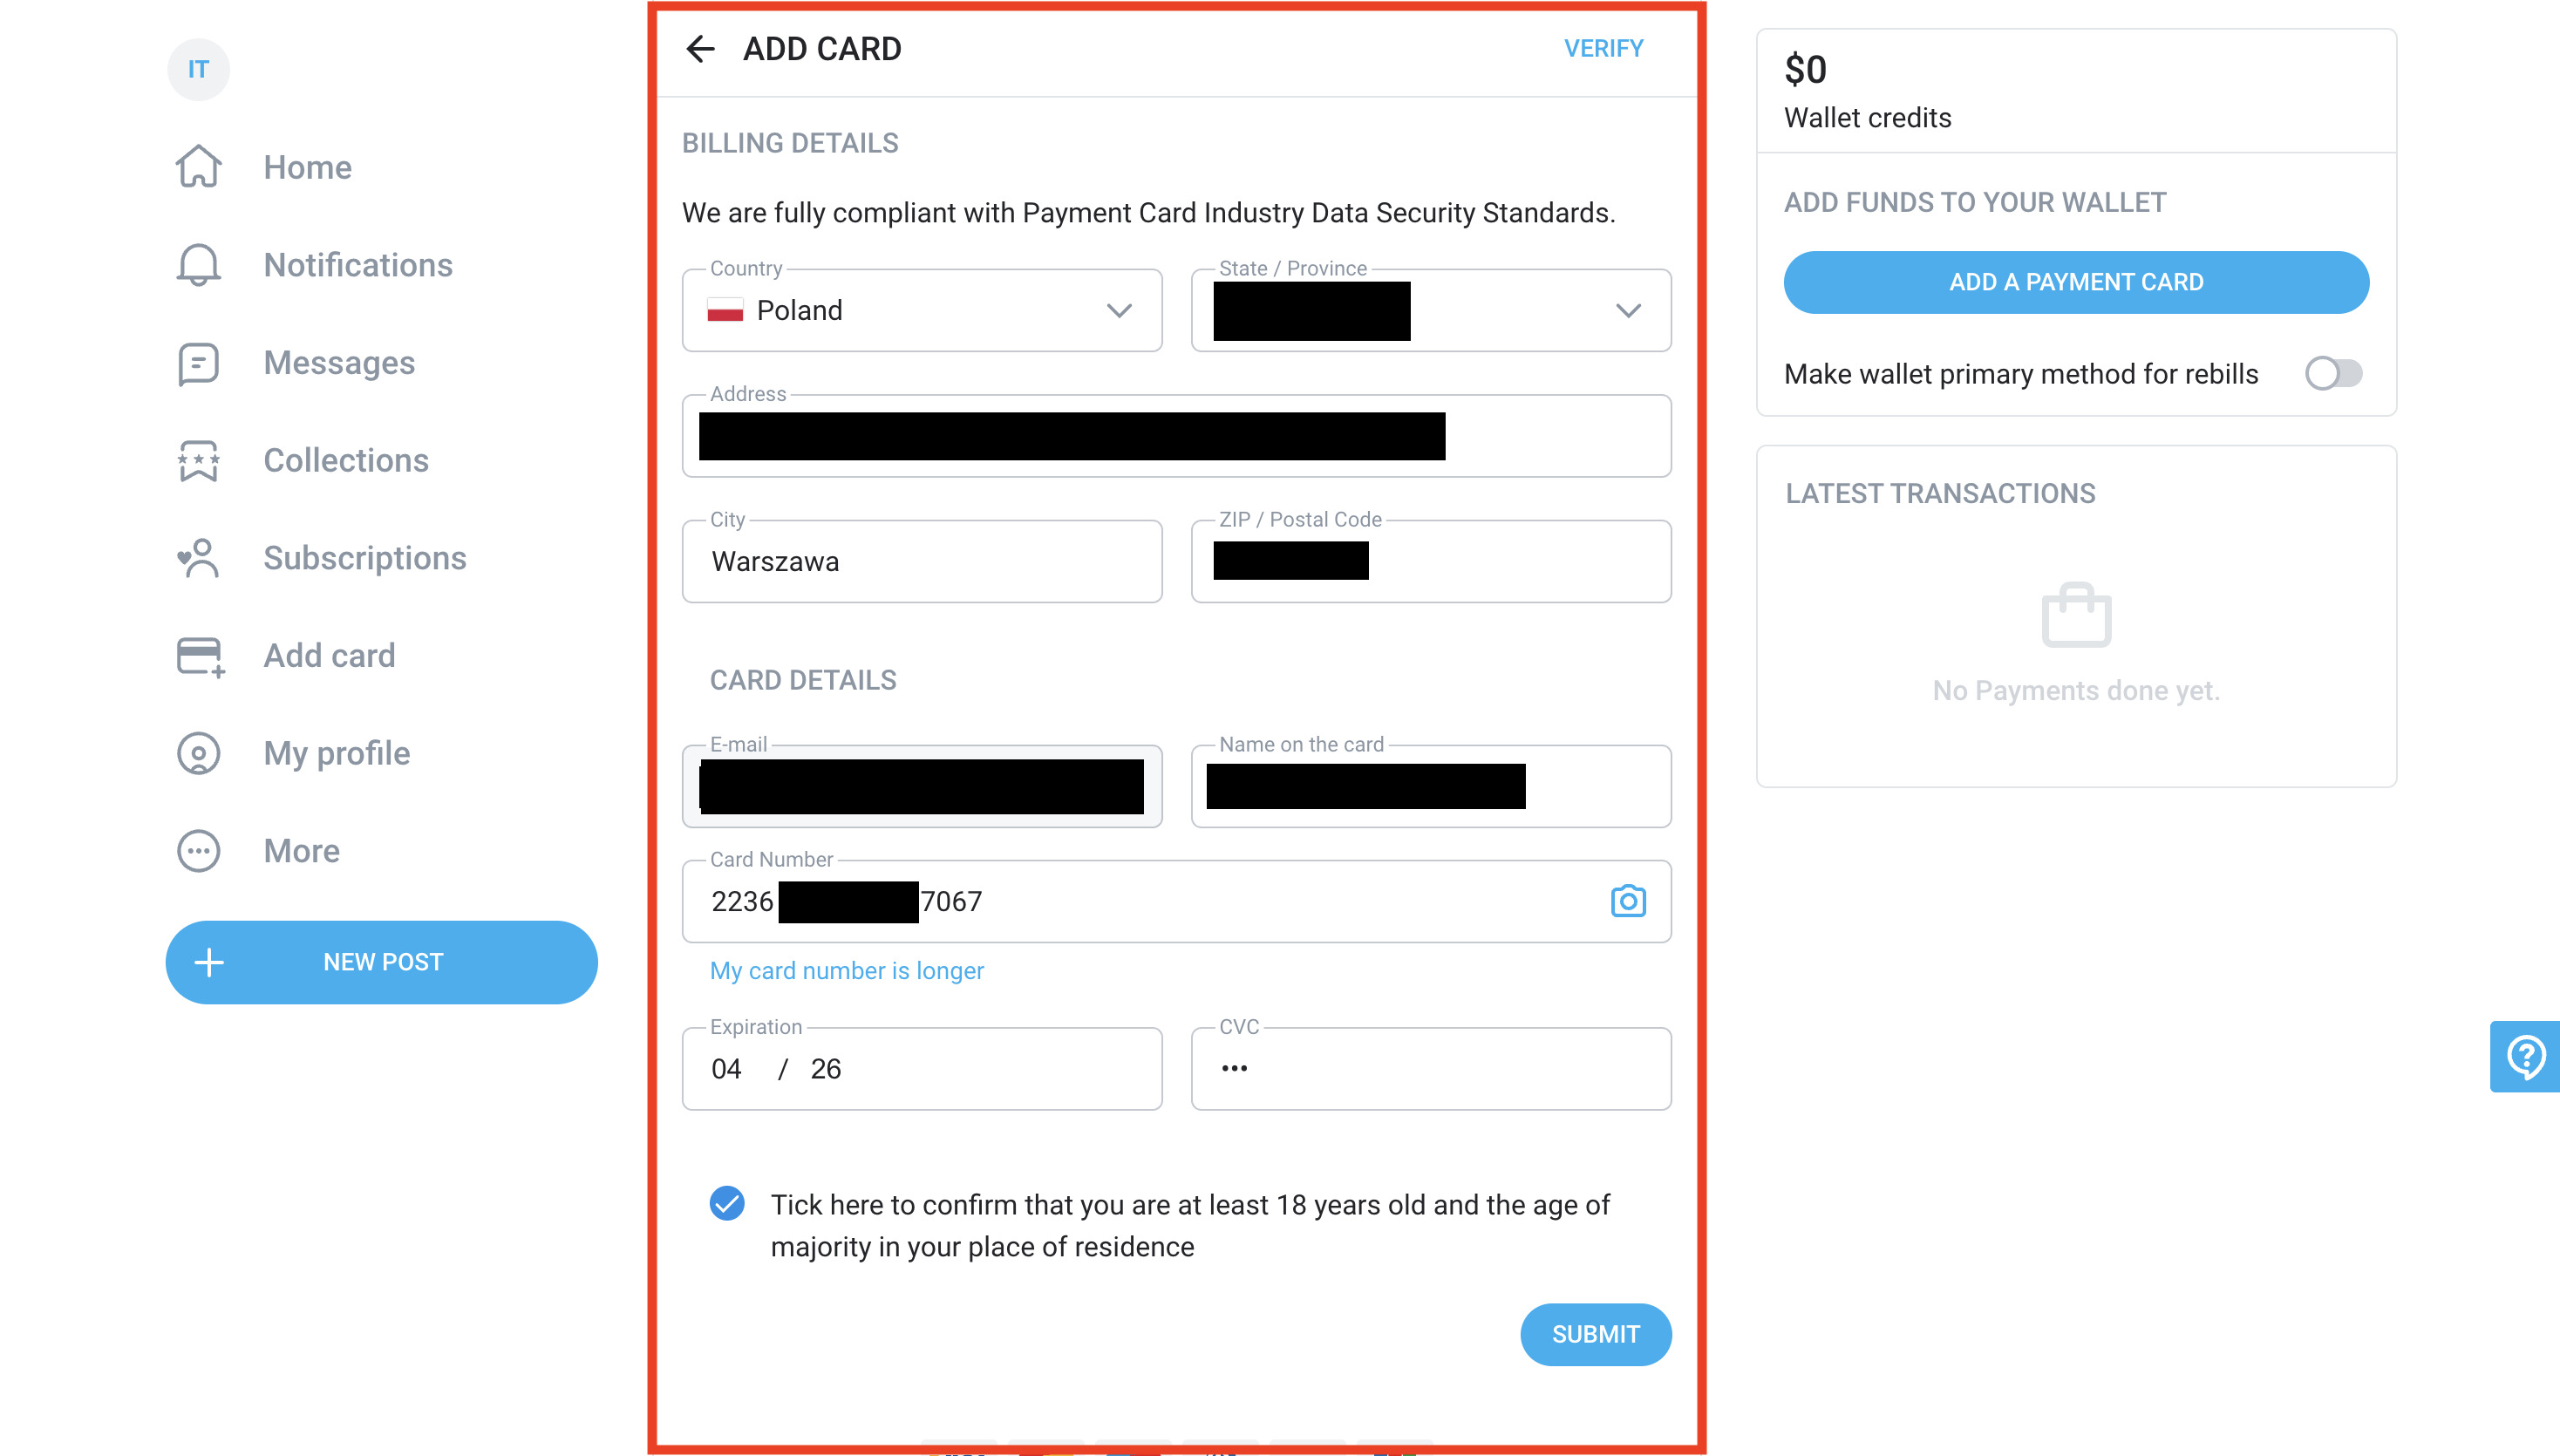
4. Transaction confirmation
The payment goes through instantly — no 3D Secure code required
Once confirmed, the card will be saved in your account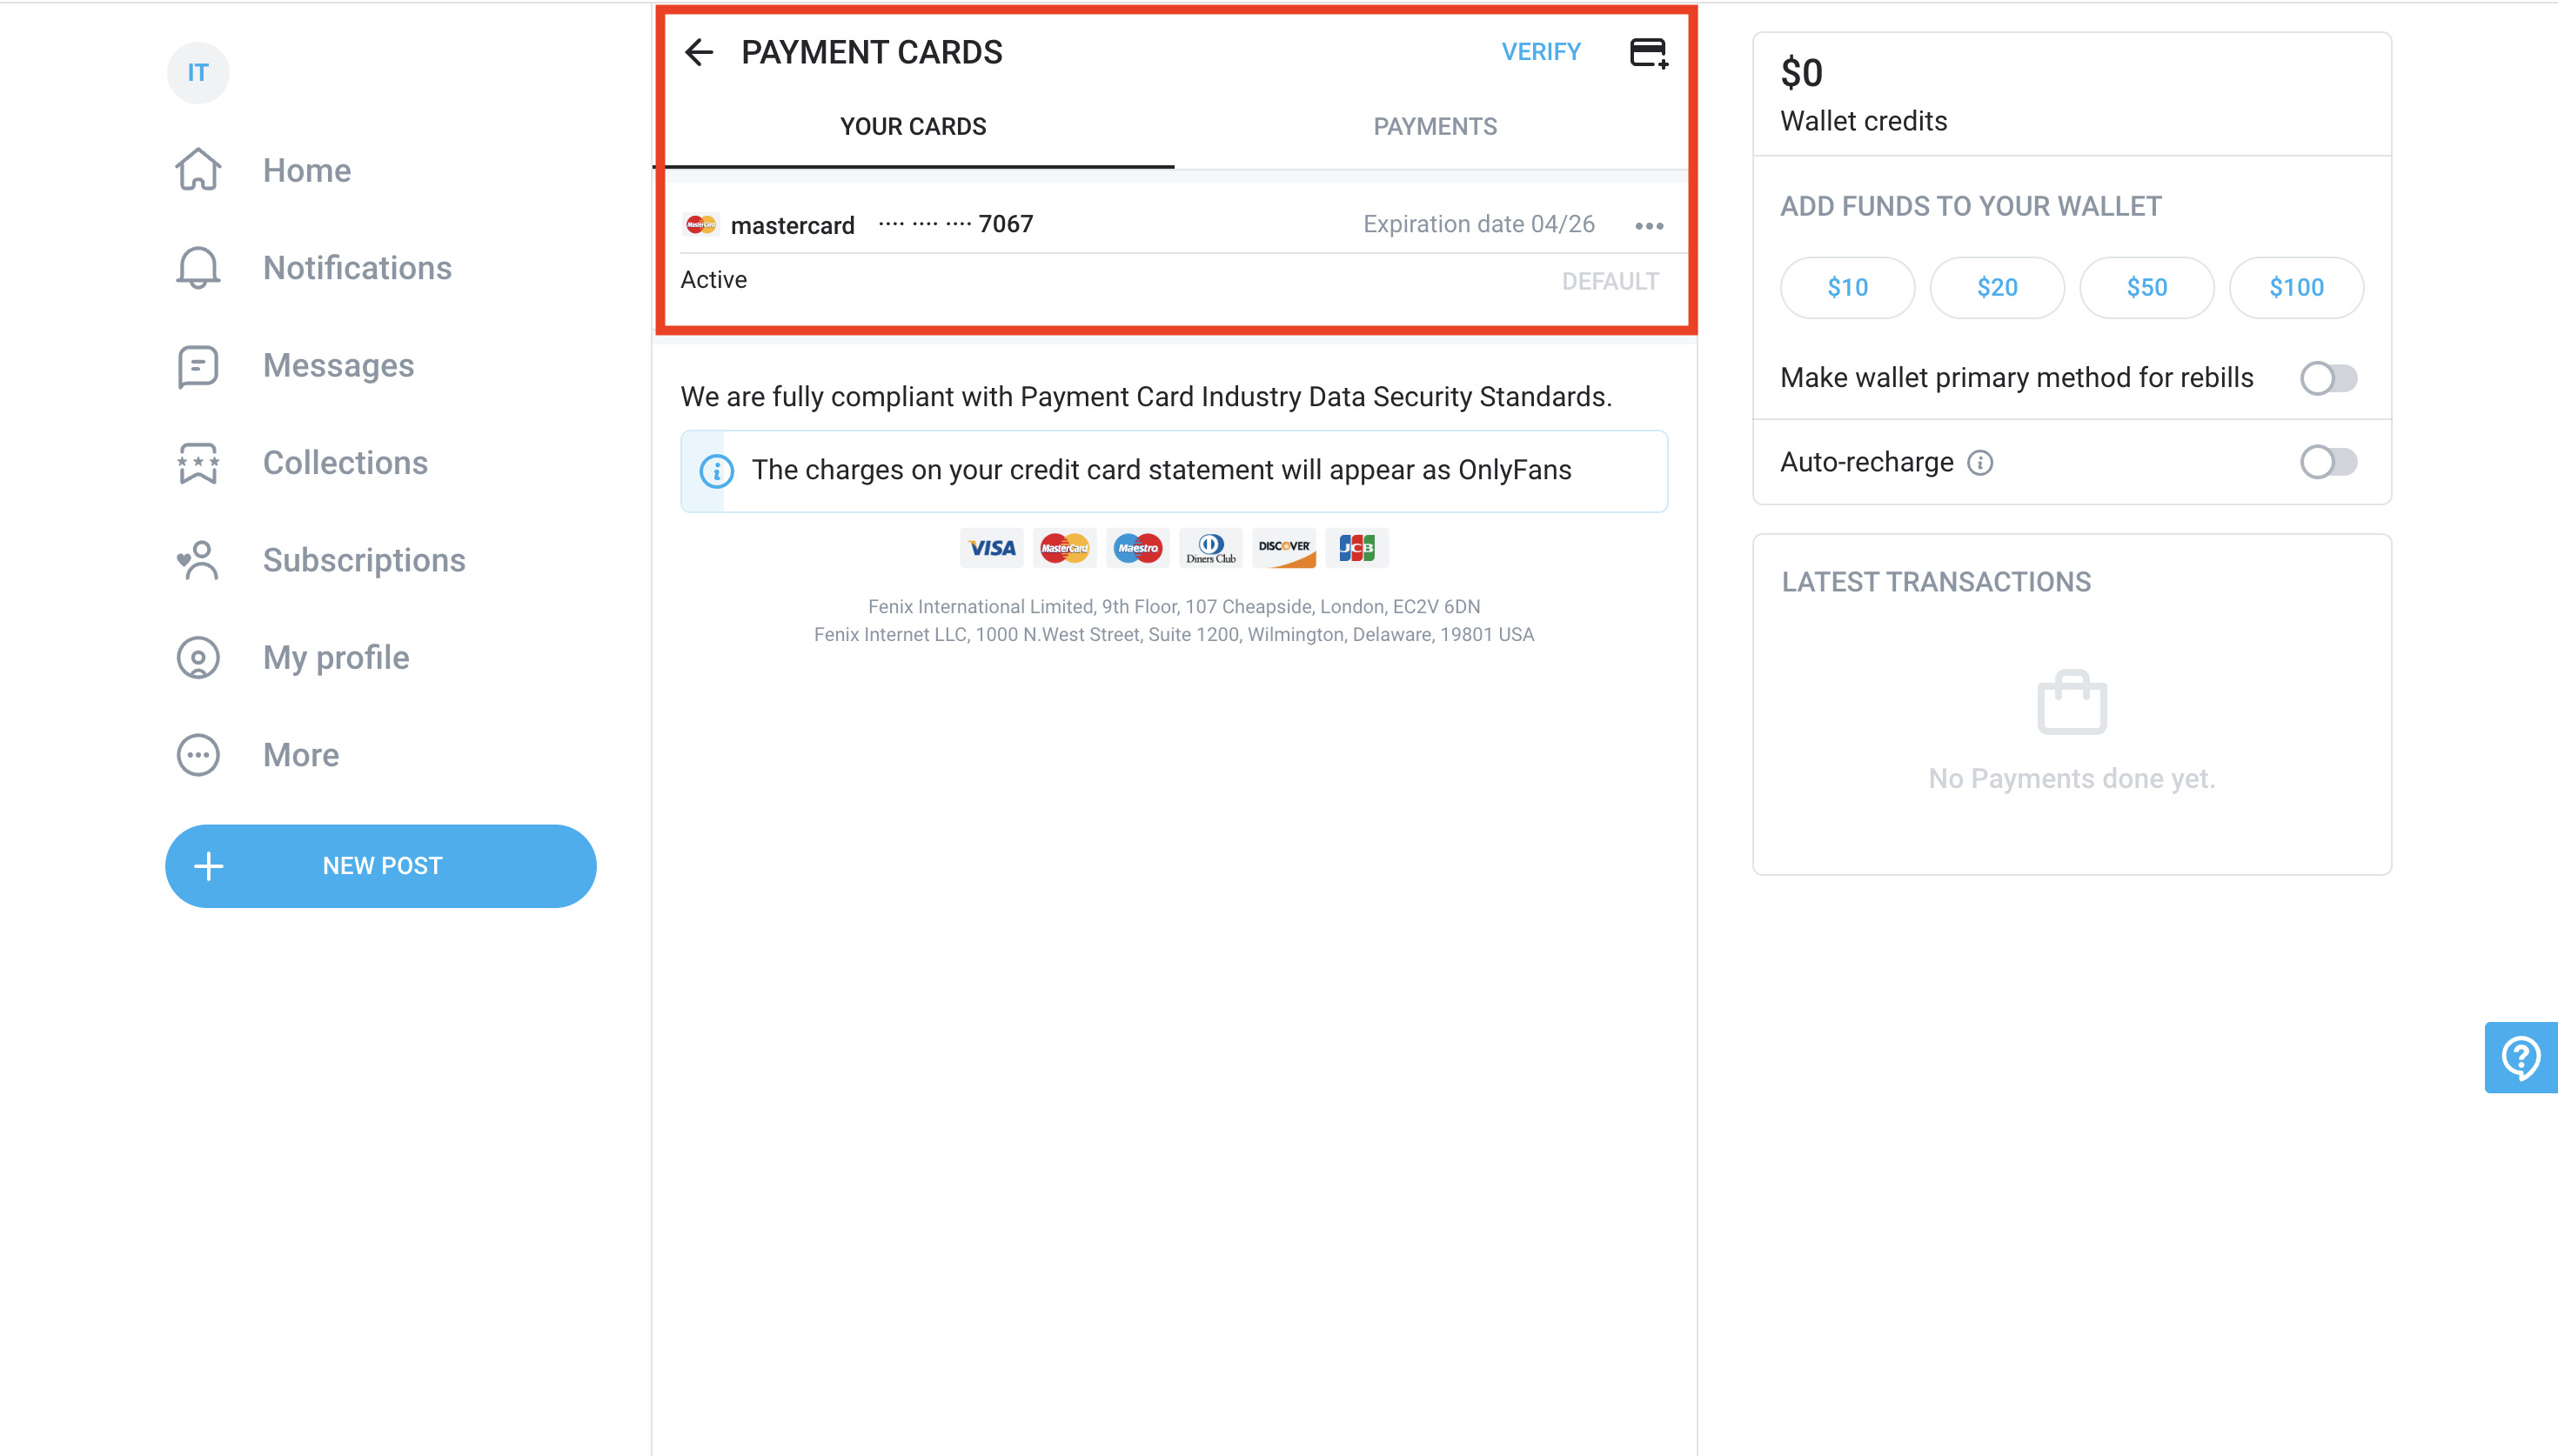
5. Top up your card
Before linking, make sure your card has funds.
For example, the card was topped up with $10, which is enough for a subscription. The balance is displayed immediately in your dashboard after funding.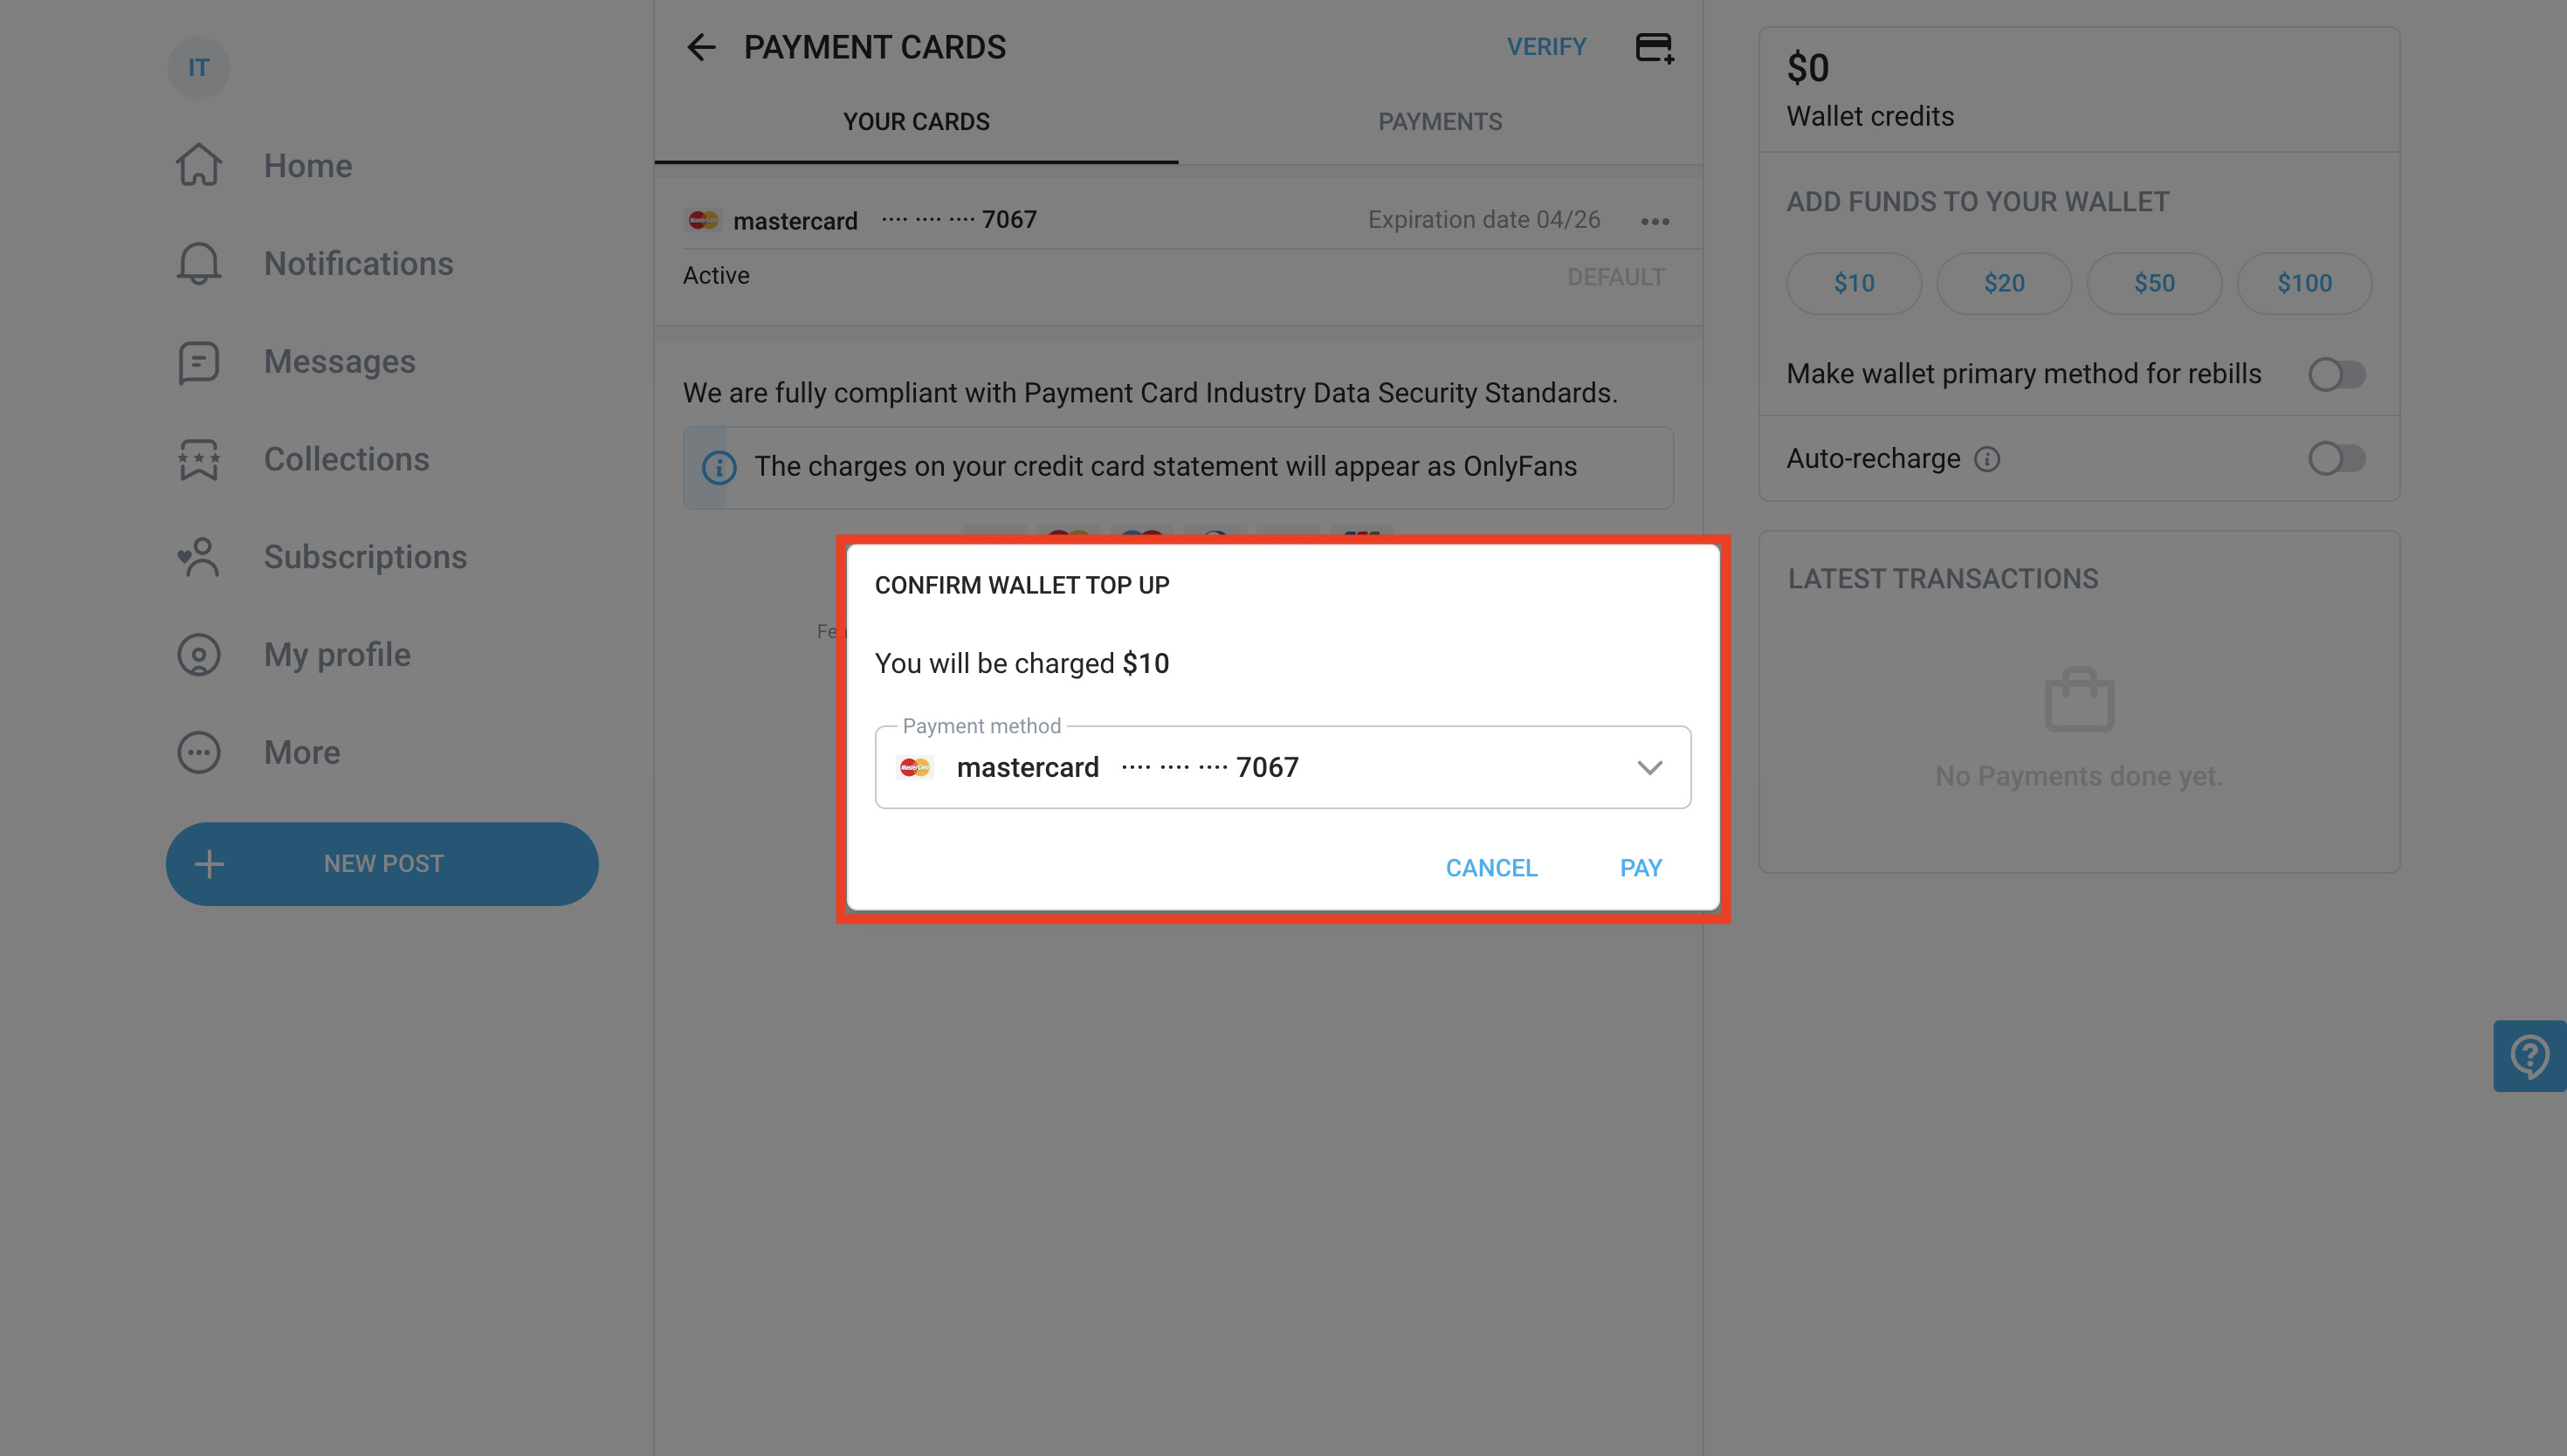

Common errors and solutions
-
Card declined → check your card balance
-
Unsupported card → make sure you are using a standard card, not a personal one
-
Error saving card → try another browser or use a VPN if your region is restricted
Conclusion
Linking a Pay2.House card to OnlyFans is simple and quick: enter your details manually, confirm, and ensure your balance is sufficient. After that, you can easily pay for subscriptions and manage your payments.


 Telegram
 Email
Email



Be the first to share your opinion!
We value your feedback—share your thoughts.