


This article is designed for users who have just registered with Pay2.House and are not yet fully familiar with the interface. With this guide, you will quickly learn the basic features of the personal account, top up your balance, and issue your first virtual card. The instructions are structured step by step so you can simply follow the points and start using the service within 5–10 minutes.
Contents
- Step 1. The first screen after registration: promo code and bonus
- Step 2. How to top up the main account
- Step 3. Converting funds before issuing a card
- Step 4. Issuing a card
- Step 5. Topping up the card
- Step 6. Conclusion
Step 1. The first screen after registration: promo code and bonus
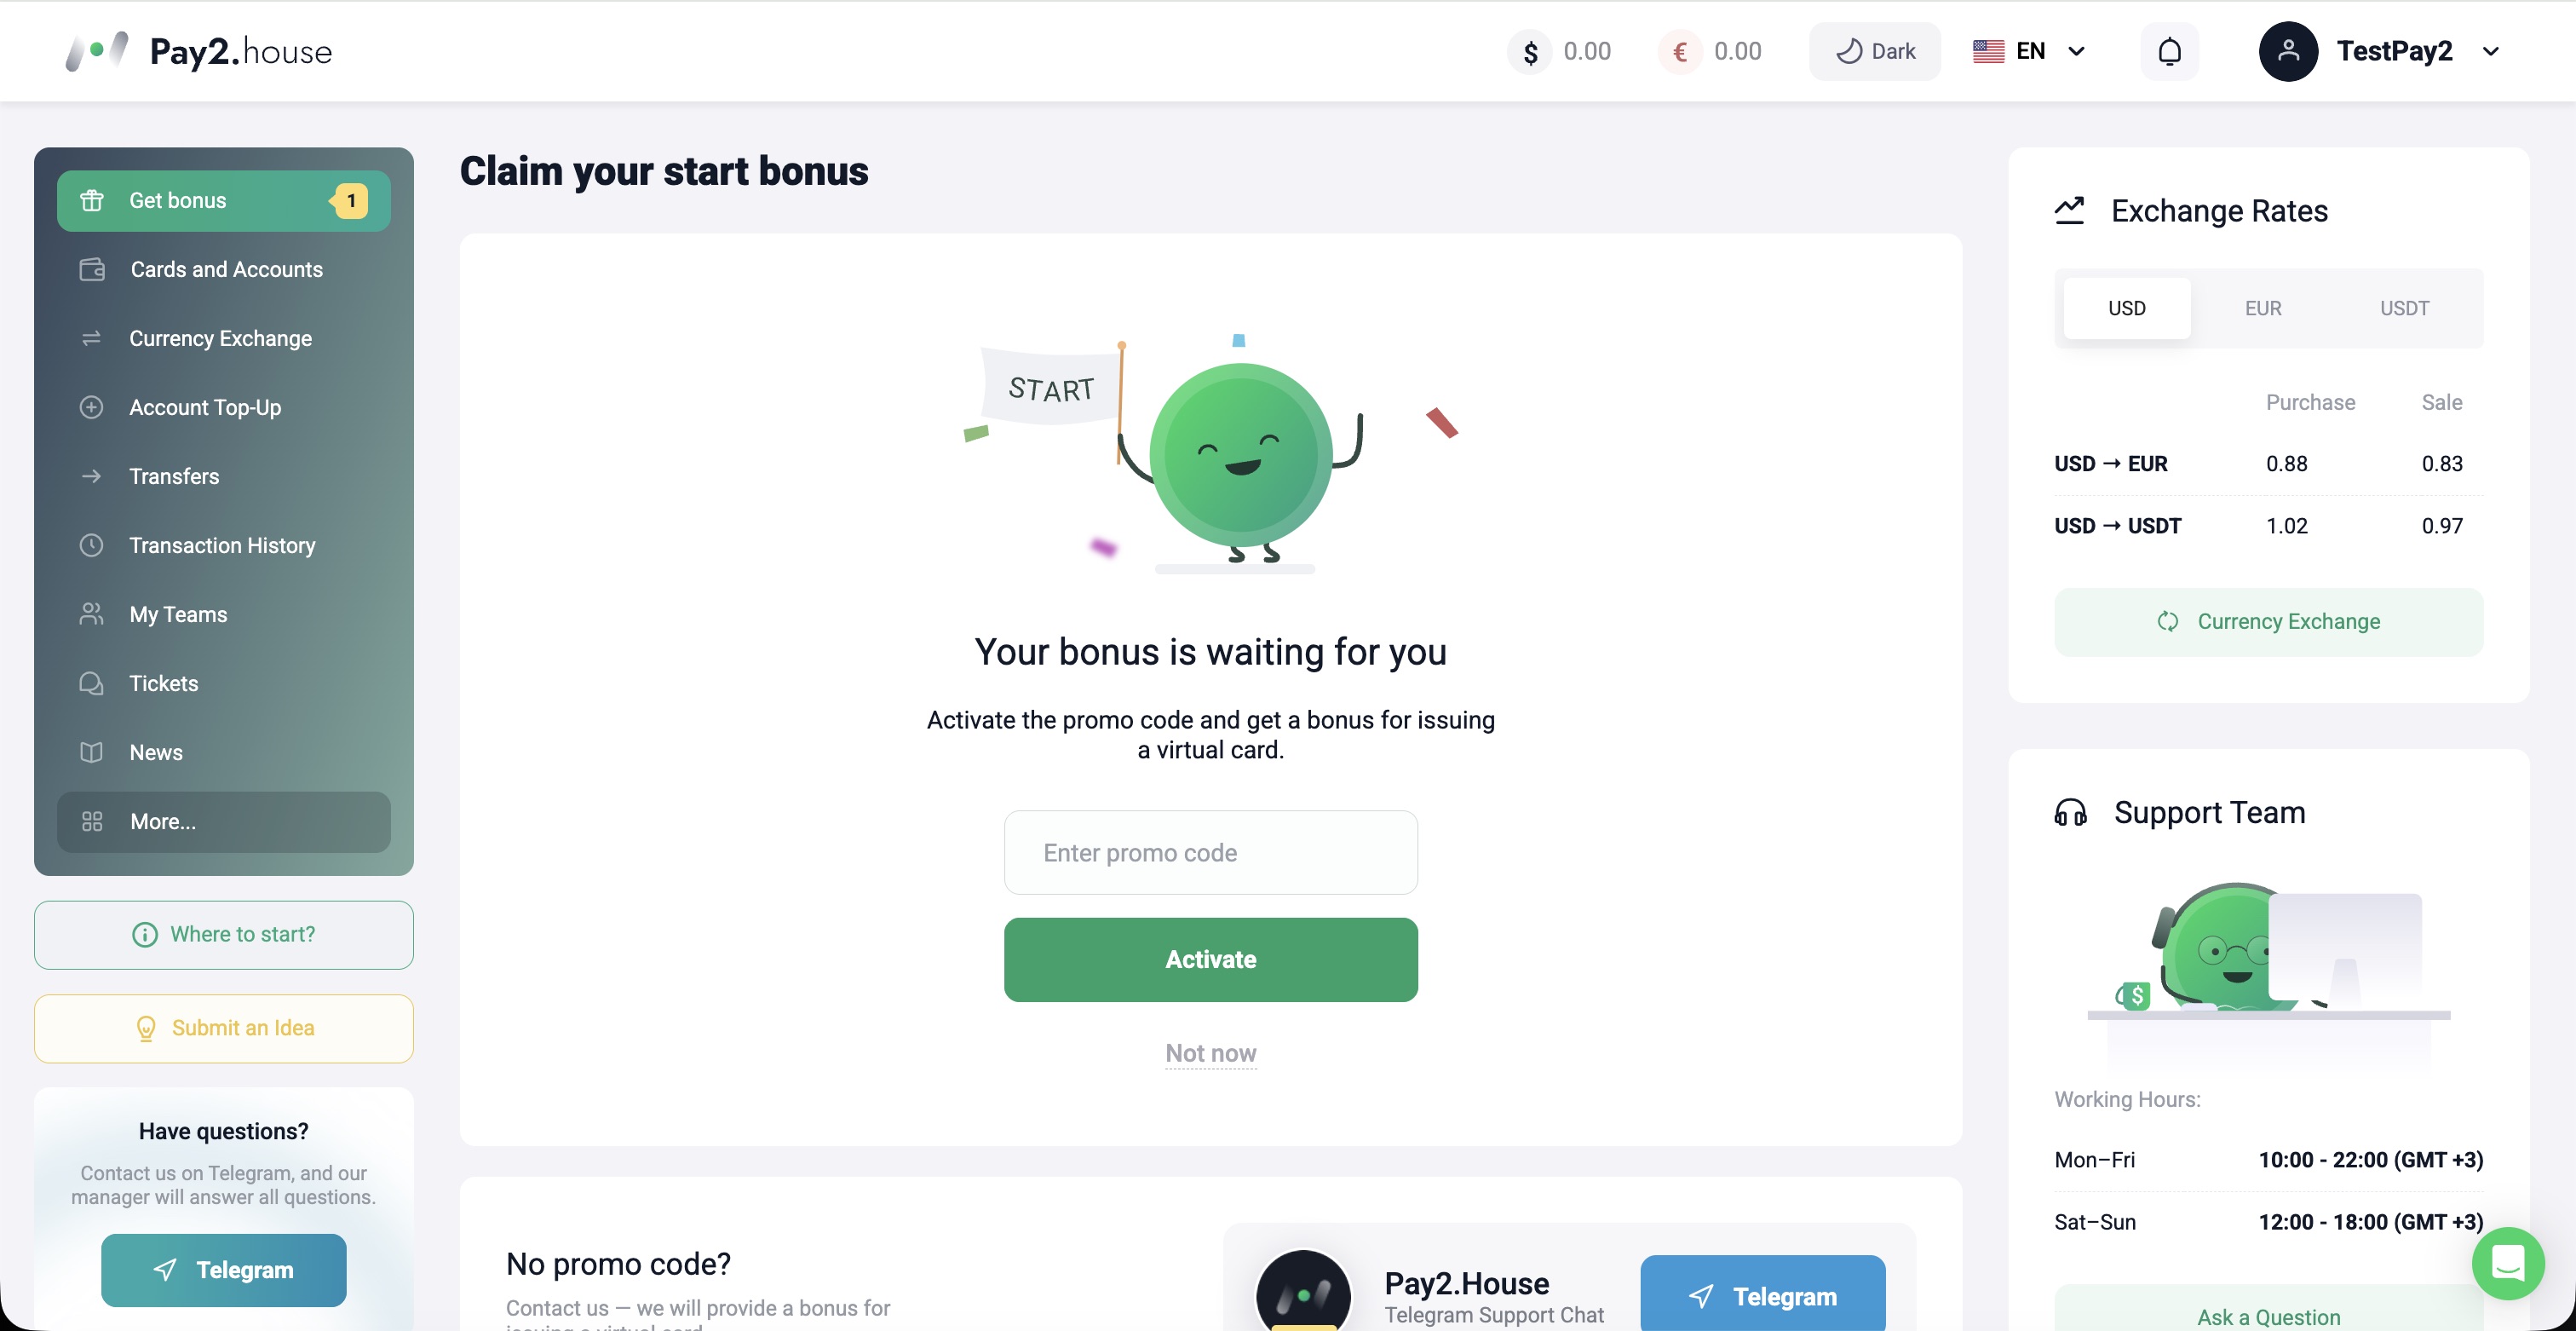 After registration, the user is immediately taken to the Pay2.House personal account and sees a field for entering a promo code. At this stage, you can activate a welcome bonus of $15 to your bonus balance. You can get the promo code from your personal manager, and then use the credited funds to issue cards.
Step 2. How to top up the main account
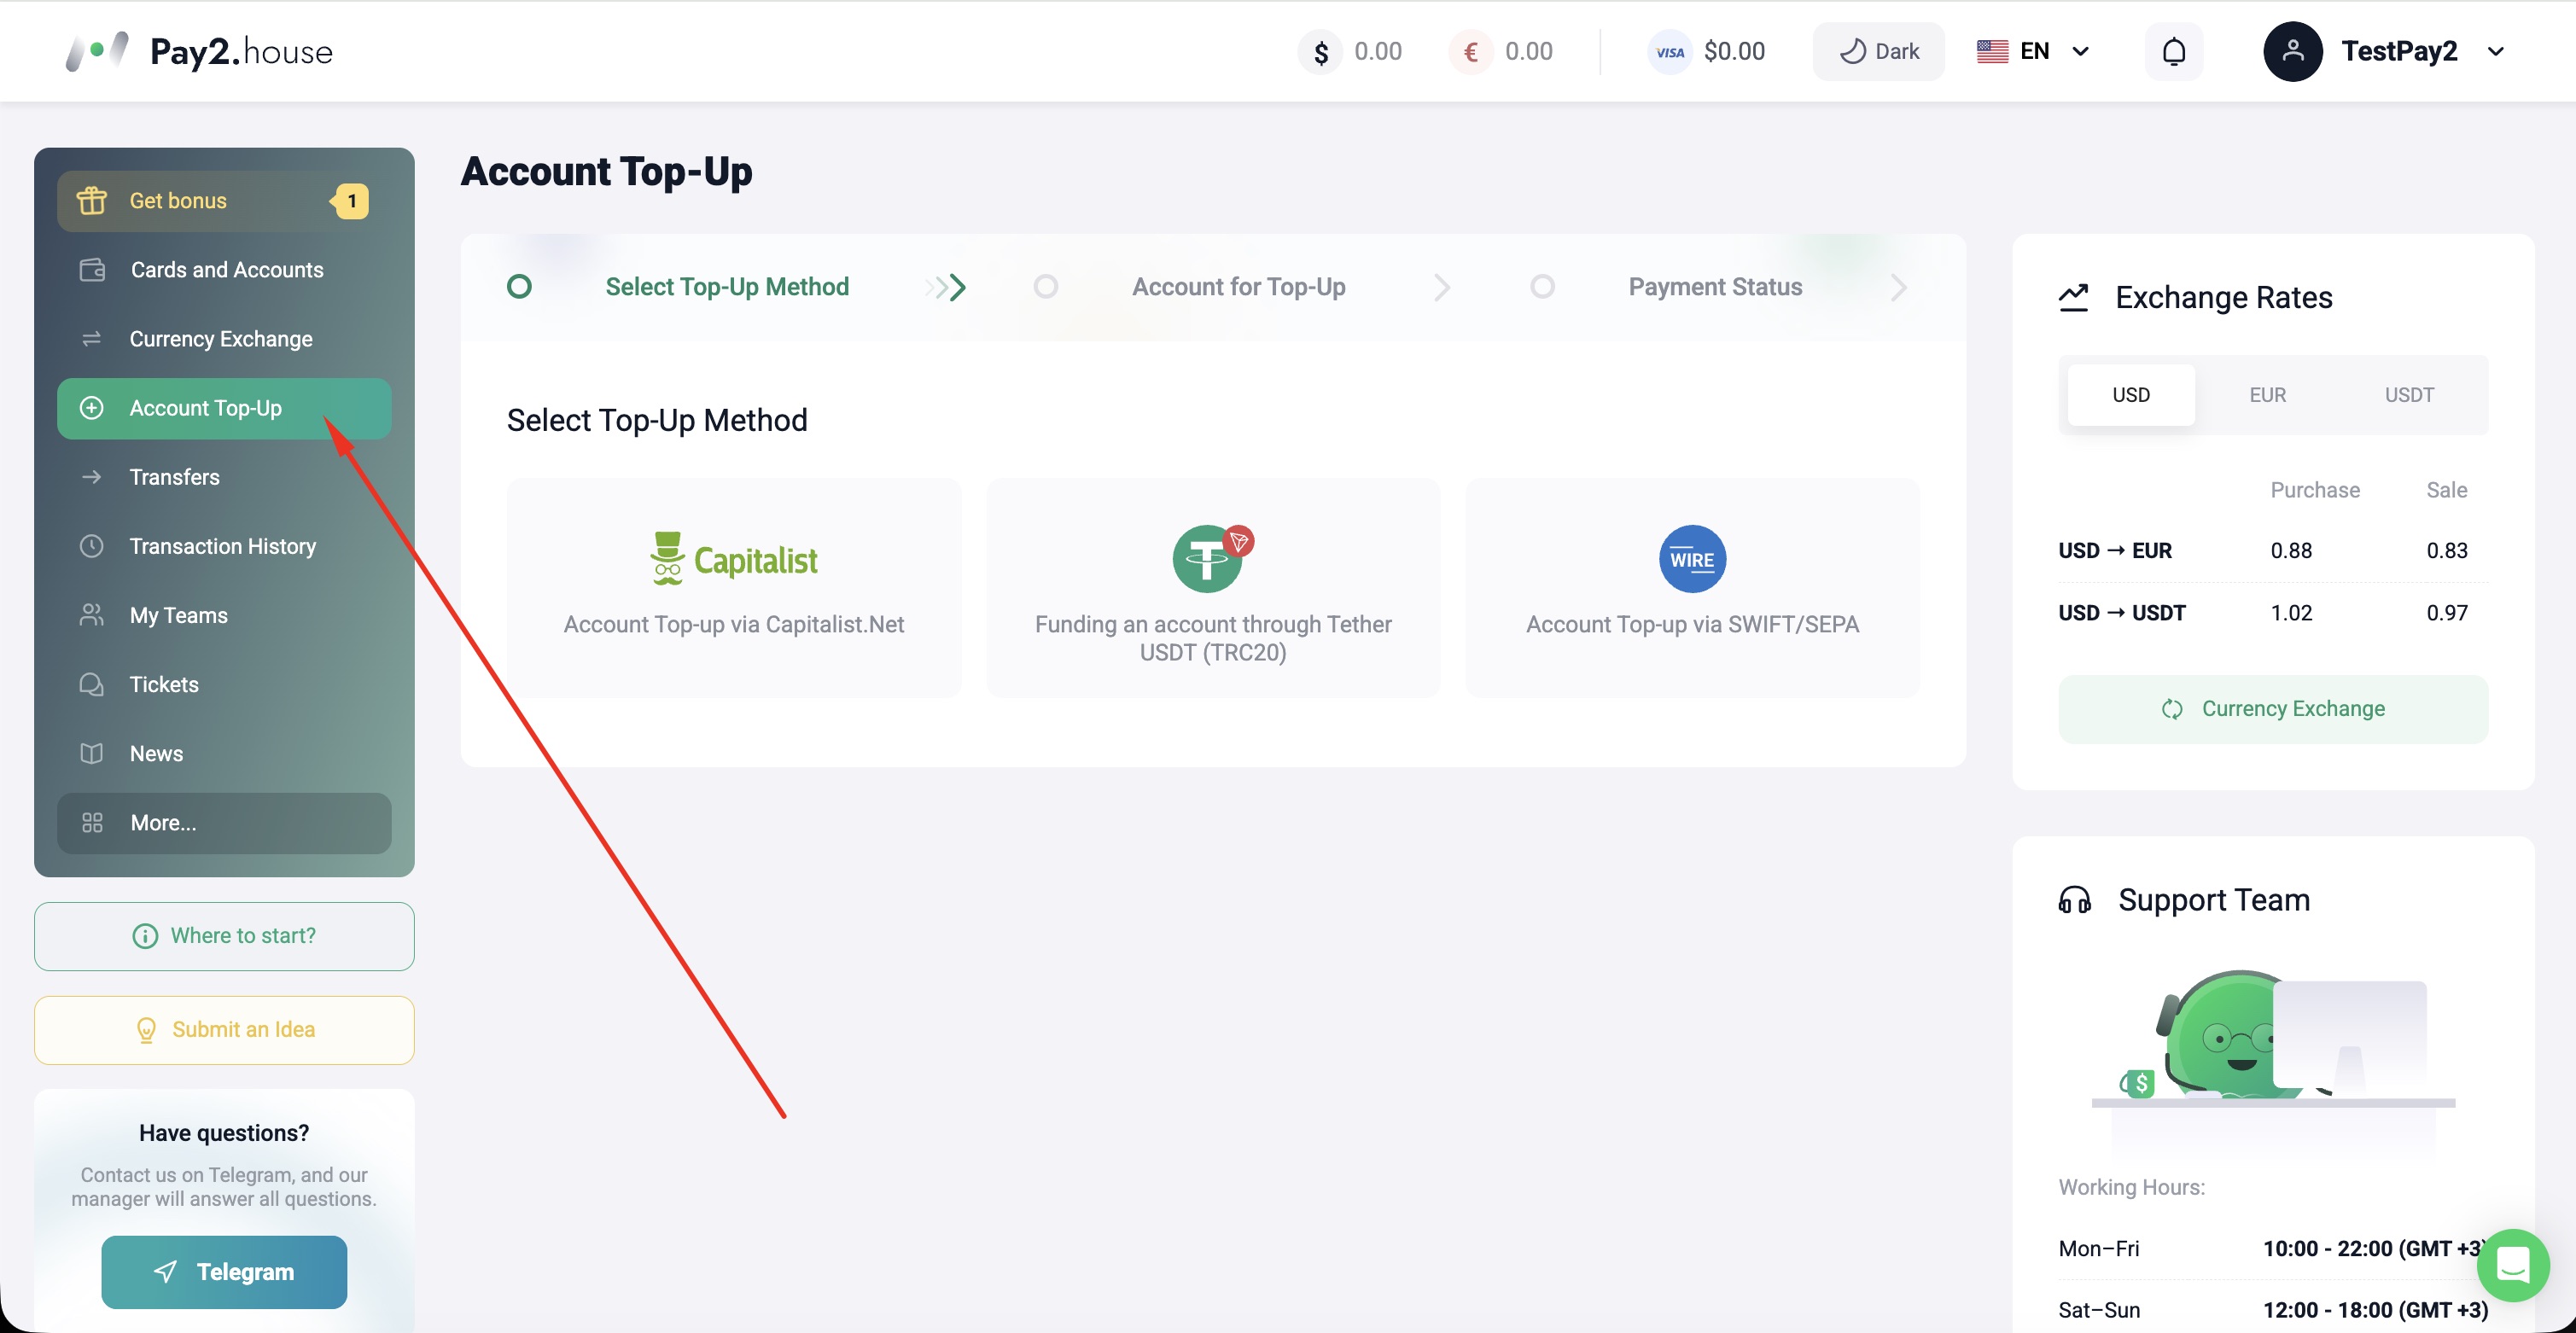 After activating the welcome bonus, move on to topping up the account. To do this, select “Top up account” in the left menu; it will open a page with the available deposit methods. Here you can add funds via Capitalist, USDT TRC20, or by bank transfer via SWIFT/SEPA. In this guide, we will cover the most popular option - USDT TRC20.
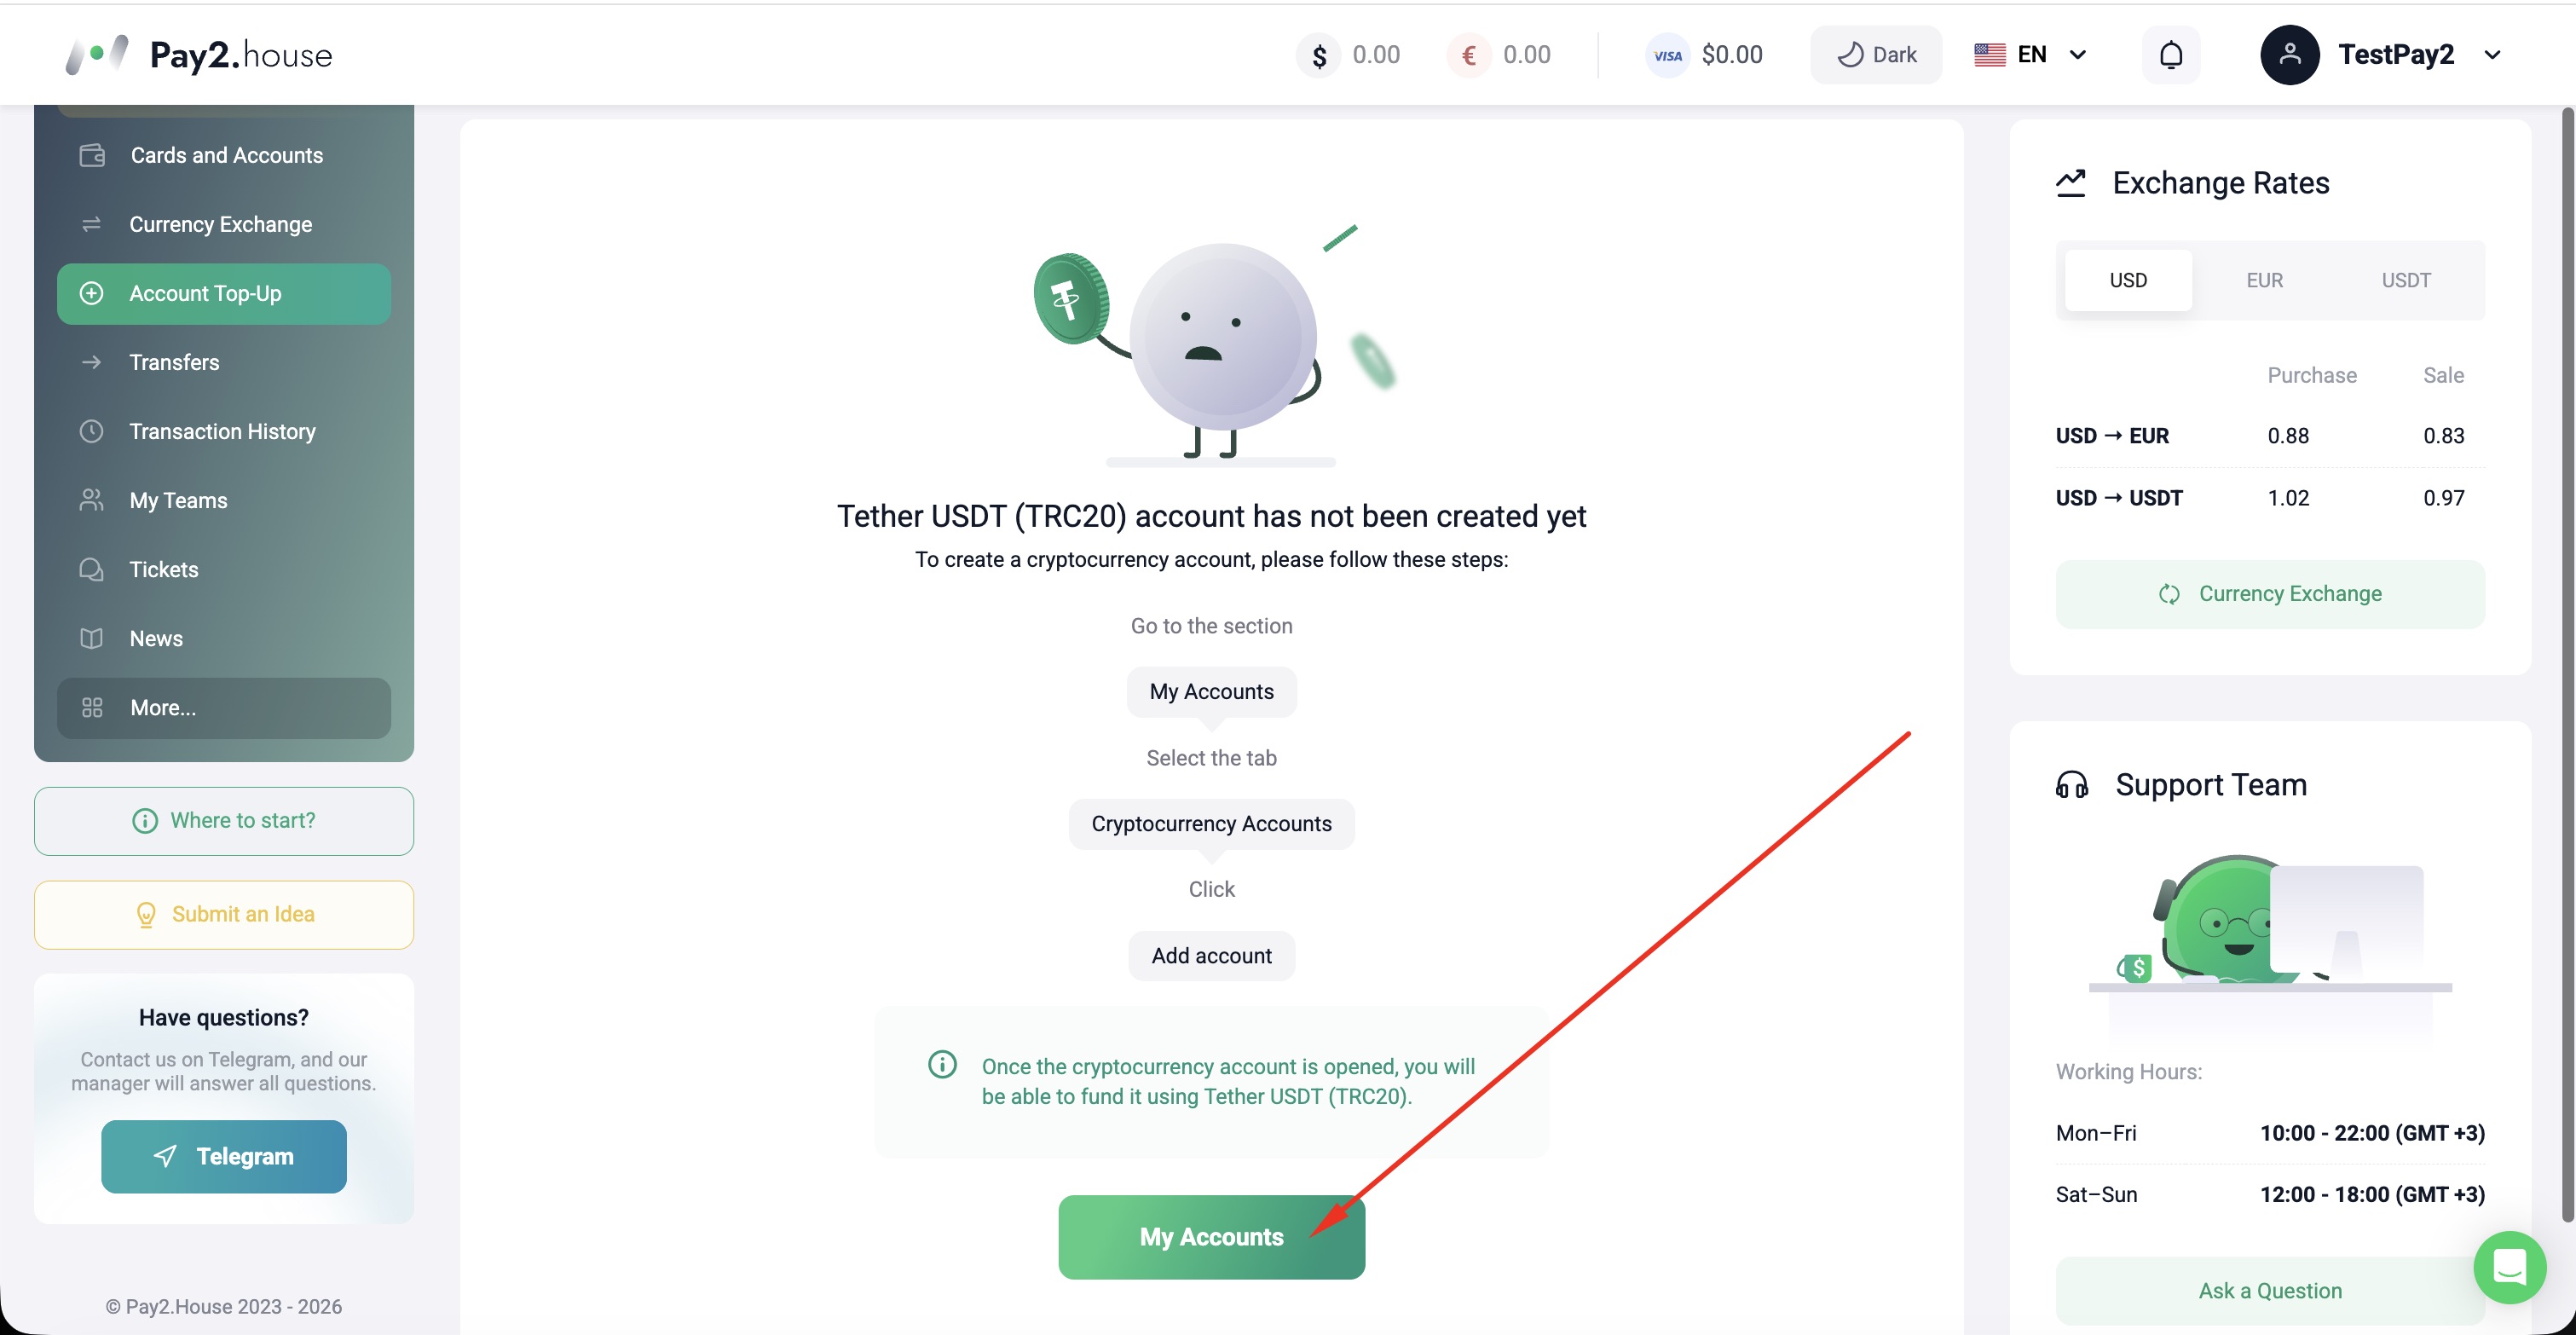 After selecting the top-up method via USDT TRC20, a screen will open where the system will prompt you to create a cryptocurrency account. To continue, click “My accounts” as shown in the screenshot.
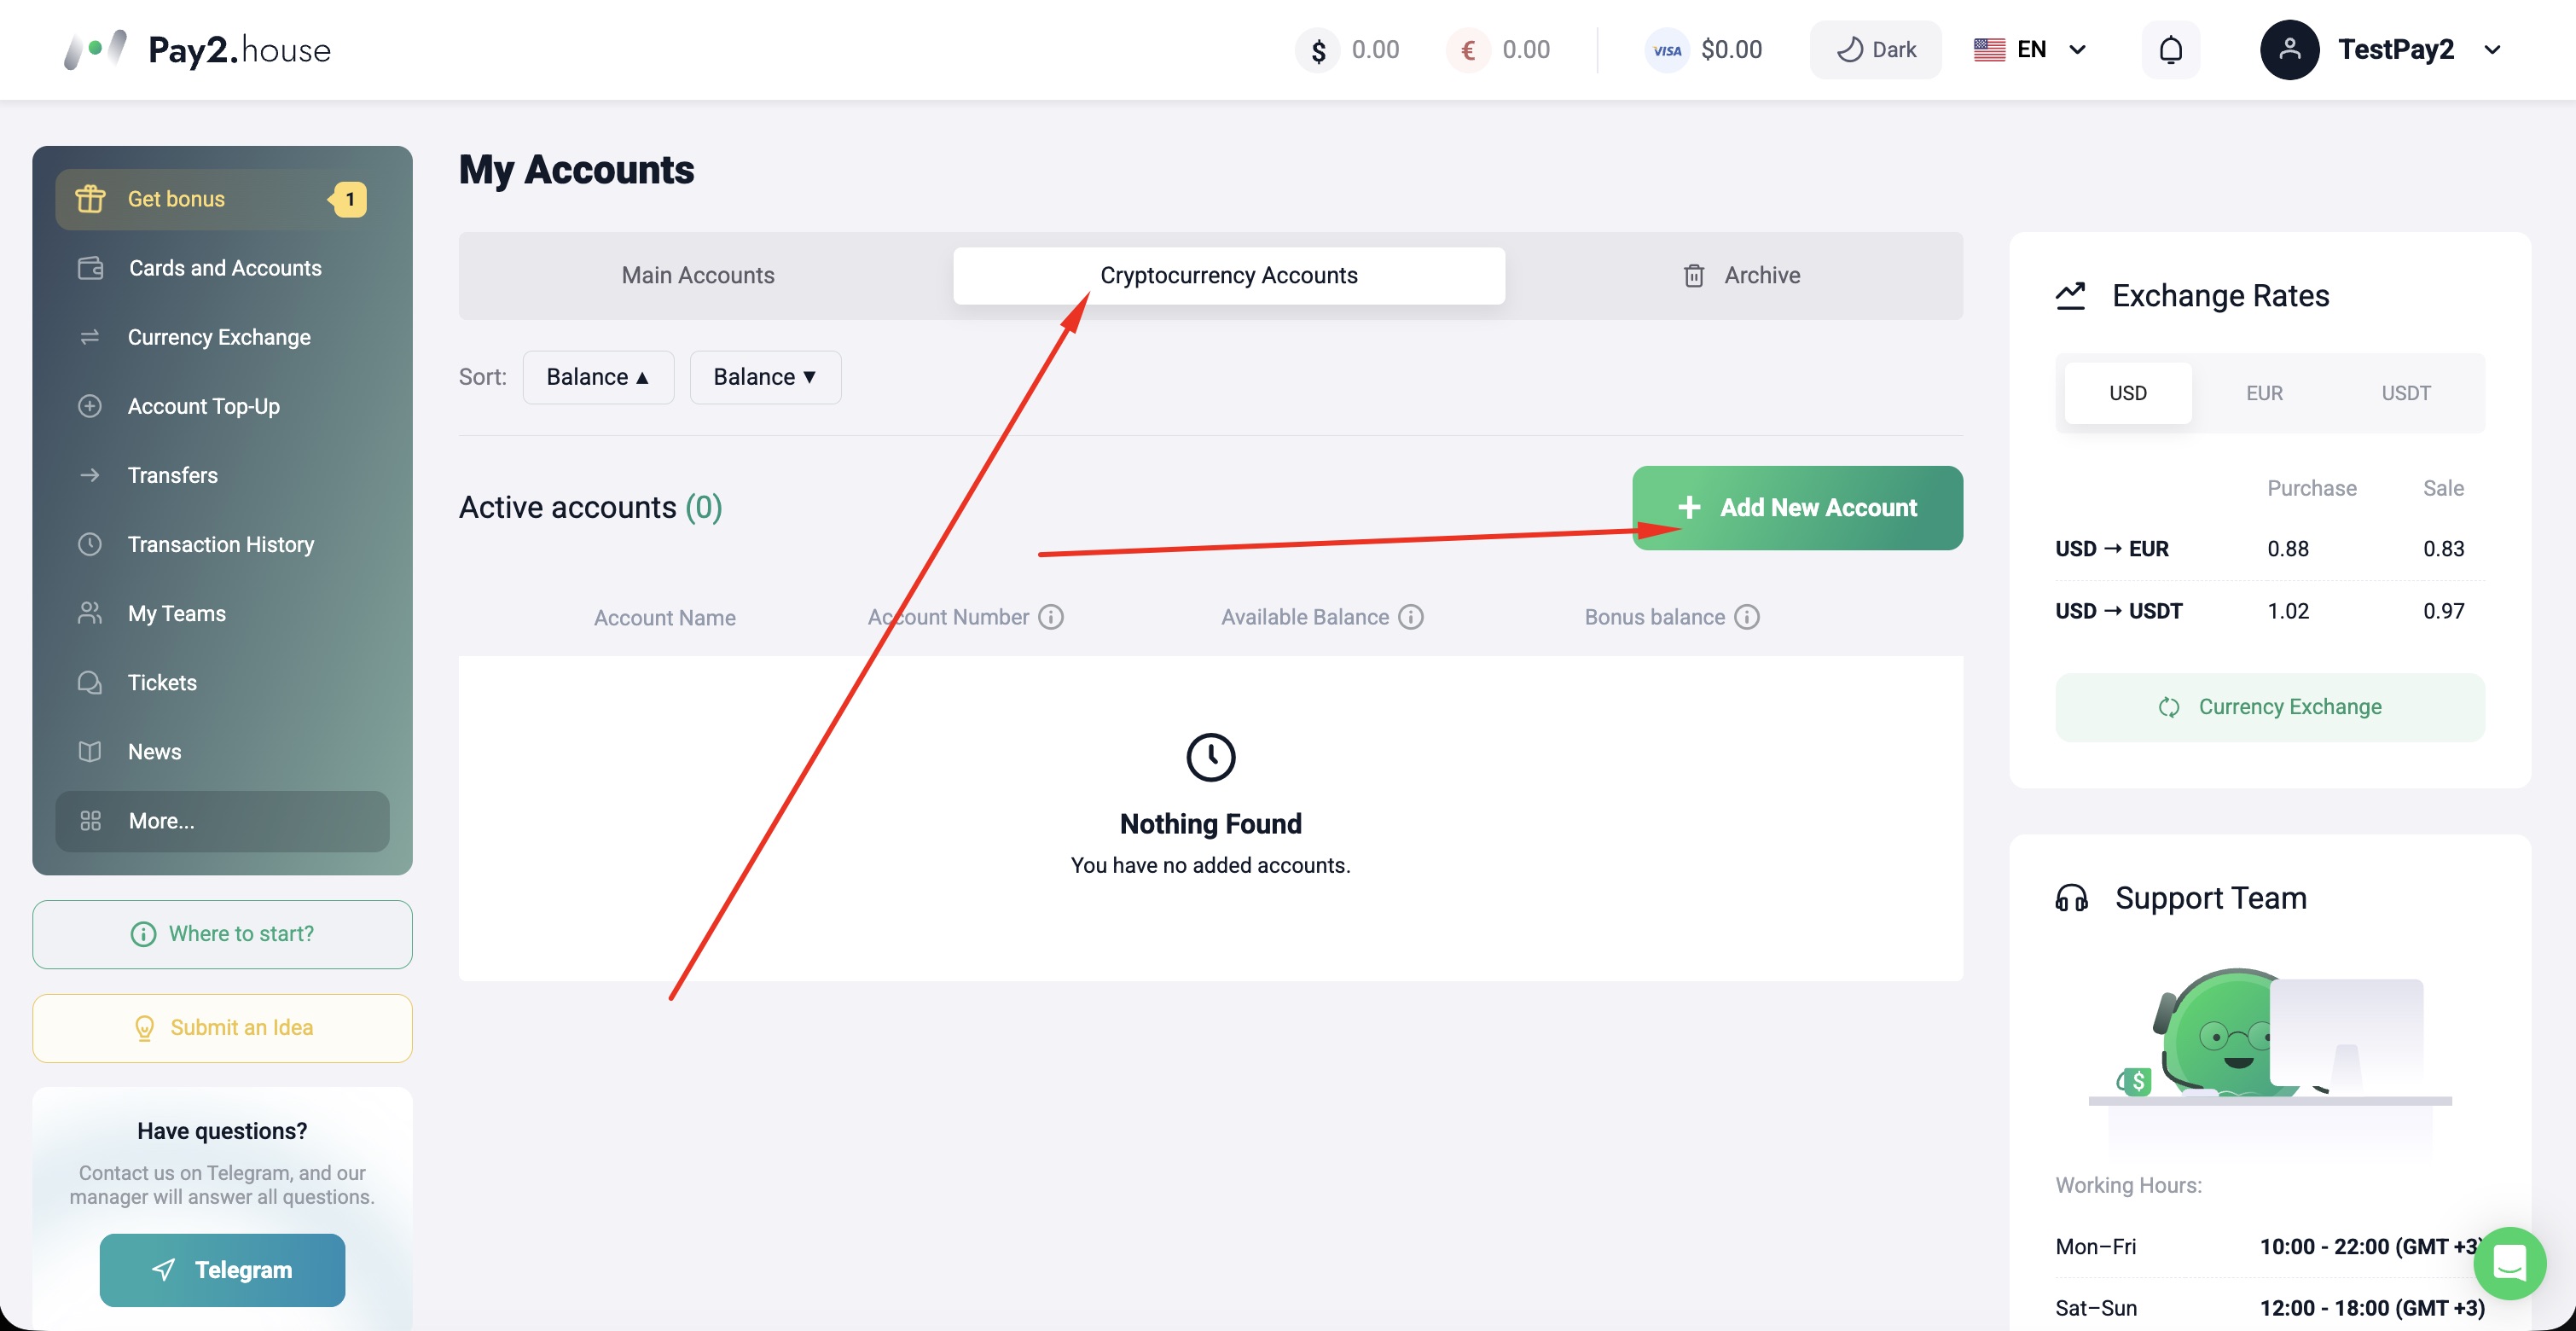 Next, open the “Cryptocurrency accounts” tab and click “Add new account”.
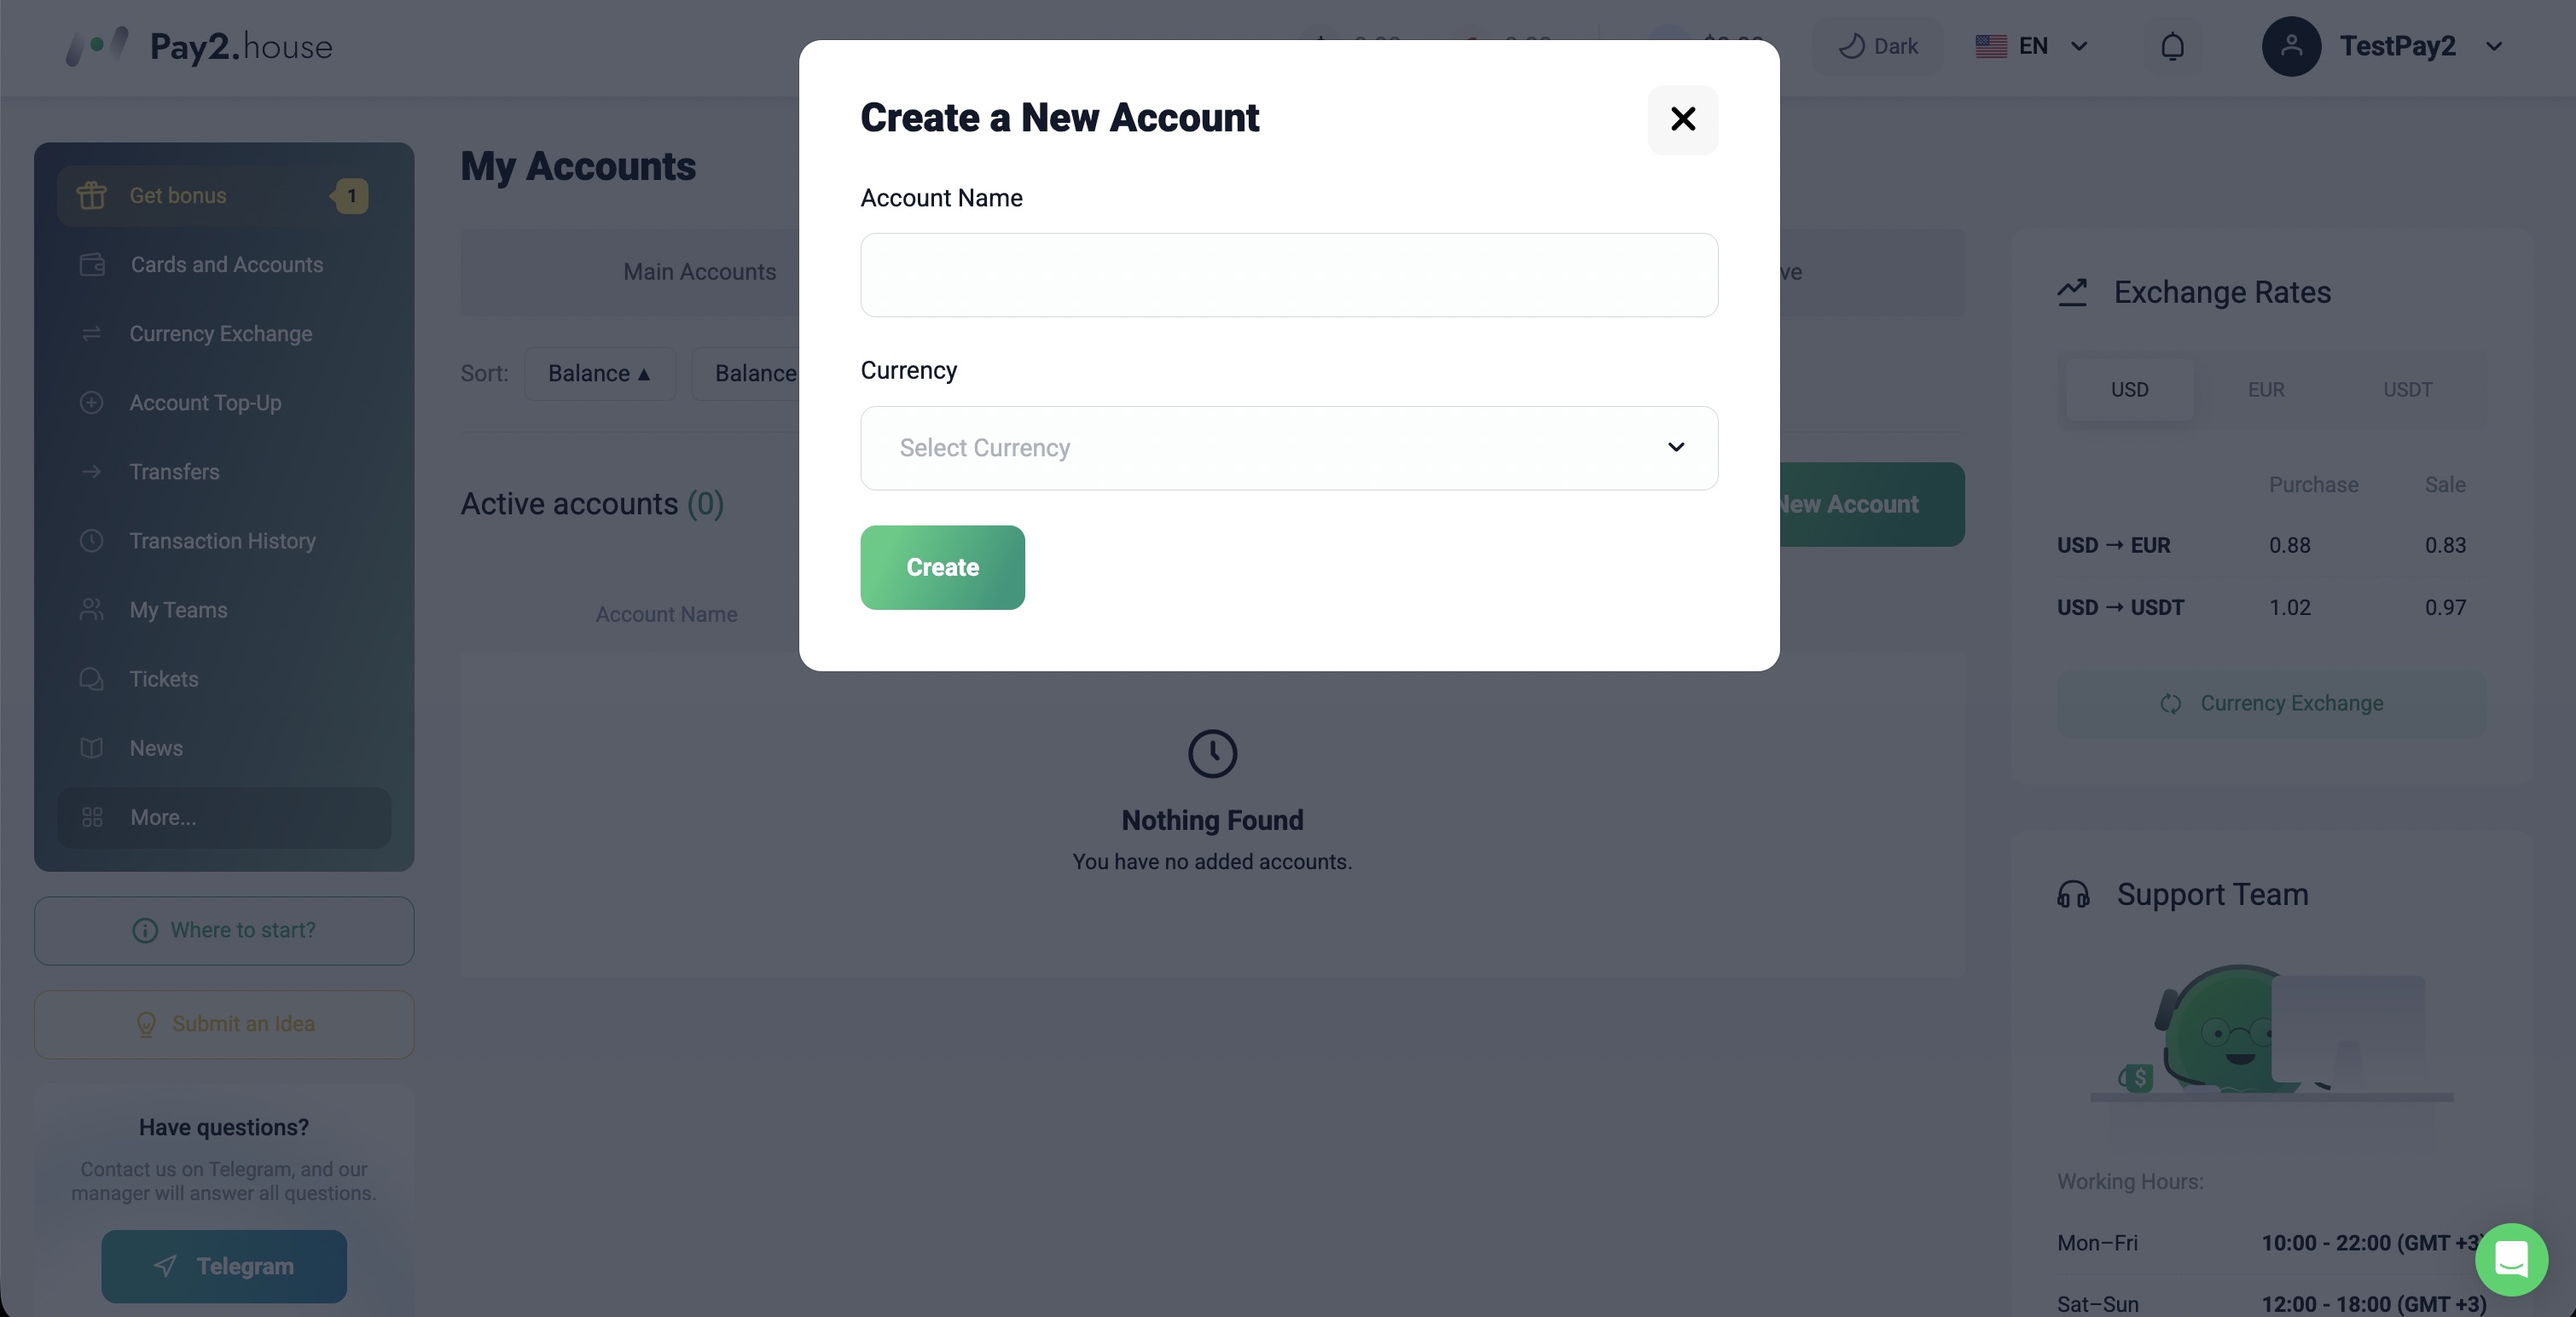 In the “Account name” field, you can enter any name that is convenient for you. In the “Account currency” field, select Tether USDT (TRC20).
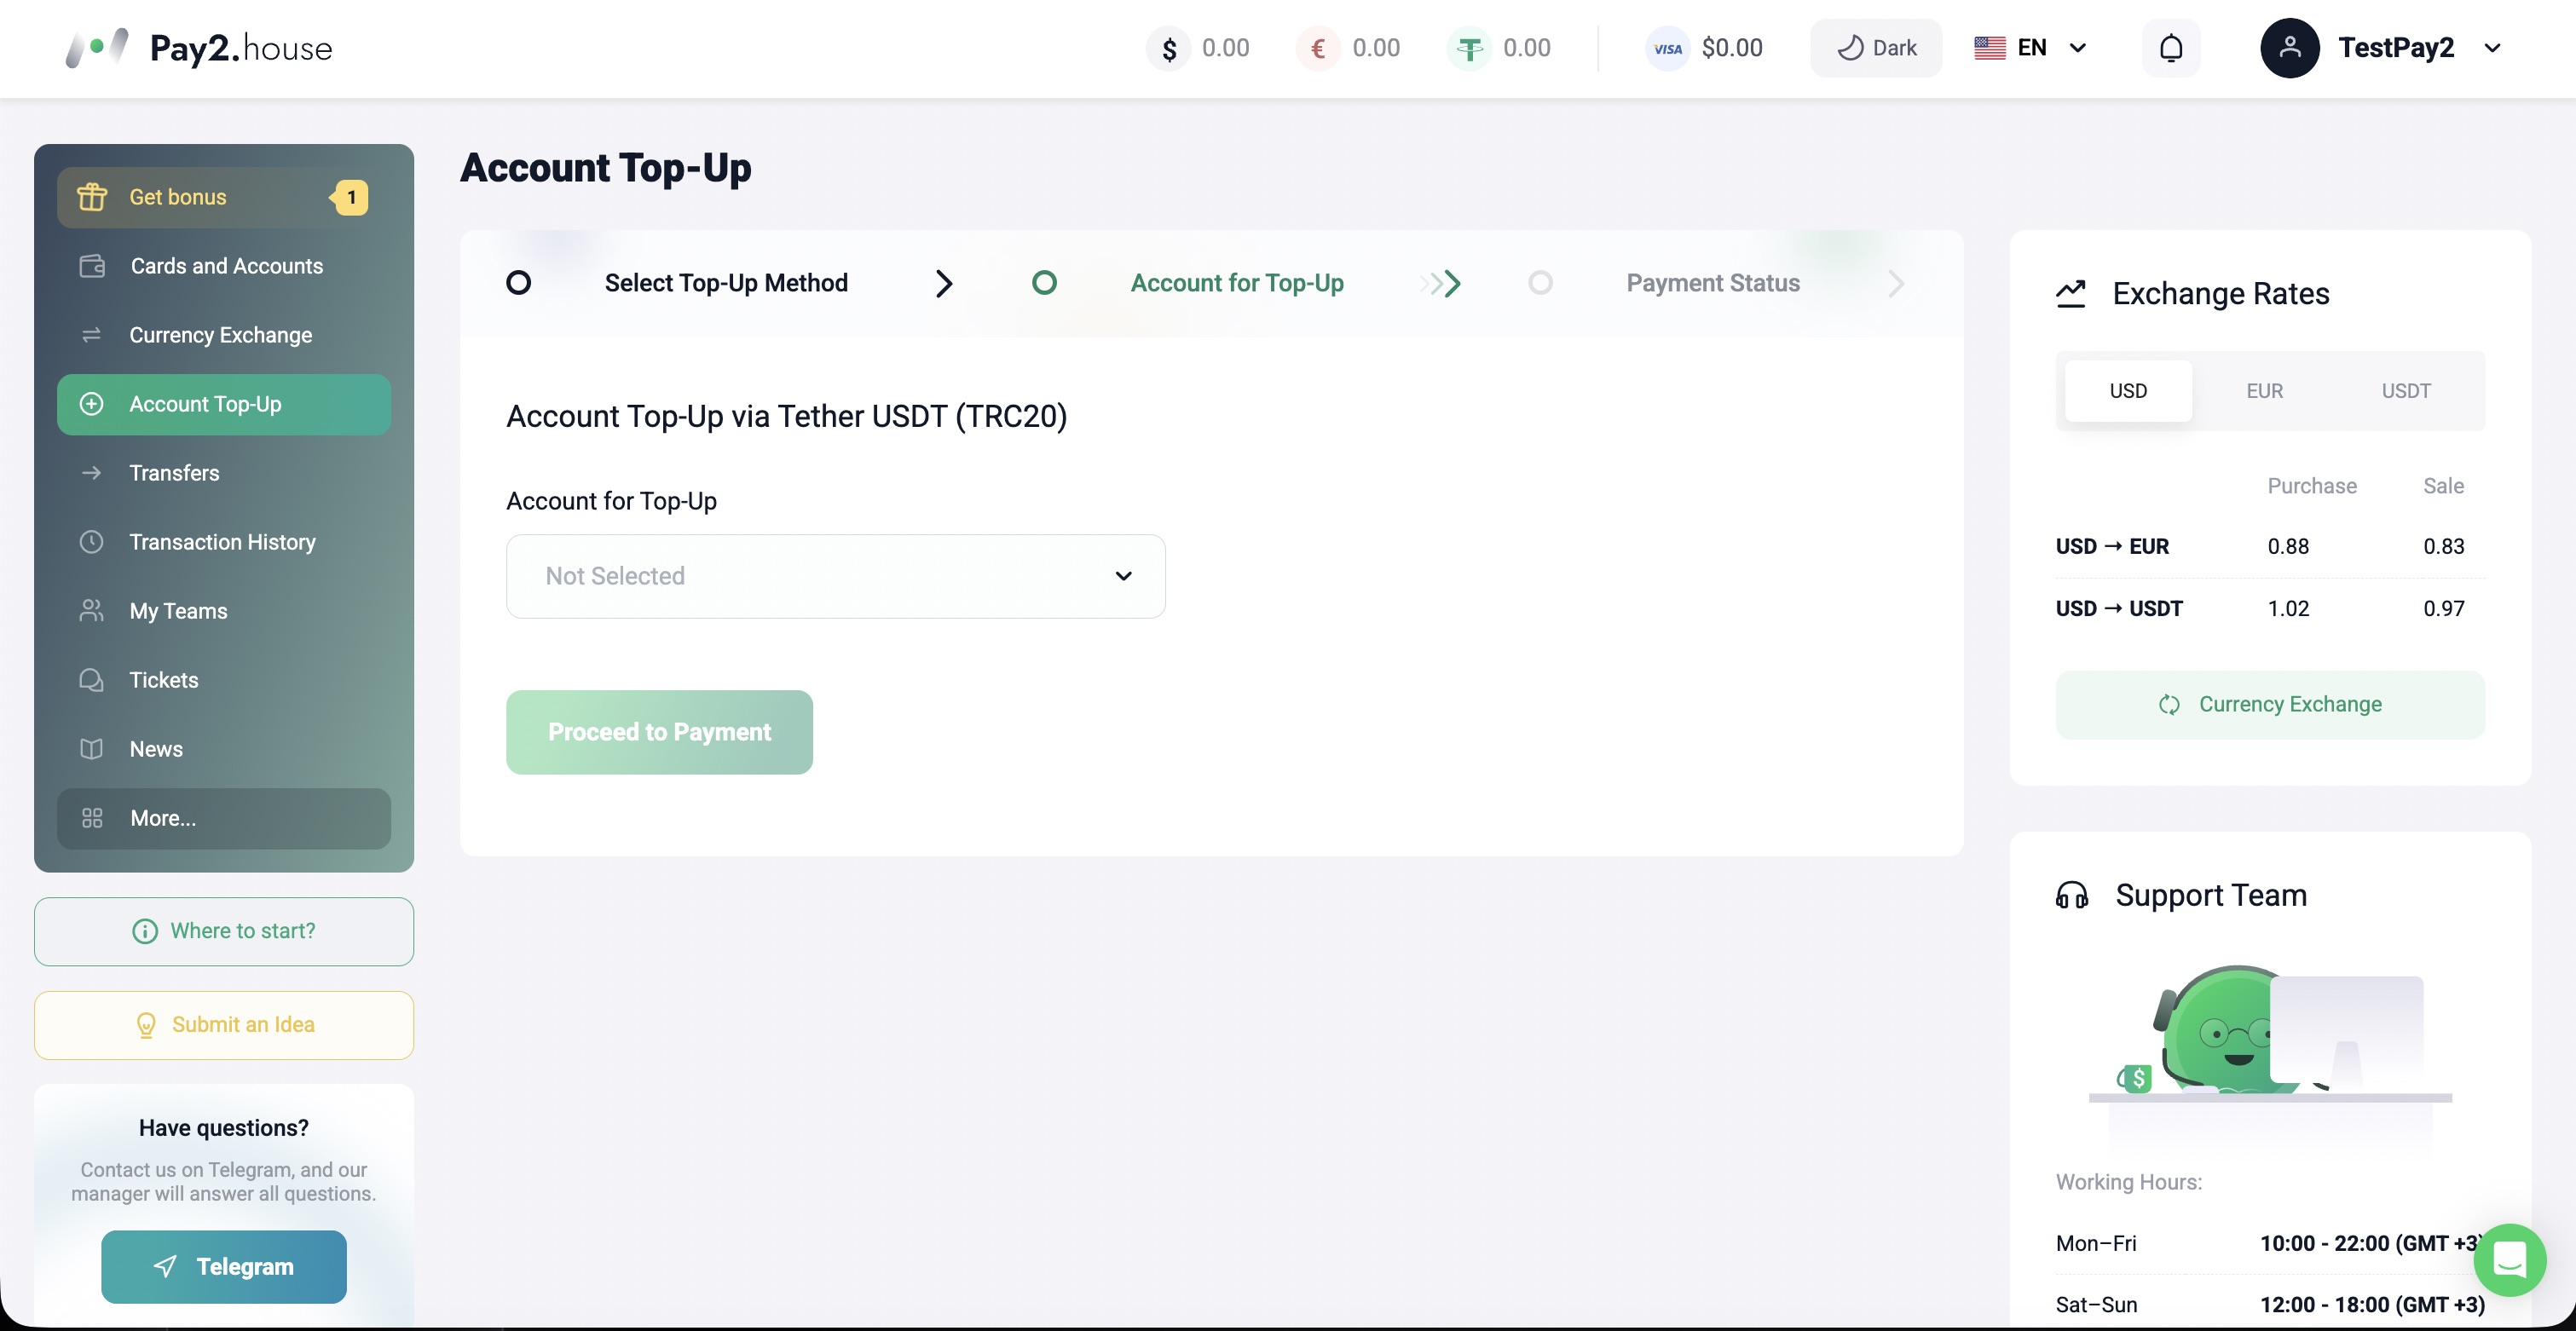 After returning to the “Top up account” section and selecting USDT TRC20, a window will open where you can choose the account to fund. Here you need to select the USDT account you just created, enter the amount you want to top up, and proceed to payment. Please note that the minimum card top-up amount at Pay2.House is $50, but in practice it is better to deposit from $53 to keep a small buffer and avoid unnecessary issues when issuing and funding the card.
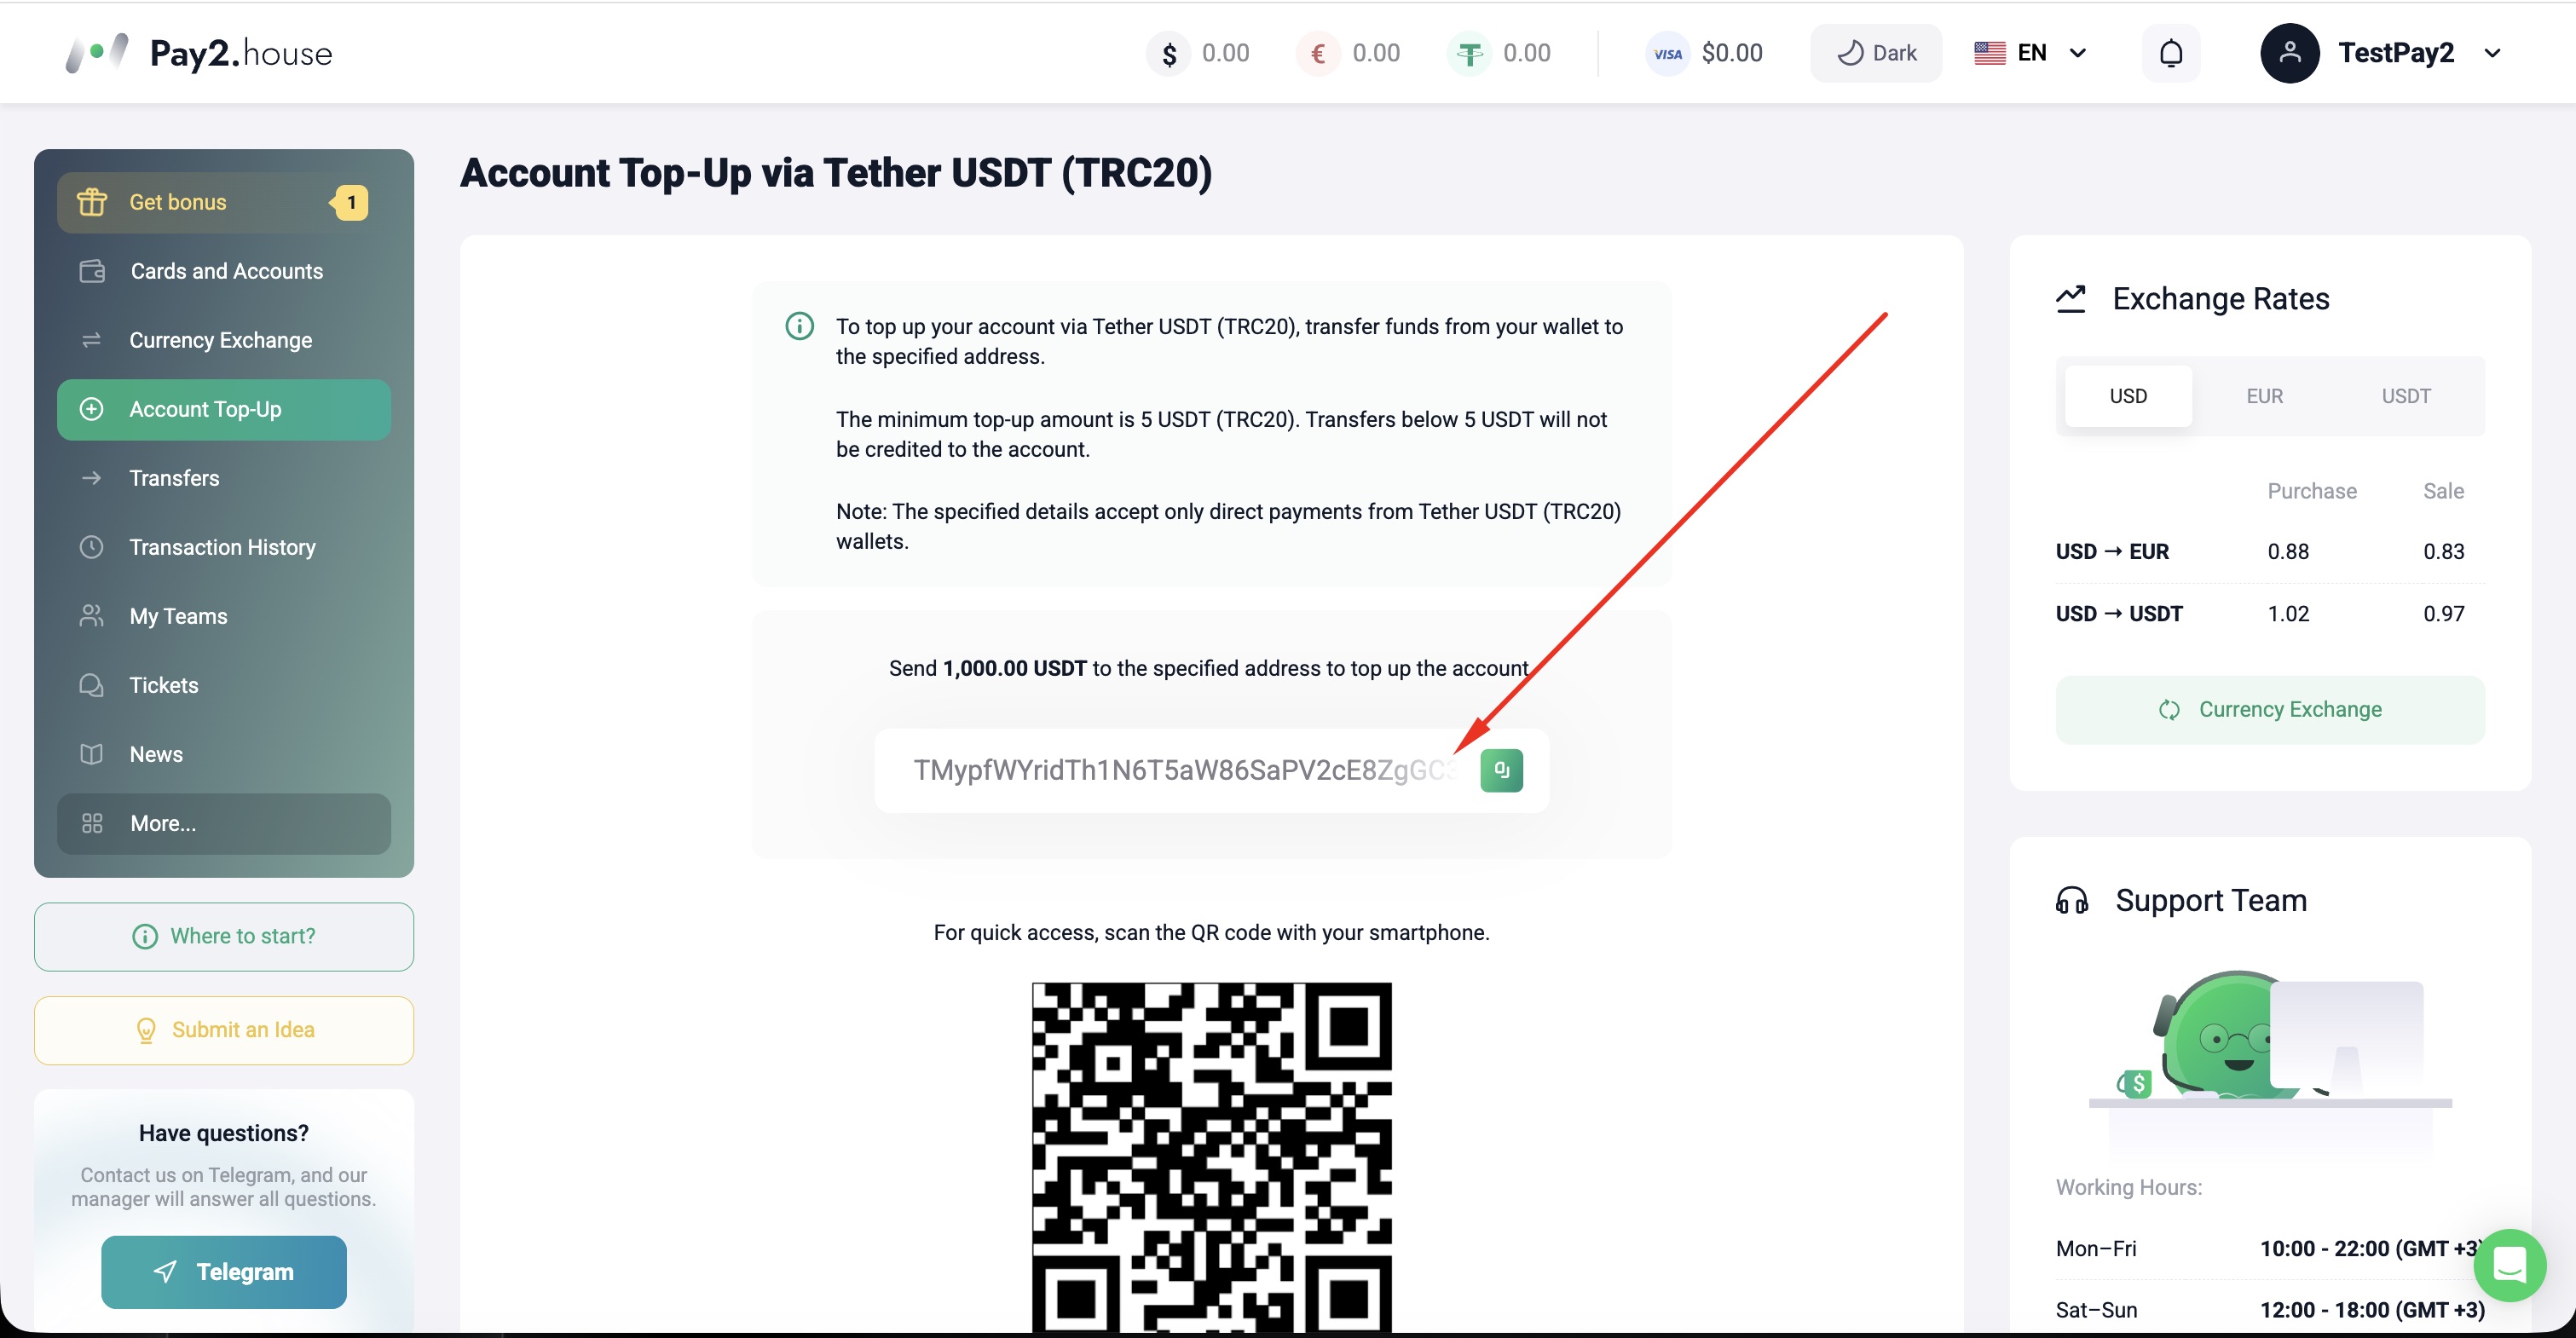 Next, the system will display the Tether USDT (TRC20) wallet address to which you need to transfer the funds. After the transfer, the money is usually credited to the Pay2.House account within 1-10 minutes.
Step 3. Converting funds before issuing a card
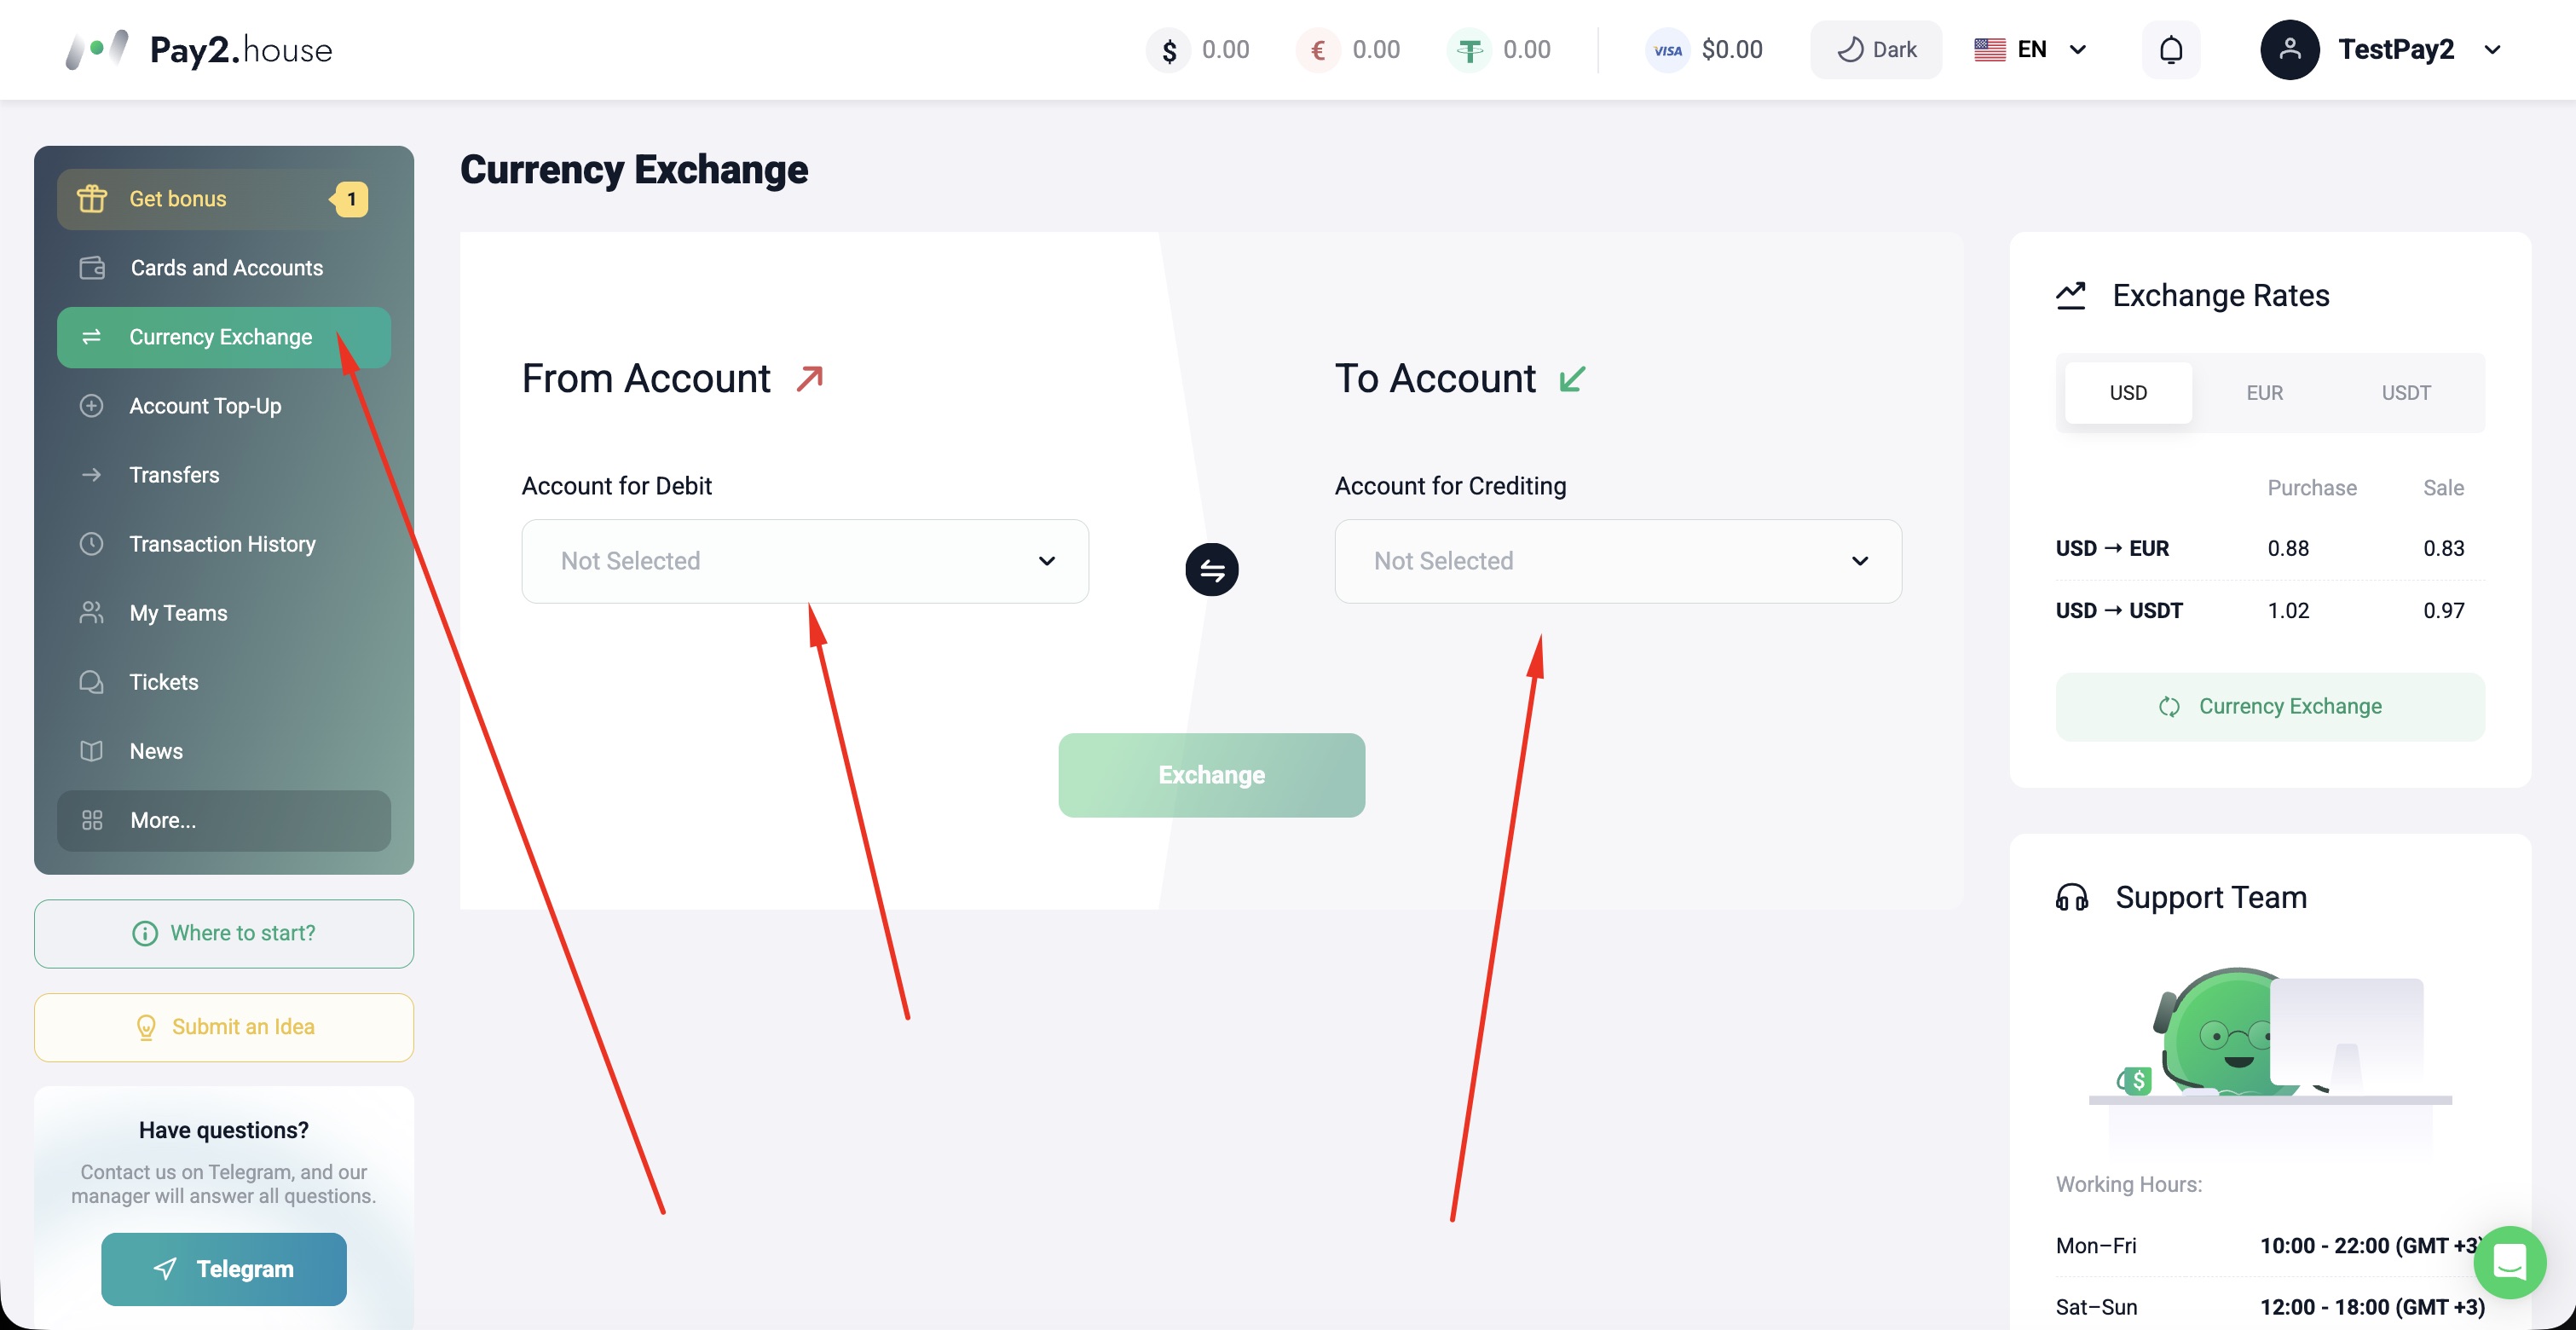 The “Currency exchange” section is one of the most important steps after funding the account. As mentioned earlier, after registration you can activate the welcome bonus of $15 by entering the promo code. However, some users at this stage wonder how exactly to use these bonus funds. After topping up the account with cryptocurrency in the amount of $50 or more, you need to go to the “Currency exchange” section and exchange USDT for USD. Only then can the money from the bonus balance be used when issuing a card.
If you need a card in euros, exchange the funds for EUR in the same section in advance. That way, when issuing the card, you will already have the required currency on your main account.
Step 4. Issuing a card
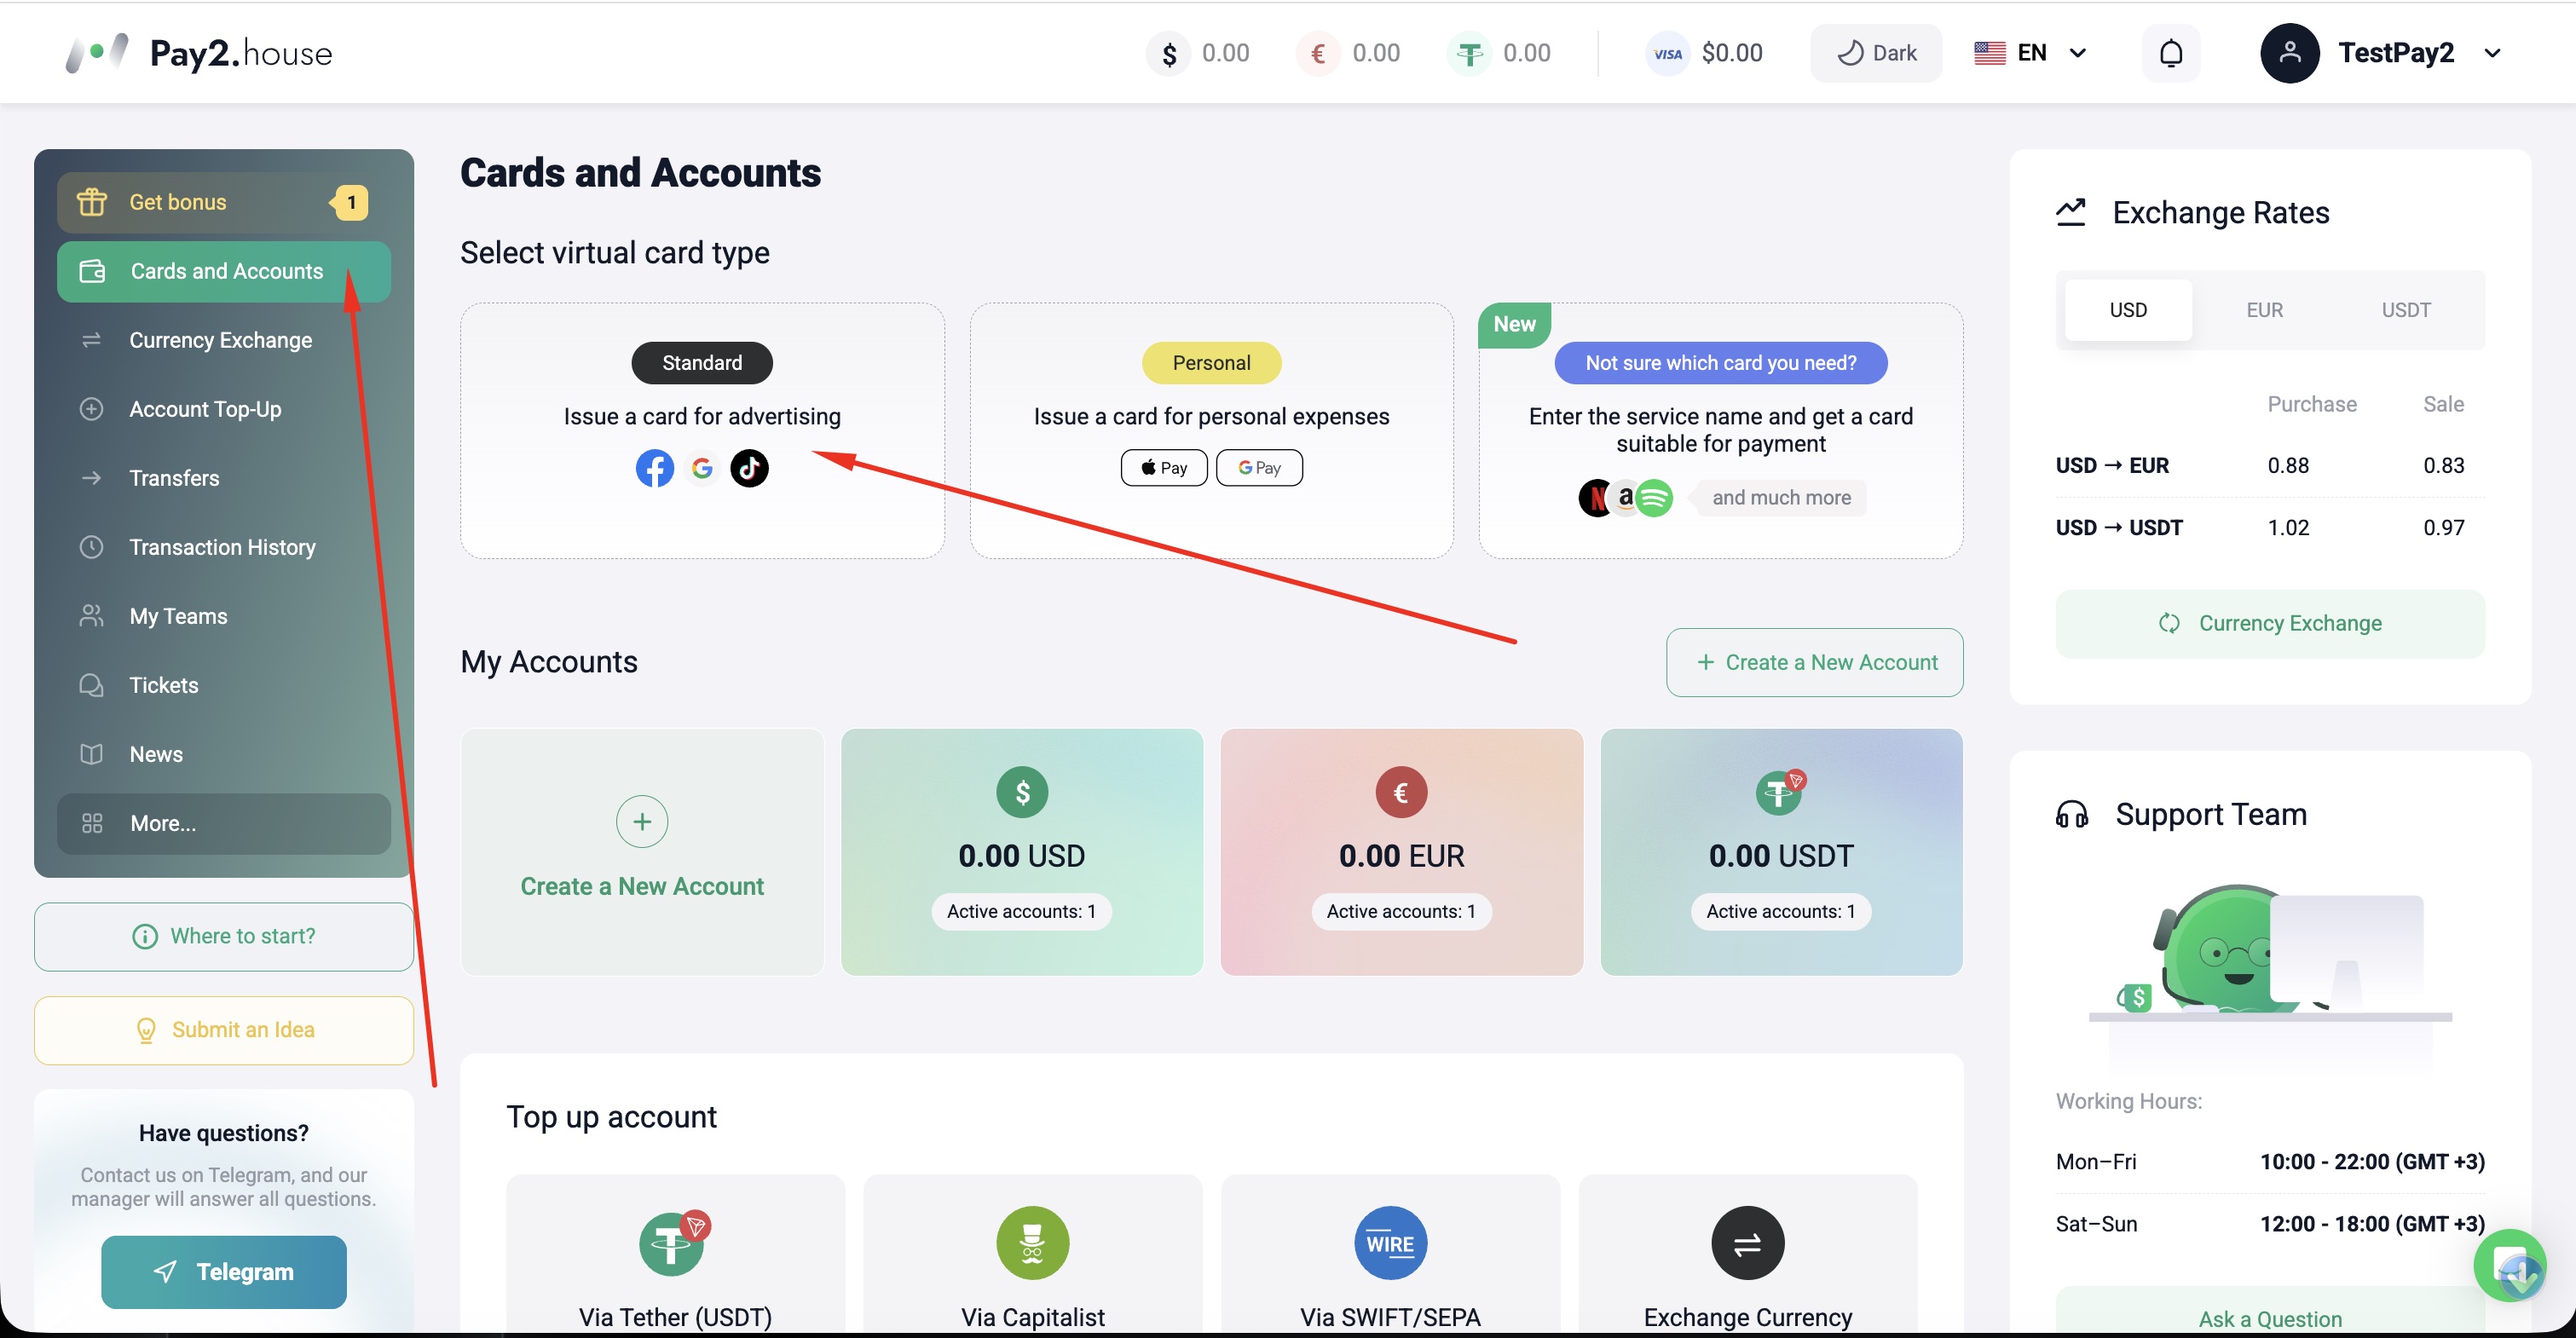 After you have converted the funds into the required currency, you can move on to issuing a card. To do this, go to the “Cards and accounts” section and select the virtual card type “Standard”.
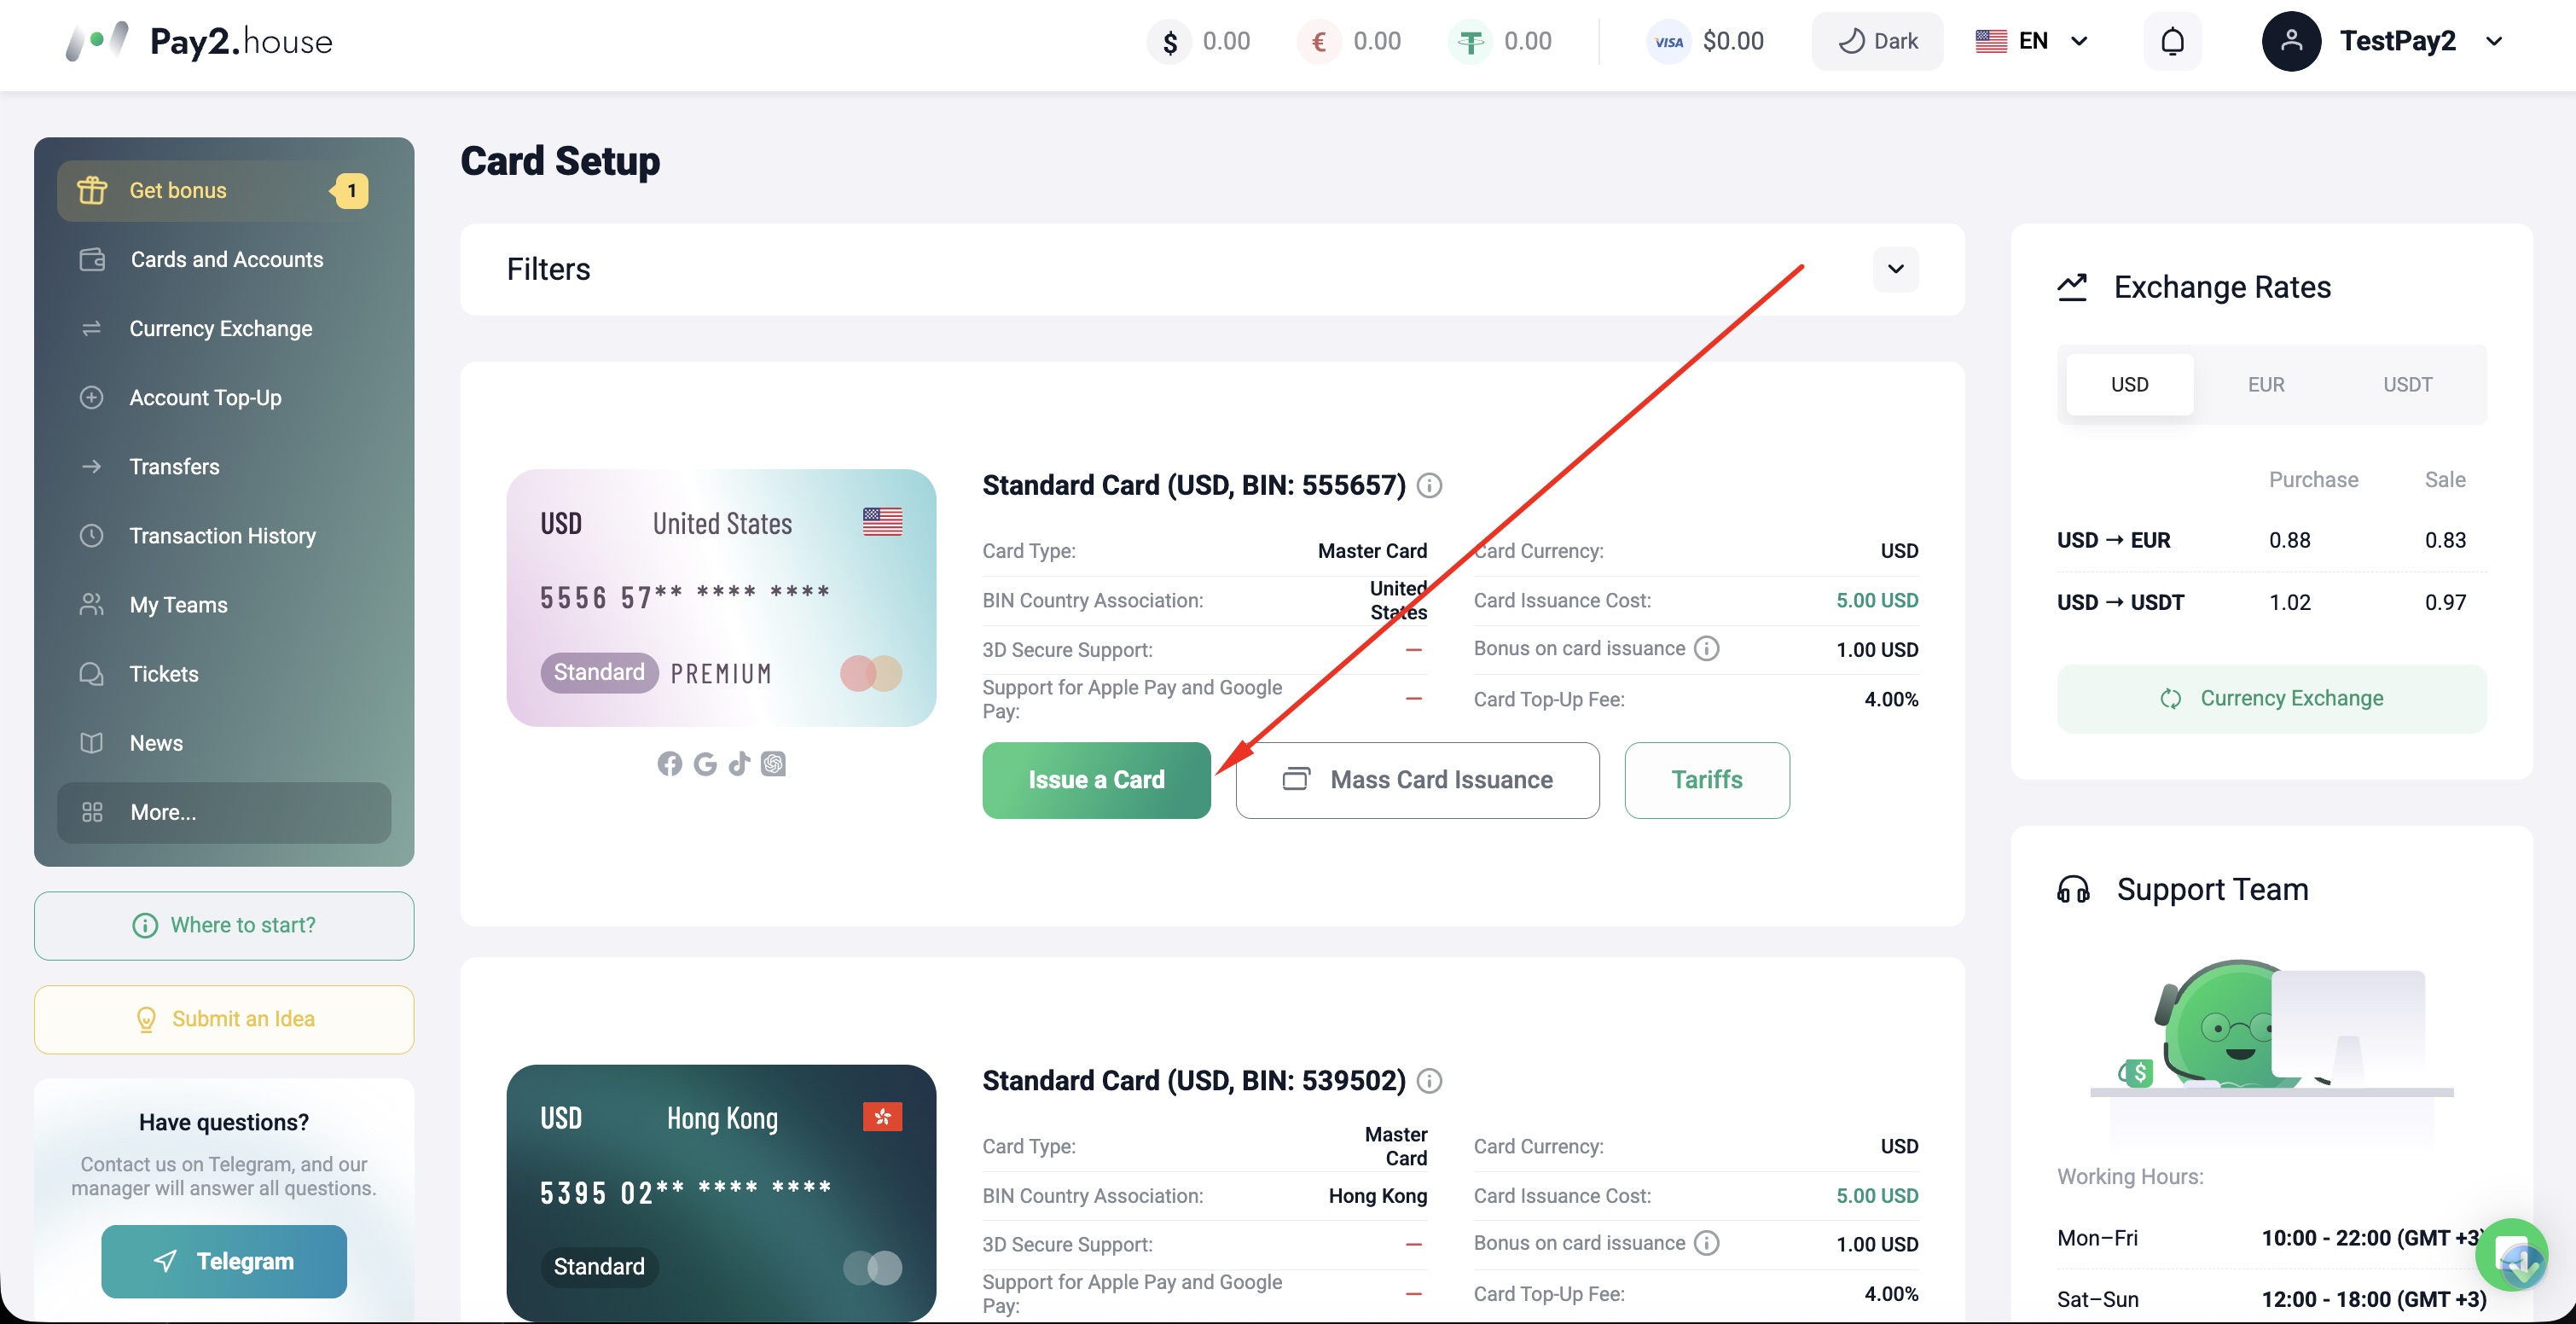 For example, I am showing this on a US card. After selecting the desired card, click the “Issue card” button. If you want to review the terms in advance, you can also open the “Rates” button in the same section.
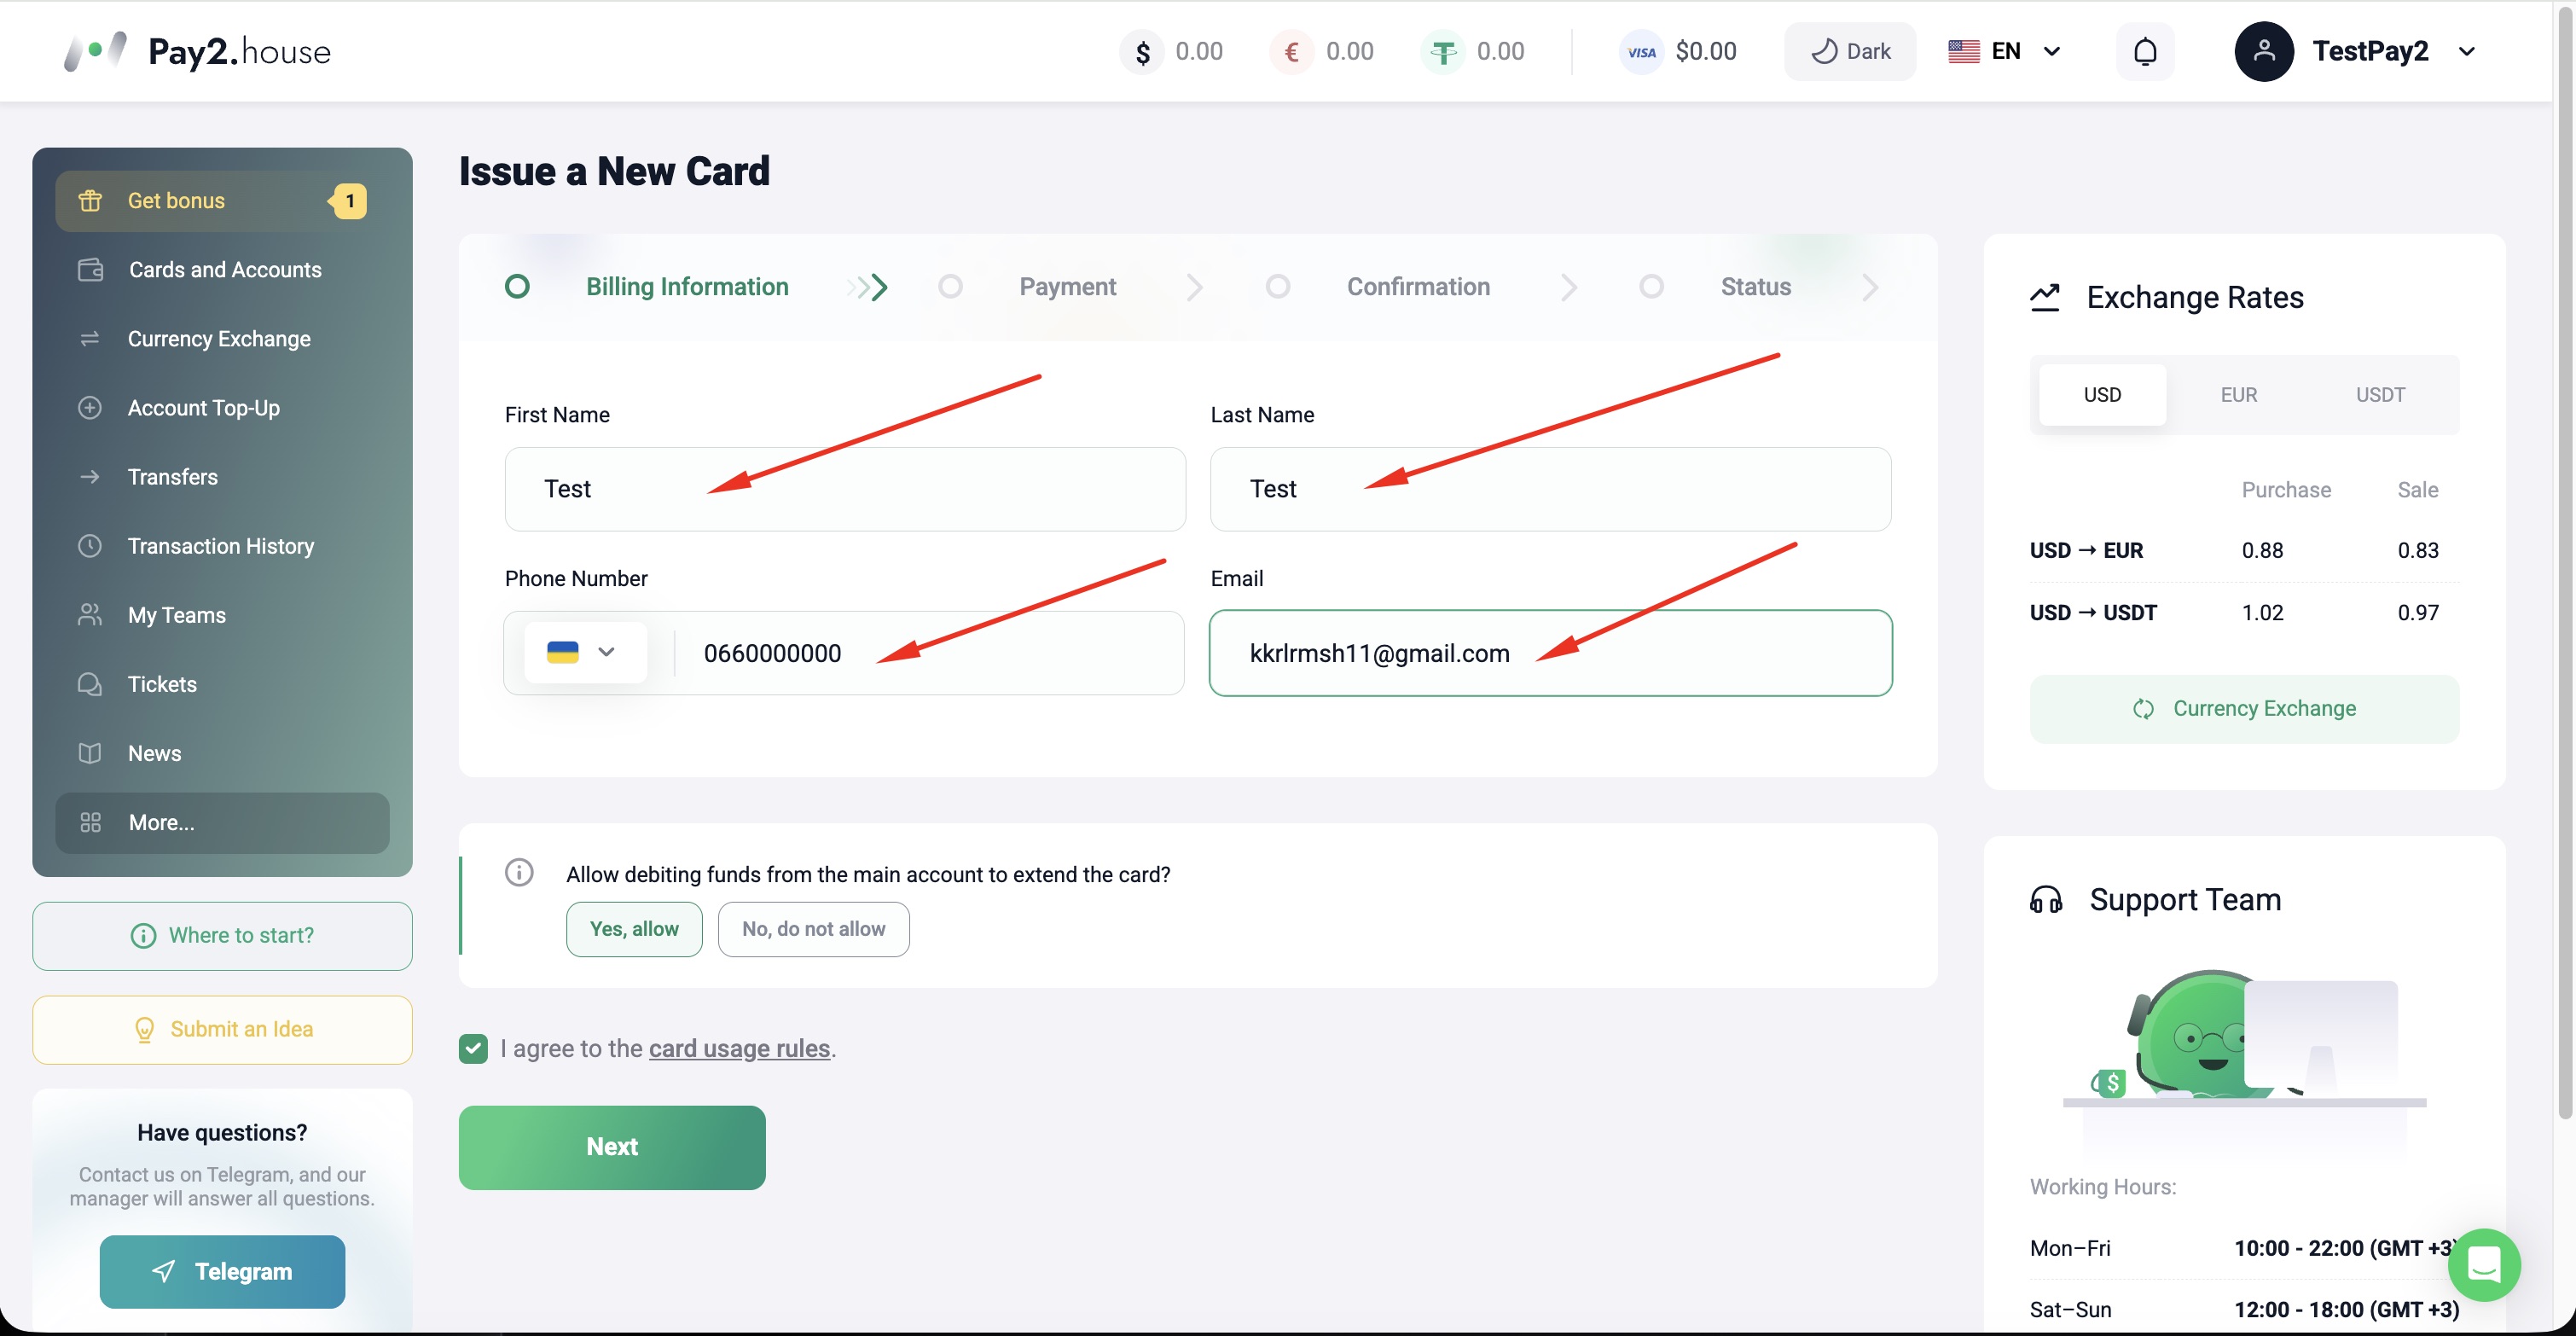 Fill out the form and click “Next”.
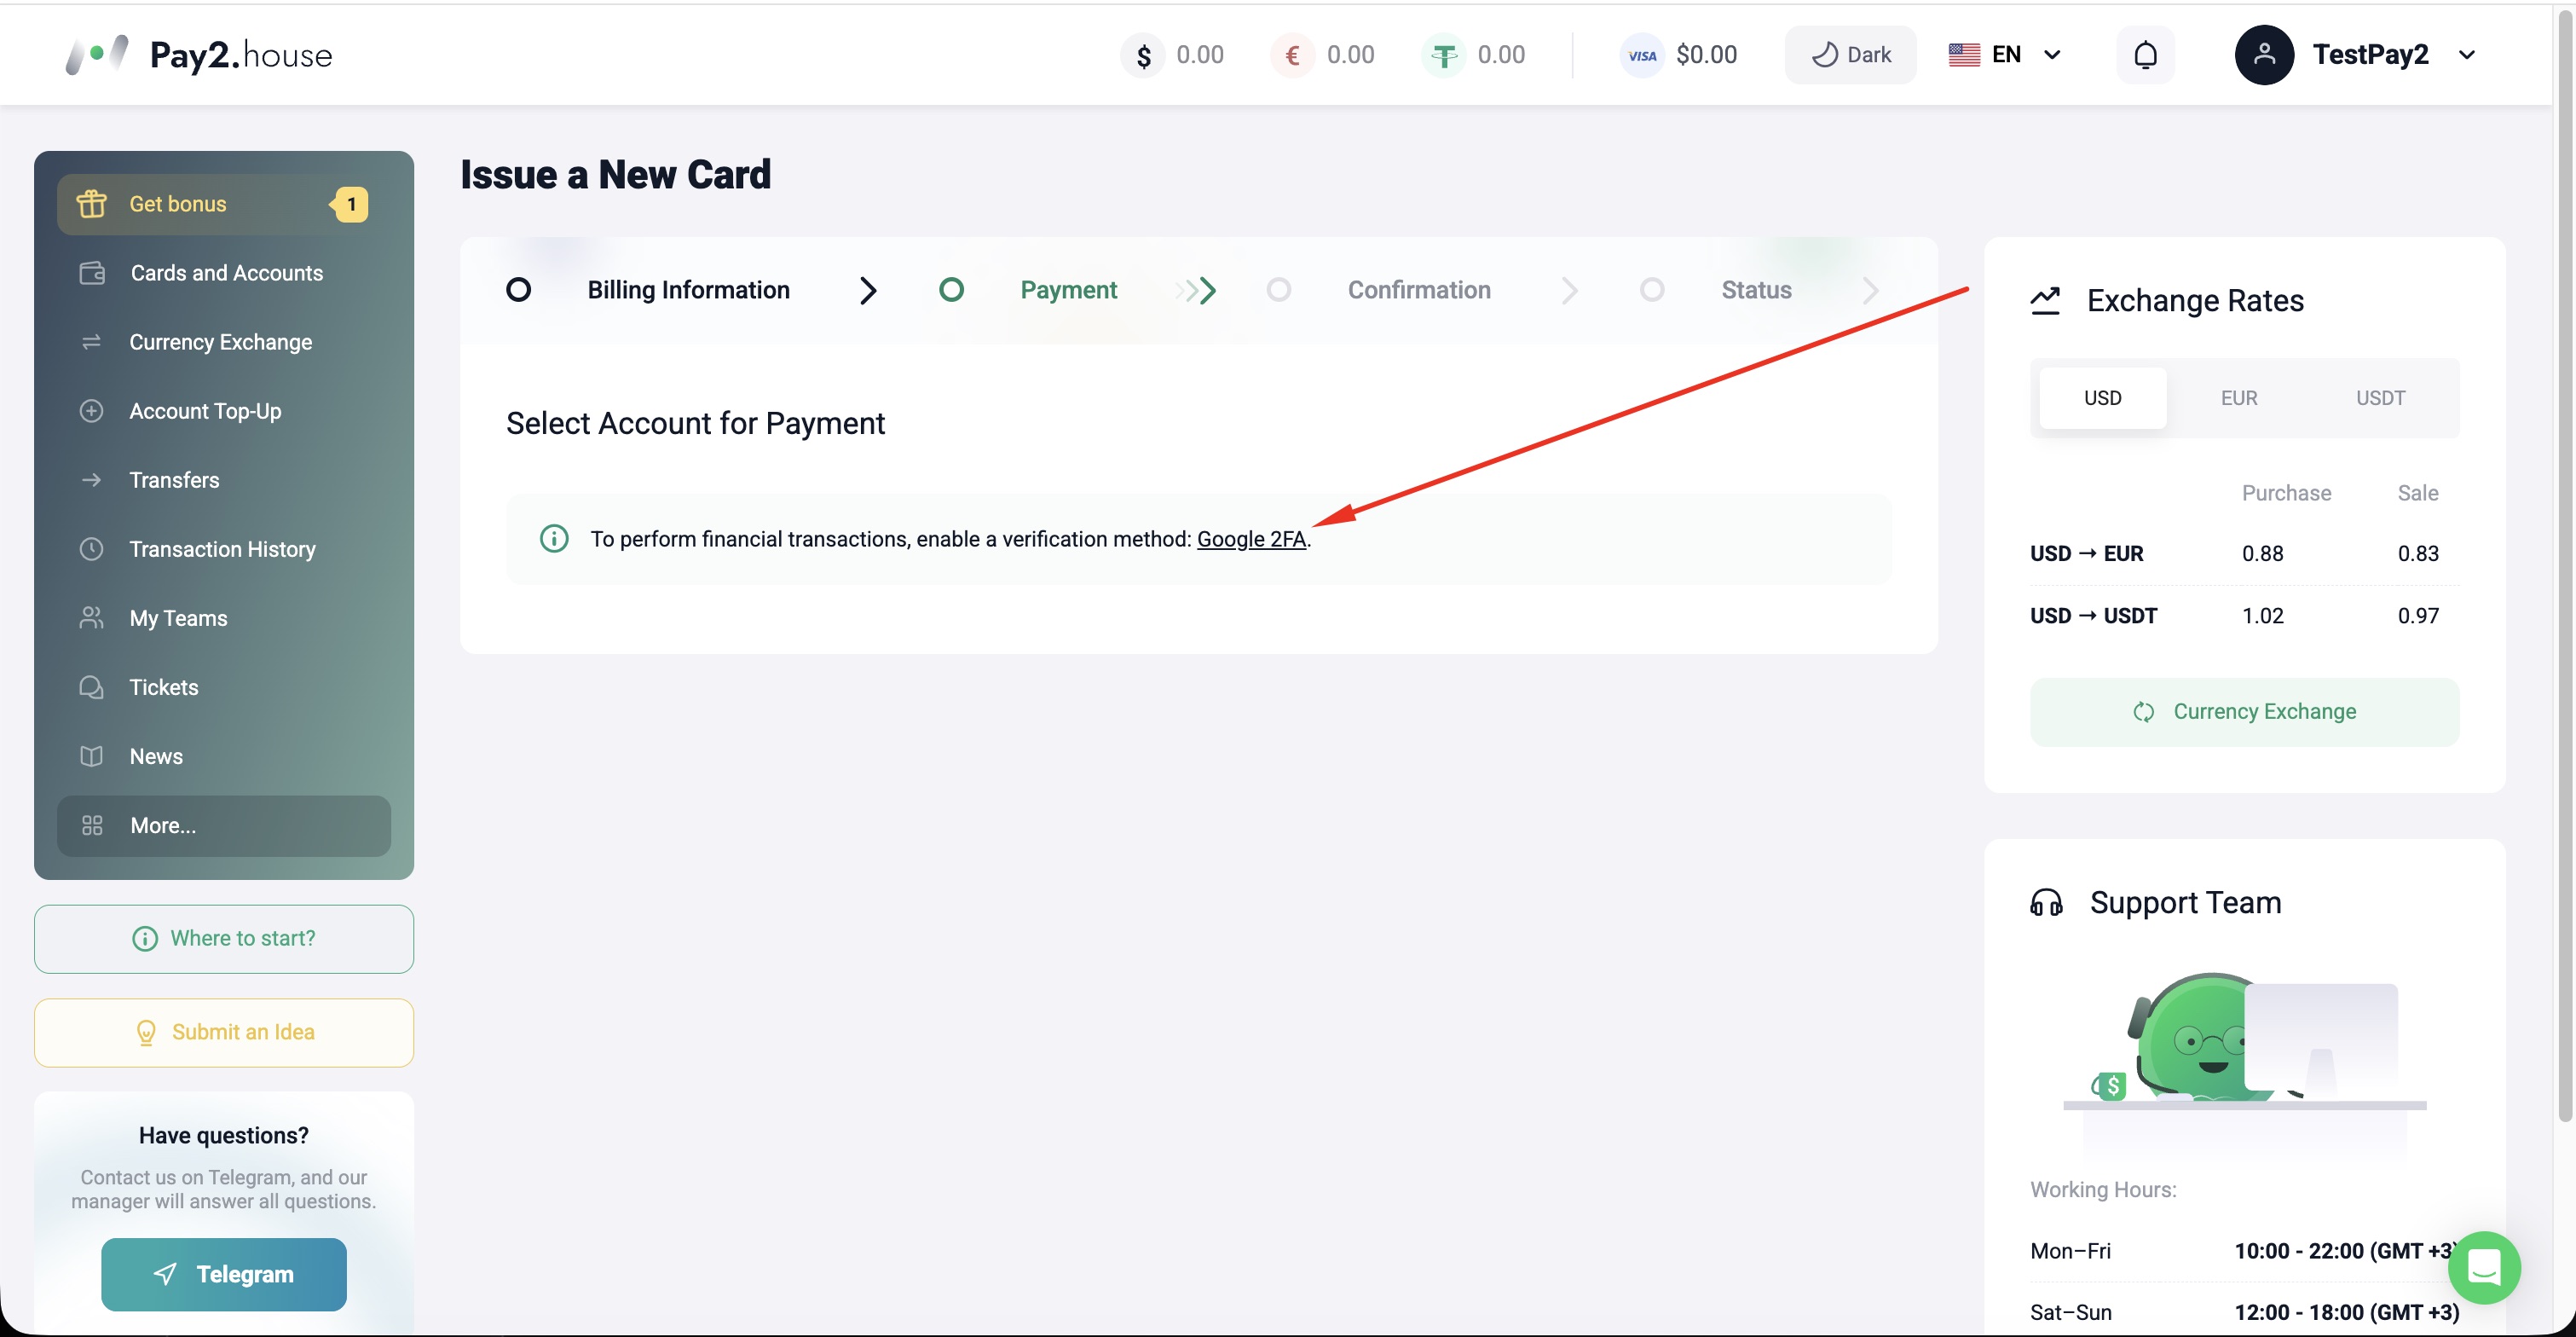 A window will appear informing you that you need to enable Google 2FA to perform financial operations. This is a mandatory requirement for using the service; without 2FA, you will not be able to issue a card. It is designed to provide additional protection for your account and funds. Click the button shown in the screenshot and continue the setup.
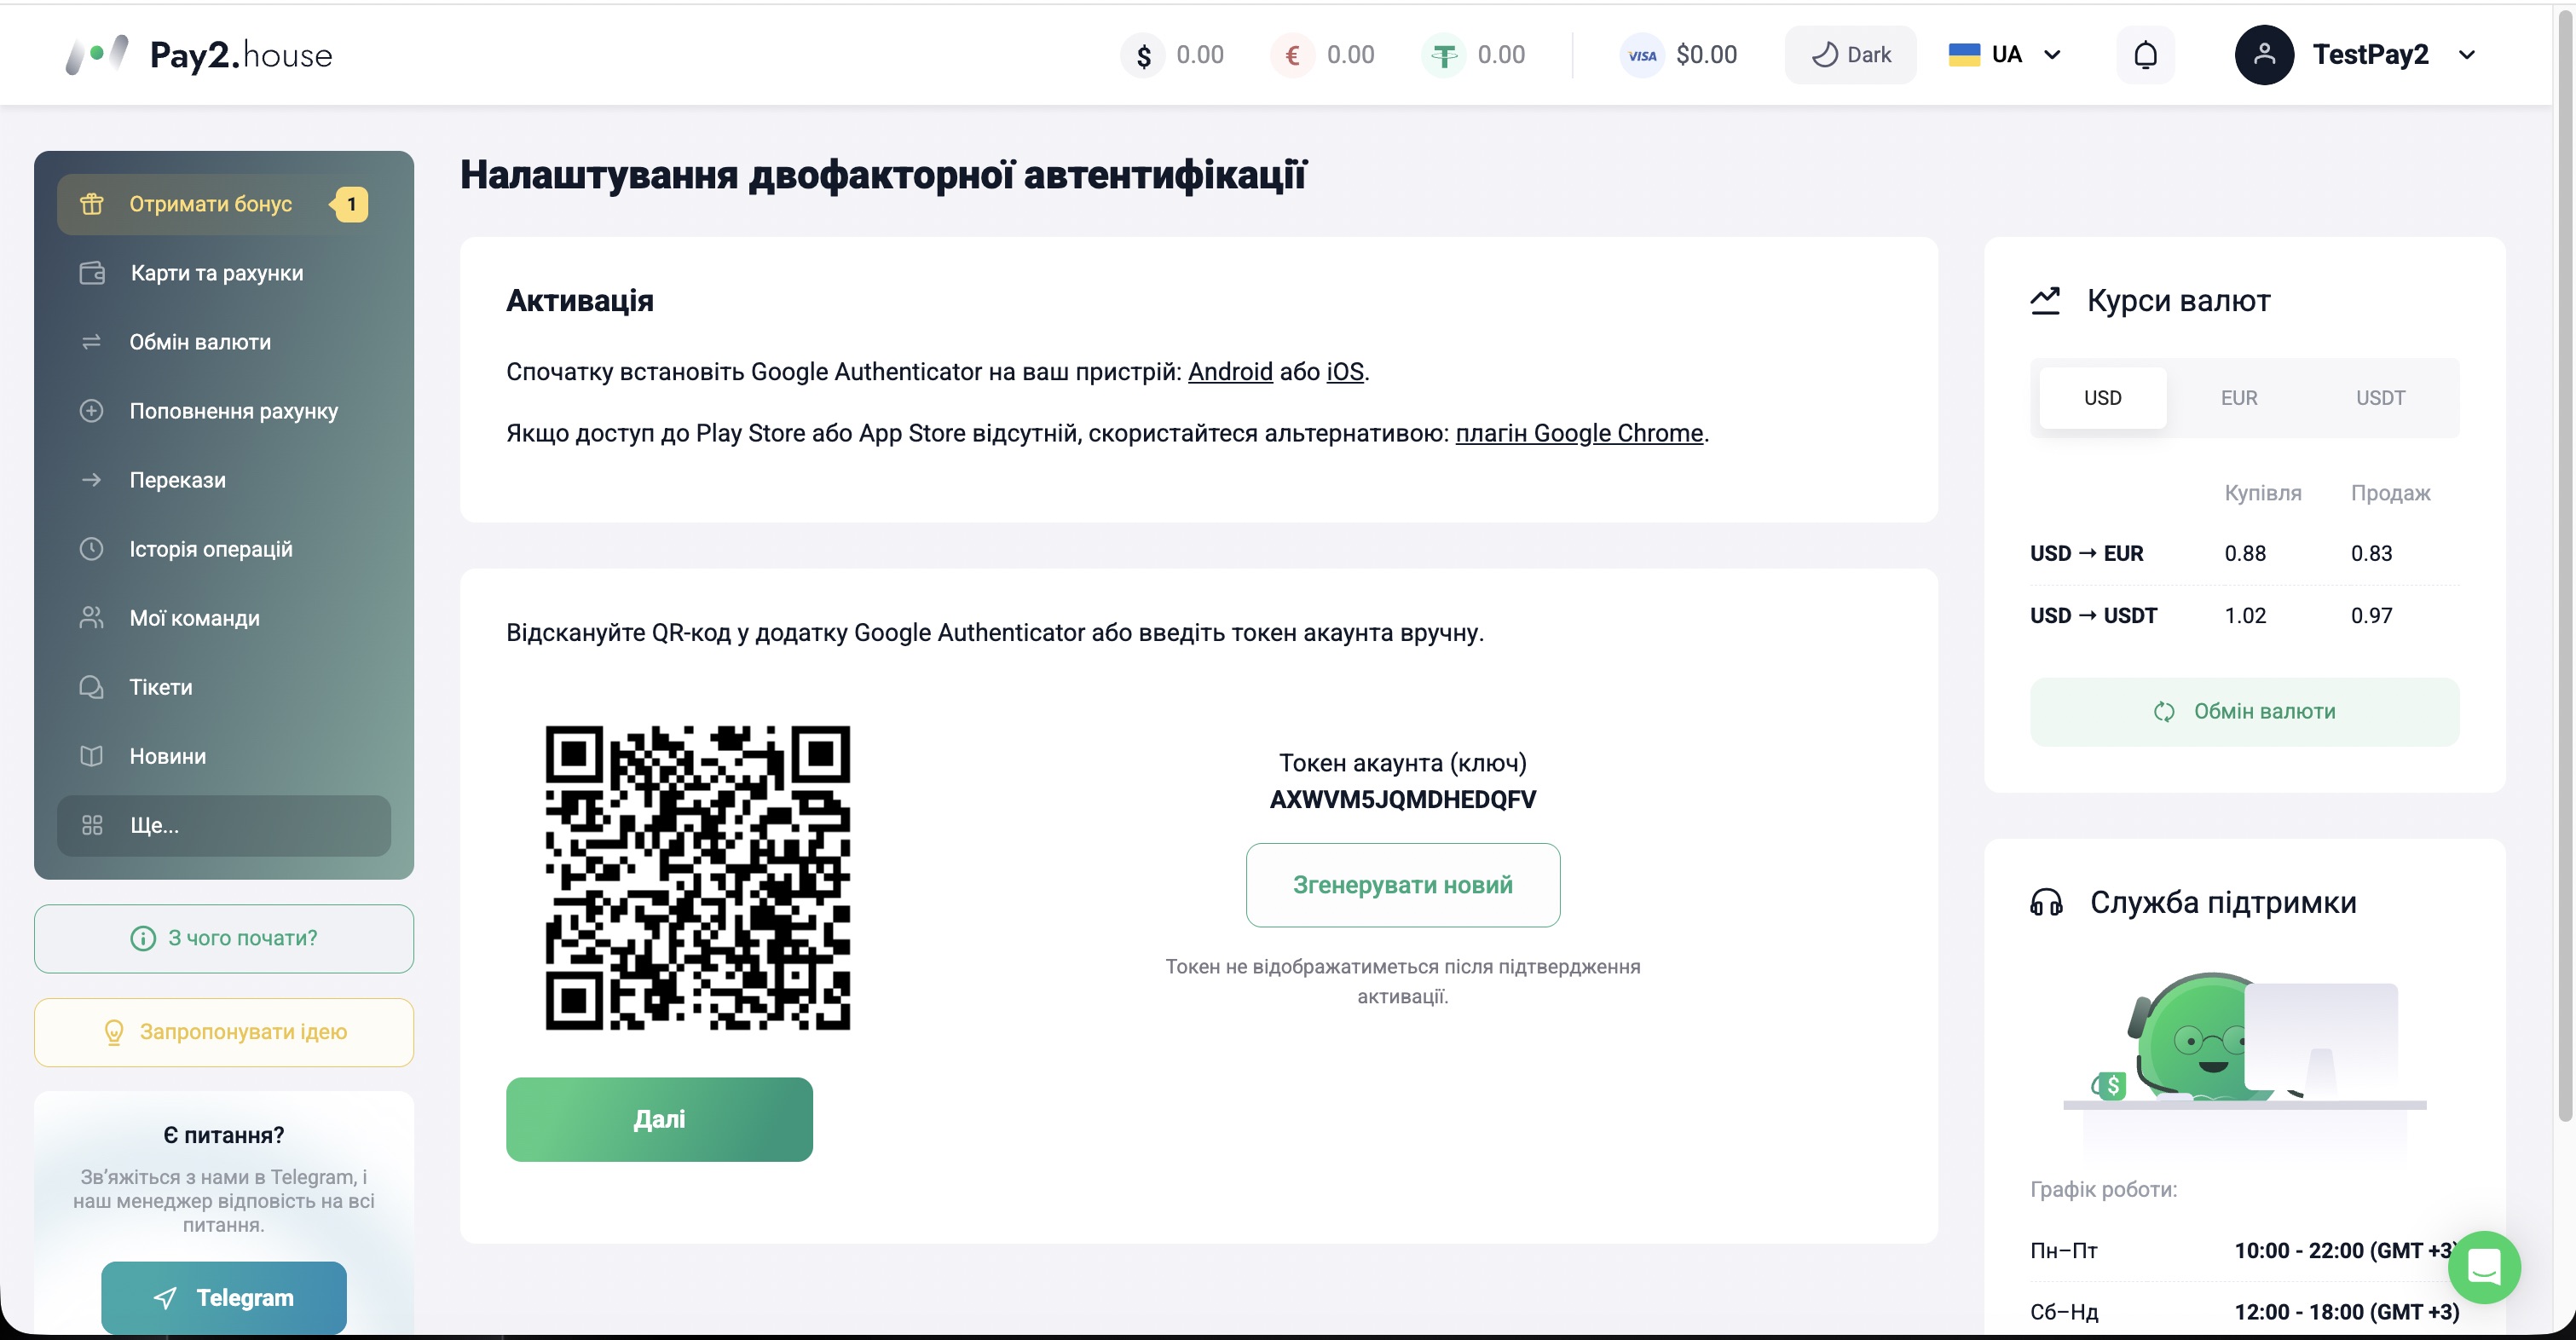 This screen contains the instructions for setting up 2FA. First, install Google Authenticator on your phone, then scan the QR code or enter the token manually and click “Next”. After that, you will need to enter the 6-digit code from the Google Authenticator app to confirm the connection to your account.
After confirming 2FA, return to the window where you were issuing the card. Your account protection is now enabled, and you can complete the card issuance.
Step 5. Topping up the card
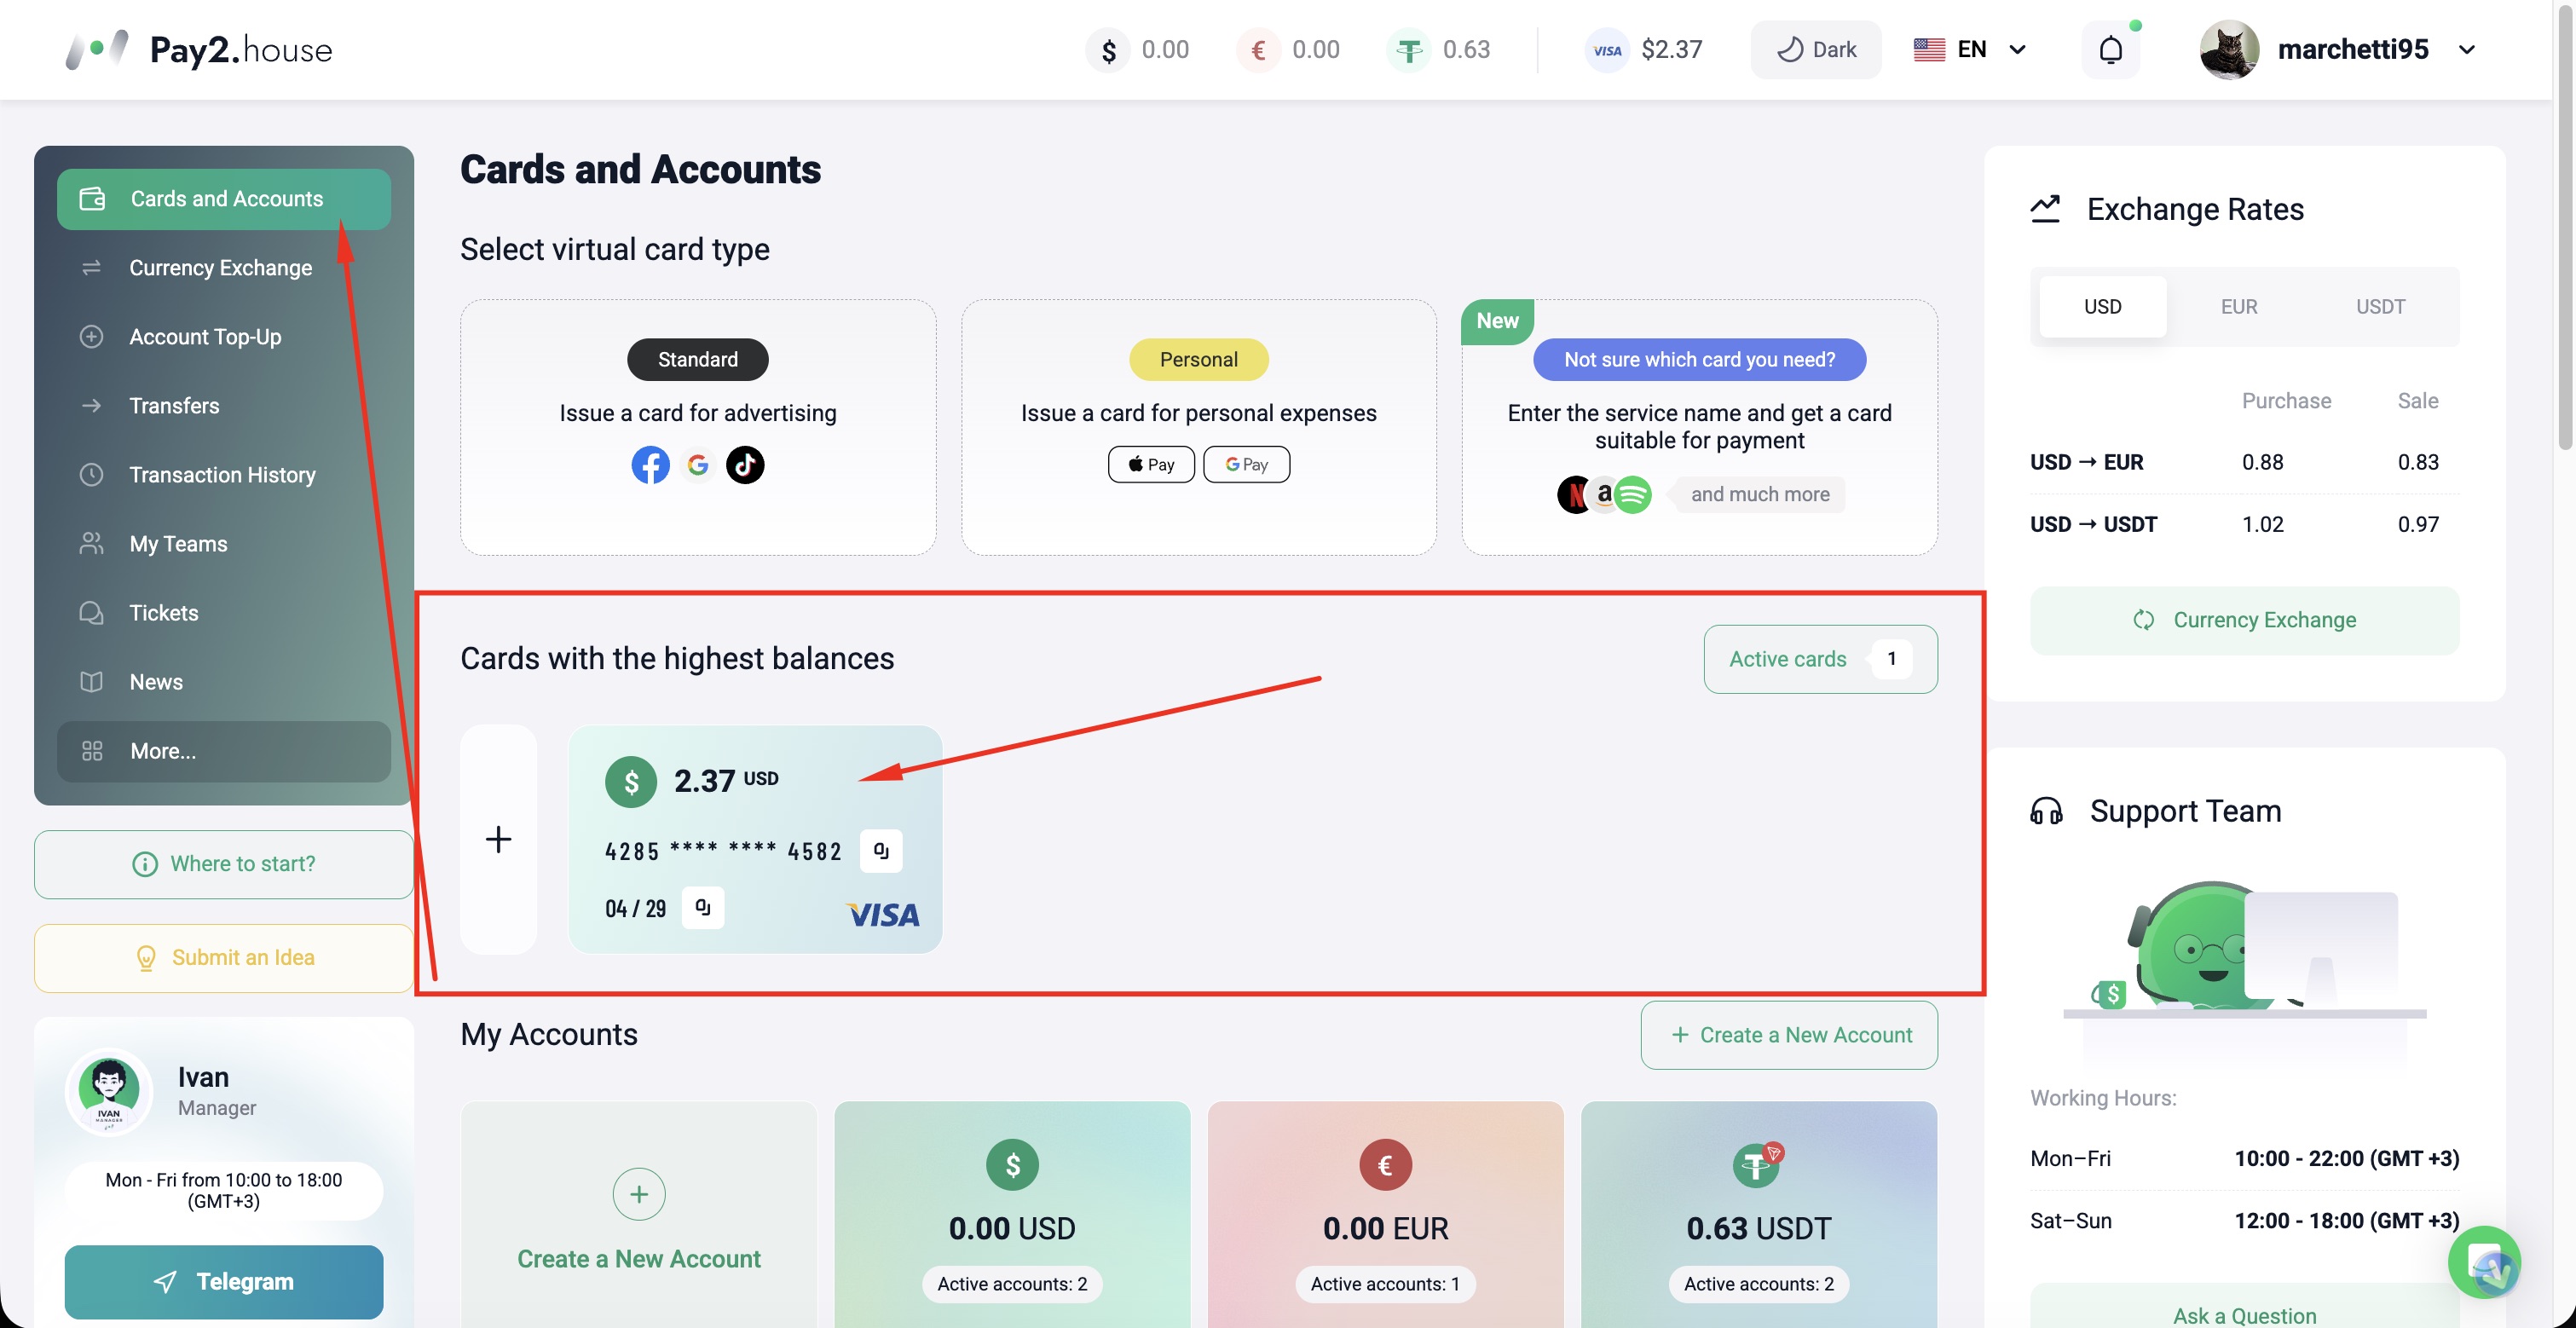 After issuance, the card will appear in the “Cards and accounts” section. Here you can top up the card, as well as view all the main information about it: card details, 3DS Password, confirmation codes, and, if necessary, block the card.
Step 6. Conclusion
Now you know how to complete the full process in Pay2.House from registration to issuing your first card. From here, all that remains is to follow the steps in this guide and put everything into practice. Pay2.House cards can be used to pay for Facebook Ads, Google, TikTok, Outbrain, Taboola, as well as AI services like ChatGPT, Claude, and Gemini, and for everyday online payments including Netflix, Etsy, Amazon, and other popular platforms.
If you have any questions at any stage, you can always contact Pay2.House support via Telegram or directly on the website. The specialists will help you understand the situation and find a solution.


 Telegram
 Email
Email



Metku1
በጣምተመችቶኛል